Sharp LC32D47U LC-32D47U Operation Manual - Page 21
Position, PC Setup, PC Audio Select, HDMI Auto View
 |
UPC - 074000371842
View all Sharp LC32D47U manuals
Add to My Manuals
Save this manual to your list of manuals |
Page 21 highlights
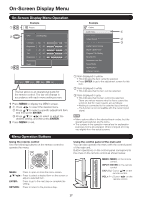
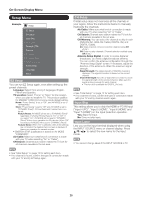
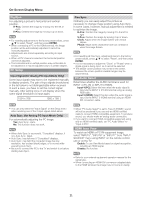
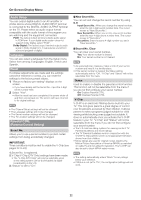
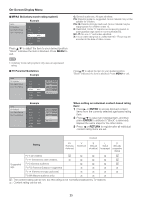
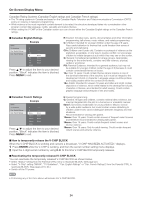
On-Screen Display Menu Position For adjusting a picture's horizontal and vertical position. H-Pos.: Centers the image by moving it to the left or right. V-Pos.: Centers the image by moving it up or down. • For resetting adjustments to the factory preset values, press a/b to select "Reset", and then press ENTER. • When connecting a PC to the HDMI terminal, the image position will be automatically adjusted. It cannot be manually adjusted. • Adjustments are stored separately according to input source. • When a DTV channel is selected, the horizontal position cannot be adjusted. • The horizontal and/or vertical position may not be able to be adjusted or it may be adjusted only to a certain degree. PC Setup Input Signal (for Analog PC Input Mode Only) Some input signals may have to be registered manually to display properly. The pair of input signals (resolutions) in the list below is not distinguishable when received. In such a case, you have to set the correct signal manually. After setting once, it will display when the same signal (resolution) is input again. 1024 x 768 1360 x 768 Fine Sync. Ordinarily you can easily adjust the picture as necessary to change image position using Auto Sync. In some cases, however, manual adjustment is needed to optimize the image. H-Pos.: Centers the image by moving it to the left or right. V-Pos.: Centers the image by moving it up or down. Clock: Adjust when the image flickers with vertical stripes. Phase: Adjust when characters have low contrast or when the image flickers. • For resetting all Fine Sync. adjustment items to the factory preset values, press a/b to select "Reset", and then press ENTER. • It is not necessary to adjust the "Clock" or "Phase" when a digital signal is being input, so it cannot be selected. • The default cursor position may not be in the center, because the screen position variable ranges may be asymmetrical. PC Audio Select Determines whether the AUDIO terminal is used for INPUT 4 (PC-IN) or INPUT 5 (HDMI). Input 4 (PC): Select this item when the audio signal is input via the INPUT 4 (PC-IN) terminal using an analog RGB cable. Input 5 (HDMI): Select this item when the audio signal is input via the INPUT 5 (HDMI) terminal using an HDMIDVI conversion cable. • You can only select the "Input Signal" on the Setup menu when receiving one of the 2 input signals listed above. Auto Sync. (for Analog PC Input Mode Only) For automatically adjusting the PC image. Yes: Auto Sync. starts. No: This function does not work. • When Auto Sync. is successful, "Completed" displays. If not, Auto Sync. failed. • Auto Sync. may fail even if "Completed" displays. • Auto Sync. may fail if the computer image has low resolution, has unclear (black) edges, or is moved while executing Auto Sync. • Be sure to connect the PC to the TV and switch it on before starting Auto Sync. • When "PC Audio Select" is set to "Input 5 (HDMI)", sound will not be produced if you use only an HDMI-certified cable to connect HDMI-compatible equipment. To produce sound, you should make an analog audio connection. • If you want to connect HDMI-compatible equipment using only an HDMI-certified cable, set "PC Audio Select" to "Input 4 (PC)". HDMI Auto View To watch an HDMI or PC-IN equipment image, select "INPUT5", "INPUT6" or "INPUT7" from "INPUT SOURCE" menu using INPUT on the remote control unit or on the TV. Enable: To use View Mode based on signal recognition, including an HDMI signal. Disable: No function. • Refer to your external equipment operation manual for the signal type. • When connecting an HDMI-DVI conversion adapter/cable to the HDMI terminal, the image may not come in clearly. 21
-
 1
1 -
2
-
3
-
4
-
5
-
6
-
7
-
8
-
9
-
10
-
11
-
12
-
13
-
14
-
15
-
 16
16 -
 17
17 -
 18
18 -
 19
19 -
 20
20 -
 21
21 -
 22
22 -
 23
23 -
 24
24 -
 25
25 -
 26
26 -
27
-
28
-
29
-
30
-
31
 |
 |