Sharp MX-M260 MX-M260 MX-M310 Software Setup Guide - Page 8
connect the USB cable p. 10. - windows 7 driver
 |
View all Sharp MX-M260 manuals
Add to My Manuals
Save this manual to your list of manuals |
Page 8 highlights
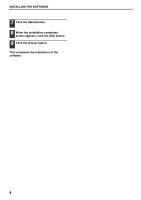
INSTALLING THE SOFTWARE 9 Select [Connected to this computer] and click the [Next] button. Follow the on-screen instructions. When "The installation of the SHARP software is complete." appears, click the [OK] button. Caution • If you are using Windows Vista and a security warning window appears, be sure to click [Install this driver software anyway]. • If you are running Windows 2000/XP and a warning message appears regarding the Windows logo test or digital signature, be sure to click [Continue Anyway] or [Yes]. 10 When installing is finished, click the [Close] button. Caution • If you are using Windows Vista and a security warning window appears, be sure to click [Install this driver software anyway]. • If you are running Windows 2000/XP and a warning message appears regarding the Windows logo test or digital signature, be sure to click [Continue Anyway] or [Yes]. A message will appear instructing you to connect the machine to your computer. Click the [OK] button. After the installation, a message Note prompting you to restart your computer may appear. In this case, click the [Yes] button to restart your computer. 11 Make sure that the power of the machine is turned on, and then connect the USB cable (p. 10). Windows will detect the machine and a Plug and Play window will appear. 12 Follow the instructions in the Plug and Play window to install the driver. Follow the on-screen instructions. Caution • If you are using Windows Vista and a security warning window appears, be sure to click [Install this driver software anyway]. • If you are running Windows 2000/XP and a warning message appears regarding the Windows logo test or digital signature, be sure to click [Continue Anyway] or [Yes]. This completes the installation of the software. After installation, see "CONFIGURING THE PRINTER DRIVER" (page 11) to check the printer driver settings. 6
-
 1
1 -
2
-
 3
3 -
 4
4 -
 5
5 -
 6
6 -
 7
7 -
 8
8 -
 9
9 -
 10
10 -
 11
11 -
 12
12 -
 13
13 -
14
-
15
-
16
-
17
-
18
-
19
-
20
 |
 |
