Sharp NP-PX2201UL User Manual - NEC
Sharp NP-PX2201UL Manual
 |
View all Sharp NP-PX2201UL manuals
Add to My Manuals
Save this manual to your list of manuals |
Sharp NP-PX2201UL manual content summary:
- Sharp NP-PX2201UL | User Manual - NEC - Page 1
Projector PX2201UL User's Manual Please visit our web site for User's Manual in the latest version. https://www.sharp-nec-displays.com/dl/en/pj_manual/lineup.html Model No. NP-PX2201UL - Sharp NP-PX2201UL | User Manual - NEC - Page 2
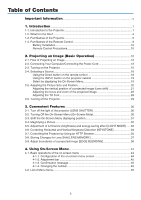
Table of Contents Important Information v 1. Introduction...1 1-1. Introduction to the Projector 1 1-2. What's in the Box?...4 1-3. Part Names of the Projector 5 1-4. Part Names of the Remote Control 9 Battery Installation 10 Remote Control Precautions 10 2. Projecting an Image (Basic - Sharp NP-PX2201UL | User Manual - NEC - Page 3
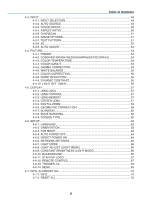
Table of Contents 4-3. INPUT...49 4-3-1. INPUT SELECTION 49 4-3-2. AUTO SOURCE 49 4-3-3. COLOR SPACE 49 4-3-4. ASPECT RATIO 50 4-3-5. OVERSCAN 51 4-3-6. IMAGE OPTIONS 51 4-3-7. TEST PATTERN 51 4-3-8. 3D...52 4-3-9. AUTO ADJUST 53 4-4. PICTURE...54 4-4-1. PRESET...54 4-4-2. CONTRAST/ - Sharp NP-PX2201UL | User Manual - NEC - Page 4
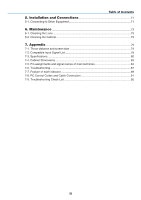
7-1. Throw distance and screen size 74 7-2. Compatible Input Signal List 78 7-3. Specifications...80 7-4. Cabinet Dimensions...83 7-5. Pin assignments and signal names of main terminals 84 7-6. Troubleshooting...87 7-7. Feature of each indicator 89 7-8. PC Control Codes and Cable Connection 91 - Sharp NP-PX2201UL | User Manual - NEC - Page 5
Corp. • Other product and company names mentioned in this user's manual may be the trademarks or registered trademarks of their respective holders. matters deemed to result from using the Projector. (5) This manual is commonly provided to all regions so they may contain descriptions that are - Sharp NP-PX2201UL | User Manual - NEC - Page 6
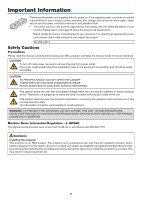
Please read this manual carefully before using your NEC projector and keep the manual handy for future -VOLTAGE COMPONENTS INSIDE. REFER SERVICING TO QUALIFIED SERVICE PERSONNEL. This symbol warns The information should be read carefully to avoid problems. WARNING: TO PREVENT FIRE OR SHOCK, - Sharp NP-PX2201UL | User Manual - NEC - Page 7
the EU directive 2006/66/EC, the battery can't be disposed improperly. The battery shall be separated to collect by local service. Important Safeguards These safety instructions are to ensure the long life of your projector and to prevent fire and shock. Please read them carefully and heed all - Sharp NP-PX2201UL | User Manual - NEC - Page 8
by qualified technicians in order to ensure proper operation and reduce the risk of bodily injury. - In addition, the ceiling must be strong enough to support the projector and the installation must be in accordance with any local building codes. WARNING • Do not cover the lens with the lens cap or - Sharp NP-PX2201UL | User Manual - NEC - Page 9
the power cord and have the projector serviced by a qualified service personnel under the following conditions: - When operate normally when you follow the instructions described in this user's manual. - If the projector has end users, it may cause of serious problem on users' safety such as visual - Sharp NP-PX2201UL | User Manual - NEC - Page 10
ferrite cores so as not to interfere with radio and television reception. For details, please refer to "5. Installation and Connections" in this user's manual. Avoid locations with extreme temperatures and humidity Failure to do so could lead to fire or electric shock or damage to the projector. The - Sharp NP-PX2201UL | User Manual - NEC - Page 11
multiple laser diodes is equipped in the product as the light source. 2. These laser diodes are sealed in the light module. No maintenance or service is required for the performance of the light module. 3. End user is not allowed to replace the light module. 4. Contact qualified distributor for - Sharp NP-PX2201UL | User Manual - NEC - Page 12
Label Information These labels are stuck on the below indicated positions. Important Information For USA The LASER PRODUCT in CLASS 3R conforming to IEC 60825-1 Second edition. For other regions The LASER PRODUCT in CLASS 1 conforming to IEC 60825-1 Third edition, and RG3 of IEC/EN 62471-5 First - Sharp NP-PX2201UL | User Manual - NEC - Page 13
Label C Label D Label C: Manufacturer's ID Label Label D: Barcode label P/N Important Information xii - Sharp NP-PX2201UL | User Manual - NEC - Page 14
Laser light radiation range The figure below shows the maximum radiation range of the laser light. (unit: degree) Horizontal angle H Lens Zoom Tele Wide NP45ZL 22.0 28.3 H NP46ZL 17.4 22.1 NP47ZL 13.9 18.2 H NP48ZL 7.0 13.8 NP49ZL 4.0 7.0 Vertical angle V Lens Zoom Tele - Sharp NP-PX2201UL | User Manual - NEC - Page 15
Radiation Zone (HD: Hazard Distance) Important Information • The below table describes the radiation range of emitted light by the projector that is classified as Risk Group 3 (RG3) of IEC/EN 62471-5 First edition 2015. • Please keep within bounds for installing the projector. Install a barrier - Sharp NP-PX2201UL | User Manual - NEC - Page 16
When projecting from above to a floor. Important Information HD Horizontal security zone: over 1 m (2.5 m for USA) RG3 zone H V Horizontal security zone: over 1 m (2.5 m for USA) xv - Sharp NP-PX2201UL | User Manual - NEC - Page 17
/detachment of the lens unit must be performed by a professional service personnel. Never try to install the projector by yourself. This may the layout of the projector, make sure to take safety measures instructed on the installation manual. • In order to refuse danger, install either a wall - Sharp NP-PX2201UL | User Manual - NEC - Page 18
those specified by Sharp NEC Display Solutions of America, Inc. in this manual. Failure to comply with this government regulation could void your right to and, if not installed and used in accordance with the instruction manual, may cause harmful interference to radio communications. Operation of - Sharp NP-PX2201UL | User Manual - NEC - Page 19
Important Information Clearance for Installing the Projector Allow ample clearance between the projector and its surroundings as shown below. The high temperature exhaust coming out of the device may be sucked into the device again. Avoid installing the projector in a place where air movement from - Sharp NP-PX2201UL | User Manual - NEC - Page 20
Important Information Precautions for Ceiling Installation Do not install the projector in the following places. Attached substances such as oil, chemicals and moisture may cause deformation or cracks of the cabinet, corrosion of the metal parts, or malfunction. • Outdoors and places with humid or - Sharp NP-PX2201UL | User Manual - NEC - Page 21
, brightness will decrease with use. Installation • Wide range of optional lenses selectable according to the place of installation This projector supports 5 types of optional lenses, providing a selection of lenses adapted to a variety of places of installation and projection methods. Note that - Sharp NP-PX2201UL | User Manual - NEC - Page 22
XPAND 3D and active shutter-type 3D eyewear. The projector is also compatible with 3D images in the DLP® Link format. Network • Supports wired LAN Equips the HDBaseT/LAN (RJ-45) port. Utilizing a wired LAN connected with this port, it enables to control the projector by a computer. • Convenient - Sharp NP-PX2201UL | User Manual - NEC - Page 23
started is to take your time and do everything right the first time. Take a few minutes now to review the user's manual. This may save you time later on. At the beginning of each section of the manual you'll find an overview. If the section doesn't apply, you can skip it. 3 - Sharp NP-PX2201UL | User Manual - NEC - Page 24
cord × 2 AAA alkaline batteries (x2) (79TM1021) For Europe/Asia/South America • Important Infomation (7N8R1201) • Quick Setup Guide (7N8R1211) NEC Projector CD-ROM User's manual (PDF) (7N953071) (79TQ1011) For North America For North America only Limited warranty For customers in Europe: You - Sharp NP-PX2201UL | User Manual - NEC - Page 25
1-3. Part Names of the Projector Front/Top The lens is sold separately. The description below is for when the NP47ZL lens is mounted. 1. Introduction Indicator Panel (→ page 7) Intake vent Takes in air to cool the projector. (→ page xviii, 73) Lens Release (PUSH) Button Lens Request the dealer to - Sharp NP-PX2201UL | User Manual - NEC - Page 26
Rear Remote Sensor (→ page 11) Exhaust vent Heated aiir is exhausted from here. (→ page xviii, 73) Terminals (→ page 8) 1. Introduction Controls (→ page 7) Main power switch While AC power is being supplied, set the main power switch to ON position (|), then your projector will enter a standby - Sharp NP-PX2201UL | User Manual - NEC - Page 27
Controls/Indicator Panel 5432 1 6 7 8 9 10 1. Introduction 1. (POWER) Button (→ page 16, 29) 2. POWER Indicator (→ page 16, 29, 89) 3. STATUS Indicator (→ page 89) 4. LIGHT Indicator (→ page 89) 5. TEMP. Indicator (→ page 89) 6. INPUT Button (→ page 19) 7. AUTO ADJUST Button (→ page 53) 8. ASPECT - Sharp NP-PX2201UL | User Manual - NEC - Page 28
the remote control. • When [HDBaseT] is selected in the [REMOTE SENSOR] and the projector is connected to a commercially-available transmission device that supports HDBaseT, remote control operations in infra-red cannot be carried out if transmission of remote control signals has been set up in the - Sharp NP-PX2201UL | User Manual - NEC - Page 29
1-4. Part Names of the Remote Control 1. Introduction 121 8 Button (→ page 44) 27. COMP. Button (→ page 18) 9. ENTER Button 28. DVI Button (→ page 44) (→ page 18) 3 4 10. FOCUS Button 29. AUX Button 5 (→ page 24, 25) (→ page 18) 6 7 11. SHIFT Button (→ page 21) 30. ID SET Button (→ - Sharp NP-PX2201UL | User Manual - NEC - Page 30
Battery Installation 1. Press the catch and remove the battery cover. 2. Install new ones (AAA). Ensure that you have the batteries' polarity (+/−) aligned correctly. 1. Introduction 2 1 3. Slip the cover back over the batteries until it snaps into place. NOTE: 1 • Do not mix different types of - Sharp NP-PX2201UL | User Manual - NEC - Page 31
Operating Range for Wireless Remote Control 1. Introduction 15° 15° 15° 15° 7 m/276 inch Remote sensor on projector cabinet 7 m/276 inch Remote control 15° 15° 15° 15° 7 m/276 inch 7 m/276 inch • The infrared signal operates by line-of-sight up to a distance of above meters and within a 60- - Sharp NP-PX2201UL | User Manual - NEC - Page 32
2. Projecting an Image (Basic Operation) This section describes how to turn on the projector and to project a picture onto the screen. 2-1. Flow of Projecting an Image Step 1 • Connecting your computer / Connecting the power cord (→ page 13) Step 2 • Turning on the projector (→ page 15) Step 3 • - Sharp NP-PX2201UL | User Manual - NEC - Page 33
2. Projecting an Image (Basic Operation) 2-2. Connecting Your Computer/Connecting the Power Cord 1. Connect your computer to the projector. This section will show you a basic connection to a computer. For information about other connections, see "5-1. Connecting to Other Equipment" on page 71. - Sharp NP-PX2201UL | User Manual - NEC - Page 34
2. Projecting an Image (Basic Operation) CAUTION Parts of the projector may become temporarily heated if the projector is turned off with the POWER button or if the AC power supply is disconnected during normal projector operation. Use caution when picking up the projector. Using the Supplied - Sharp NP-PX2201UL | User Manual - NEC - Page 35
2. Projecting an Image (Basic Operation) 2-3. Turning on the Projector NOTE: • The projector has two power switches: A main power switch and a POWER button (POWER ON and POWER ON on the remote control) • Turning on the projector: 1. Press the main power switch to the ON position (I). The projector - Sharp NP-PX2201UL | User Manual - NEC - Page 36
to perform [CENTER LENS] by pressing and holding the HOME button on the projector cabinet for at least two seconds. Perform [CENTER LENS] also when trouble is found on the lens shift motion. Calibration corrects the adjustable lens shift range. Also, perform [CENTER LENS] when an error occurs in the - Sharp NP-PX2201UL | User Manual - NEC - Page 37
2. Projecting an Image (Basic Operation) About the language of the on-screen menu When you turn on the power for the first time after purchase, the on-screen menu is displayed in English. The display language of the on-screen menu can be changed by selecting [SETUP] → [LANGUAGE] on the on-screen - Sharp NP-PX2201UL | User Manual - NEC - Page 38
2. Projecting an Image (Basic Operation) 2-4. Selecting a Source Selecting the computer or video source NOTE: • Turn on the computer or video source equipment connected to the projector. Using the Direct button on the remote control Press the Direct button on the remote control. Select the input - Sharp NP-PX2201UL | User Manual - NEC - Page 39
2. Projecting an Image (Basic Operation) Using the INPUT button on the projector cabinet Pressing the INPUT button will switch to the next input source. HDMI 1 → HDMI 2 → COMPUTER → BNC → DVI-D → DisplayPort → SDI → HDBaseT...... Select by displaying the On-Screen Menu 1. Press the MENU button. The - Sharp NP-PX2201UL | User Manual - NEC - Page 40
2. Projecting an Image (Basic Operation) 2-5. Adjusting the Picture Size and Position In this chapter drawings and cables are omitted for clarity. Adjusting the projected image's vertical and horizontal position [Lens shift] (→ page 21) Adjusting the focus [Focus] (→ page 24, 25) Finely adjusting - Sharp NP-PX2201UL | User Manual - NEC - Page 41
2. Projecting an Image (Basic Operation) Adjusting the vertical position of a projected image (Lens shift) CAUTION • Perform the adjustment from behind or from the side of the projector. If adjustments are performed from the front, your eyes could be exposed to strong light and get injured. • Keep - Sharp NP-PX2201UL | User Manual - NEC - Page 42
may shift the home position of the lens and may cause of malfunction. The STATUS indicator flashed in Orange to inform this kind of trouble occurrence. In this case, perform [CENTER LENS]. Operating procedure 1. Power on the projector. 2. Press the HOME button. [CENTER LENS] is executed. TIP: • The - Sharp NP-PX2201UL | User Manual - NEC - Page 43
2. Projecting an Image (Basic Operation) Adjusting the focus and zoom of the projected image Adjust the focus and size of the projected image. The adjustment procedure differs depending on the lens unit that you are using. Recommend to perform the focus adjustment after leaving the projector under - Sharp NP-PX2201UL | User Manual - NEC - Page 44
Applicable lens: NP48ZL/NP49ZL 2. Projecting an Image (Basic Operation) 1. Adjust the focus until the image is clear. Adjusting with buttons on the cabinet Use the FOCUS (+) or (−) button on the projector cabinet. Adjusting with the remote control ① Press the FOCUS button or the ZOOM button. The - Sharp NP-PX2201UL | User Manual - NEC - Page 45
Applicable lens: NP45ZL/NP46ZL/NP47ZL 2. Projecting an Image (Basic Operation) The lens unit NP45ZL, NP46ZL, or NP47ZL allows you to manually adjust the edge focus in addition to the electric focus. Edge focus position for each lens unit NP45ZL NP46ZL NP47ZL Edge focus ring Edge focus - Sharp NP-PX2201UL | User Manual - NEC - Page 46
2. Projecting an Image (Basic Operation) * With the lens shift in the center position the optical axis is at the center of the image. In this case, adjust the focus at the center of the projected image. 2. Adjust the zoom until the projected image fits the screen. Adjusting with buttons on the - Sharp NP-PX2201UL | User Manual - NEC - Page 47
2. Projecting an Image (Basic Operation) 4. Adjust the focus at the edges of the projected image. (Manual focus) Turn the edge focus ring clockwise or counterclockwise. In this case the focus near the optical axis adjusted in the step 1 and step 3 will not be changed. Optical axis 27 - Sharp NP-PX2201UL | User Manual - NEC - Page 48
2. Projecting an Image (Basic Operation) Adjusting the Tilt Foot 1. The position to project image may be adjusted by the tilt foot positioned at four corners of the cabinet bottom. The tilt foot height can be adjusted by its turn. "To adjust the height of the projected image" The height of the - Sharp NP-PX2201UL | User Manual - NEC - Page 49
2. Projecting an Image (Basic Operation) 2-6. Turning off the Projector 1. Press the (POWER) button on the projector cabinet or the POWER STANDBY button on the remote control. The [POWER OFF] message will appear. 2. Press the (POWER) button again. Power On Standby The light source will be - Sharp NP-PX2201UL | User Manual - NEC - Page 50
3. Convenient Features 3-1. Turn off the light of the projector (LENS SHUTTER) Press the SHUTTER button. The light source will turn off temporarily. Press again to allow the screen to become illuminated again. • Press the SHUTTER CLOSE ( ) button on the remote control. Press the SHUTTER OPEN ( ) - Sharp NP-PX2201UL | User Manual - NEC - Page 51
3. Convenient Features 3-3. Shift the On-Screen Menu displaying position 1. Press the MENU button. The On-Screen Menu will be displayed on. 2. Move the cursor by the ▶ button to the [SETUP]. 3. Move the cursor by the ▼ or ▲ button to the [MENU] and then press the ENTER or ▶ button. 4. Move the - Sharp NP-PX2201UL | User Manual - NEC - Page 52
3-4. Magnifying a Picture You can magnify the picture up to two times. 3. Convenient Features NOTE: • Depending on an input signal, the maximum magnification may be less than two times, or the function may be restricted. To do so: 1. Press and hold the CTL button and then press VOL./D-ZOOM (+) - Sharp NP-PX2201UL | User Manual - NEC - Page 53
3. Convenient Features 3-5. Adjustment of luminance (brightness) and energy-saving effect [LIGHT MODE] The brightness of the projector can be adjusted within a range of 30 to 100% (in 1% increments) and maintained at a constant level after adjusting. In addition, when you set the [LIGHT MODE] to [ - Sharp NP-PX2201UL | User Manual - NEC - Page 54
3. Convenient Features 3-6. Correcting Horizontal and Vertical Keystone Distortion [KEYSTONE] Use the [KEYSTONE] feature to correct keystone (trapezoidal) distortion to make the top or bottom and the left or right side of the screen longer or shorter so that the projected image is rectangular. 1. - Sharp NP-PX2201UL | User Manual - NEC - Page 55
3. Convenient Features 3-7. Controlling the Projector by Using an HTTP Browser Overview Using the web browser on the computer, the HTTP server screen of the projector can be displayed to operate the projector. Possible operations on the HTTP server screen • Configure the settings required for - Sharp NP-PX2201UL | User Manual - NEC - Page 56
3. Convenient Features Handling of the Address for Operation via a Browser Regarding the actual address that is entered for the address or entered to the URL column when operation of the projector is via a browser, the host name can be used as it is when the host name corresponding to the IP address - Sharp NP-PX2201UL | User Manual - NEC - Page 57
3. Convenient Features 3-8. Storing Changes for Lens Shift [LENS MEMORY] Stores the projection position (lens shift) on the screen in the projector's memory. A maximum of 10 values can be stored. When you recall the stored [LENS MEMORY], the lens shift will automatically move at the adjustment value - Sharp NP-PX2201UL | User Manual - NEC - Page 58
3. Convenient Features 3-9. Adjust boundaries of a projected image [EDGE BLENDING] This projector is equipped with an "EDGE BLENDING Function" that makes the edges (boundaries) of the projection screen indistinguishable. NOTE: • Before performing the EDGE BLENDING function, place the projector in - Sharp NP-PX2201UL | User Manual - NEC - Page 59
3. Convenient Features Setting the overlap of projection screens ① Enable [EDGE BLENDING]. 1. Press the MENU button. The menu will be displayed. 2. Select [DISPLAY] → [EDGE BLENDING]. The [EDGE BLENDING] screen will be displayed. Align the cursor with [MODE] and then press the ENTER button. The mode - Sharp NP-PX2201UL | User Manual - NEC - Page 60
3. Convenient Features • Select [TOP], [BOTTOM], [LEFT], [RIGHT] after selecting [RANGE] or [BLACK LEVEL]. TOP: OFF LEFT: OFF RIGHT: ON BOTTOM: ON TOP: OFF LEFT: ON RIGHT: OFF BOTTOM: ON TOP: ON LEFT: OFF RIGHT: ON BOTTOM: OFF TOP: ON LEFT: ON RIGHT: OFF BOTTOM: OFF 40 - Sharp NP-PX2201UL | User Manual - NEC - Page 61
3. Convenient Features ② Adjust [RANGE] to determine an area of overlapped edges of images projected from each projector. When [MARKER] is set to [ON], markers of two colors are displayed on the screen according to the setting of [RANGE]. The red marker represent the edges of the region where images - Sharp NP-PX2201UL | User Manual - NEC - Page 62
3. Convenient Features Black Level Adjustment This adjusts the black level of the overlapping area and the non-overlapping area of the multi-screen (EDGE BLENDING). Adjust the brightness level if you feel the difference is too large. NOTE: • Adjustable area varies depending on what combination of [ - Sharp NP-PX2201UL | User Manual - NEC - Page 63
TIP: 9-segmented portions for Black Level adjustment The black level of the center projector is adjusted as shown in the figure. 3. Convenient Features TOP RIGHT LEFT TIP: • The edge blending width is the width set in the range. • The [BLACK LEVEL] can be adjusted to make it brighter only. - Sharp NP-PX2201UL | User Manual - NEC - Page 64
be abbreviated to "menu". NOTE: • The menu screen in this manual may differ slightly from the actual one. 4-1-1. Configuration of the on- → page 31) Main menu tab Cursor Adjustment bar Sub-menu Mark Set value Key Guide 2. Press the ◀/▶ button. The cursor will move to the main menu tab (INPUT - Sharp NP-PX2201UL | User Manual - NEC - Page 65
4. Using On-Screen Menu 4-1-2. Adjustment bar To change the value on the adjustment bar, press the ◀/▶ button. When you press the ◀/▶ button, the menu screen disappears and an adjustment bar is displayed at the bottom of the screen. Press the ◀/▶ button to adjust and MENU button to confirm. 4-1-3. - Sharp NP-PX2201UL | User Manual - NEC - Page 66
4. Using On-Screen Menu 4-2. List of Menu Items Some menu items are not available depending on the input source. TOP MENU SUB MENU INPUT SELECTION AUTO SOURCE COLOR SPACE INPUT ASPECT RATIO OVERSCAN IMAGE OPTIONS TEST PATTERN H TOTAL H START H PHASE V START 3D AUTO ADJUST PRESET CONTRAST - Sharp NP-PX2201UL | User Manual - NEC - Page 67
TOP MENU LENS LOCK LENS CONTROL LENS MEMORY CENTER LENS DIGITAL ZOOM SUB MENU ZOOM FOCUS SHIFT MEMORY 1 MEMORY 2 MEMORY 3 MEMORY 4 MEMORY 5 MEMORY 6 MEMORY 7 MEMORY 8 MEMORY 9 MEMORY 10 DIGITAL ZOOM DIGITAL PAN DIGITAL SCAN RESET KEYSTONE ROTATION HORIZONTAL VERTICAL ROTATION RESET ROTATION RESET - Sharp NP-PX2201UL | User Manual - NEC - Page 68
/ LETTERBOX / AUTO / NATIVE OFF / SCREEN / 5:4 / 4:3 / 16:10 / 16:9 / 1.88 / 2.35 / LETTERBOX / AUTO / NATIVE TOP-LEFT / TOP-RIGHT / BOTTOM-LEFT / BOTTOM-RIGHT / CENTER 0 / 25 / 50 / 75 MANUAL / AUTO 5 SEC / AUTO 15 SEC / AUTO 45 SEC OFF / ON OFF / ON 48 - Sharp NP-PX2201UL | User Manual - NEC - Page 69
4-3. INPUT 4. Using On-Screen Menu 4-3-1. INPUT SELECTION Select the input terminal to project. A " • " (dot) will appear in the selected input terminal. HDMI 1 HDMI 2 COMPUTER BNC DVI-D DisplayPort SDI HDBaseT Projects the image of the device connected to the HDMI 1 IN input terminal. Projects - Sharp NP-PX2201UL | User Manual - NEC - Page 70
4-3-4. ASPECT RATIO Select the aspect ratio of the screen. 5:4 4:3 16:10 16:9 1.88 2.35 LETTERBOX Projects the picture in 5:4 aspect ratio Projects the picture in 4:3 aspect ratio. Projects the picture in 16:10 aspect ratio Projects the picture in 16:9 aspect ratio Projects the picture in 1.88:1 ( - Sharp NP-PX2201UL | User Manual - NEC - Page 71
4-3-5. OVERSCAN Set overscan (process to cut the frame around the screen). OFF CROP ZOOM Overscan will not be performed. Projects the image with the surroundings hidden. Enlarges the image to fit the projection screen. Projected image Overscaned by 10% 4. Using On-Screen Menu 4-3-6. IMAGE - Sharp NP-PX2201UL | User Manual - NEC - Page 72
etc.) while watching, stop watching immediately and take a rest. If the problem persists after a while, consult your doctor. • View 3D images from to view the 3D image. • Check the operating conditions described in the instruction manual of the Blu-ray player. • When playing 3D video software on a - Sharp NP-PX2201UL | User Manual - NEC - Page 73
4. Using On-Screen Menu 4-3-9. AUTO ADJUST When executed, the projected screen is automatically adjusted. • Automatic adjustment can also be performed by pressing the AUTO ADJUST button on the projector. NOTE: • If the screen is distorted even after performing automatic adjustment, adjust the image - Sharp NP-PX2201UL | User Manual - NEC - Page 74
4-4. PICTURE 4. Using On-Screen Menu 4-4-1. PRESET Select the optimal settings for the projected picture. HIGH-BRIGHT PRESENTATION VIDEO Use this setting when projecting in a bright room. Use this setting when making a presentation with PowerPoint etc. Use this setting when projecting TV - Sharp NP-PX2201UL | User Manual - NEC - Page 75
4. Using On-Screen Menu 4-4-6. WHITE BALANCE Adjust the white level and black level of the signal to achieve the best color reproduction. CONTRAST R CONTRAST G CONTRAST B BRIGHTNESS R BRIGHTNESS G BRIGHTNESS B Adjusts the white color of the picture. Adjusts the black color of the picture. NOTE: • - Sharp NP-PX2201UL | User Manual - NEC - Page 76
MAGENTA YELLOW WHITE RESET 4. Using On-Screen Menu HUE Adjusts the color near the area centered around magenta. Move in the "+" direction to make the color appear more red and move in the "−" direction to make the color more blue. SATURATION Adjusts the intensity of the magenta color. Move in - Sharp NP-PX2201UL | User Manual - NEC - Page 77
4-5. DISPLAY 4. Using On-Screen Menu 4-5-1. LENS LOCK Disables the use of the ZOOM/FOCUS adjustment, lens shift and [CENTER LENS] functions. By performing [LENS LOCK], it is possible to prevent other people from adjusting the lens without permission after the lens has been adjusted. 4-5-2. LENS - Sharp NP-PX2201UL | User Manual - NEC - Page 78
4. Using On-Screen Menu 4-5-5. DIGITAL ZOOM Enlarge the screen up to a maximum of 2 times. • Digital zoom can also be performed by holding the CTL button and pressing the VOL/D-ZOOM + button on the remote control. DIGITAL ZOOM DIGITAL PAN DIGITAL SCAN RESET Enlarges the screen by up to 2 times. - Sharp NP-PX2201UL | User Manual - NEC - Page 79
ROTATION Rotates the screen within the display area. As the angle of rotation increases, the screen becomes smaller. ROTATION -100 (-25°) 0 4. Using On-Screen Menu 100 (25°) RESET Returns the rotation adjustment value to the factory setting. PINCUSHION / BARREL Adjust this when projecting - Sharp NP-PX2201UL | User Manual - NEC - Page 80
ARC Adjusts the barrel-shaped distortion for each of the 4 sides. TOP -150 (-30%) 4. Using On-Screen Menu 0 150 (30%) BOTTOM -150 (-30%) 0 150 (30%) LEFT -150 (-30%) 0 150 (30%) RIGHT -150 (-30%) 0 150 (30%) RESET Resets the [ARC] adjustment value to the factory setting. TOP LEFT - Sharp NP-PX2201UL | User Manual - NEC - Page 81
TOP RIGHT CORNER Adjusts the top right corner distortion. HORIZONTAL -192 (Pixels) 4. Using On-Screen Menu 0 192 (Pixels) VERTICAL -120 (Pixels) 0 120 (Pixels) RESET Returns the adjustment value to the factory setting. BOTTOM LEFT CORNER Adjusts the bottom left corner distortion. - Sharp NP-PX2201UL | User Manual - NEC - Page 82
4. Using On-Screen Menu PC TOOL Recall the geometric correction data that is registered in the projector beforehand. Three types of correction data can be registered. 4-5-7. BLANKING Adjusts the display range (BLANKING) of the top, bottom, left, and right edges of the video signal. 4-5-8. EDGE - Sharp NP-PX2201UL | User Manual - NEC - Page 83
4-6. SETUP 4-6-1. LANGUAGE Select the language to be displayed in the menu. NOTE: • [LANGUAGE] will not be changed even if [RESET ALL] is performed. 4. Using On-Screen Menu 4-6-2. ORIENTATION Select the orientation according to the installation status of the projector and screen. WARNING • - Sharp NP-PX2201UL | User Manual - NEC - Page 84
4-6-3. FAN MODE Set the cooling fan operation to lower the temperature inside the projector. 4. Using On-Screen Menu AUTO HIGH ALTITUDE Turns the fan at an appropriate speed using the temperature sensor and pressure sensor inside the projector. The fan rotation is quiet. Select this option when - Sharp NP-PX2201UL | User Manual - NEC - Page 85
PROJECTOR NAME HOST NAME Always select [LAN1]. [LAN2] is used for servicing. When [ON] is selected, you can exercise control via a The DHCP server automatically assigns an IP address, subnet mask and gateway. Manually set an arbitrary IP address or subnet mask assigned by the network administrator - Sharp NP-PX2201UL | User Manual - NEC - Page 86
4-6-7. LIGHT MODE Adjust the light source output of the projector. 4. Using On-Screen Menu NORMAL ECO Brightness changes to 100% and the screen becomes bright. The brightness becomes about 80% of the brightness in the [NORMAL] mode. The operating noise and power consumption will also decrease due - Sharp NP-PX2201UL | User Manual - NEC - Page 87
side of the projector is enabled. • When [CONTROL ID] is set to [ON], the projector cannot be operated from a remote control that does not support the [CONTROL ID] function (except for the projector operation buttons). • [CONTROL ID] will not be changed even if reset is performed. TIP: • The remote - Sharp NP-PX2201UL | User Manual - NEC - Page 88
How to set/change the ID in the remote control 1. Turn on the power of the projector. 2. Press the ISD SET button on the remote control. The [CONTROL ID] screen will be displayed. 4. Using On-Screen Menu At this point, [ACTIVE] is displayed if the projector can be operated with the current remote - Sharp NP-PX2201UL | User Manual - NEC - Page 89
4. Using On-Screen Menu 4-6-13. TRIGGER-1/2 Set whether to output the control voltage for screen control from the screen trigger terminal according to the input video signal. 4-6-14. MENU MENU POSITION MENU TRANSLUCENT DISPLAY TIME MESSAGE DISPLAY CONTROL PANEL LOCK Changes the position to display - Sharp NP-PX2201UL | User Manual - NEC - Page 90
4-7. INFO. And RESET ALL 4-7-1. INFO. 4. Using On-Screen Menu MODEL NO. SERIAL NUMBER FIRMWARE LANCPU SUB-CPU CONTROL ID INPUT TERMINAL SIGNAL FORMAT H/V REFRESH RATE PIXEL CLOCK LIGHT HOURS USED THERMAL STATUS Displays the model name. Displays the serial number. Displays the firmware version - Sharp NP-PX2201UL | User Manual - NEC - Page 91
5. Installation and Connections 5-1. Connecting to Other Equipment Below is an example of connections to external equipment. No connection cables are included with this projector. Use the appropriate cables for the connections. CAUTION • Be sure to turn off the projector before connecting the - Sharp NP-PX2201UL | User Manual - NEC - Page 92
twisted pair (STP) cable of Category 5e or higher for the LAN cable (sold commercially). • The HDBaseT/LAN port of the projector supports HDMI signals (HDCP) from transmission devices, control signals from external devices (serial, LAN) and remote control signals (IR commands). • The maximum - Sharp NP-PX2201UL | User Manual - NEC - Page 93
6. Maintenance WARNING • Turn off the projector, and unplug the projector before cleaning. • Please do not use a spray containing flammable gas to remove dust attached to the lens or the cabinet, etc. Doing so may result in fires. 6-1. Cleaning the Lens • Use a blower or lens paper to clean the lens - Sharp NP-PX2201UL | User Manual - NEC - Page 94
7. Appendix 7-1. Throw distance and screen size This projector can be used with 5 kinds of optional lenses (sold separately). Refer to the information on this page and use a lens suited for the installation environment (screen size and throw distance). Request the dealer to attach or detach the - Sharp NP-PX2201UL | User Manual - NEC - Page 95
Projection range for the different lenses NP48ZL: 87"-1016"/2.2-25.8 m NP46ZL: 51"-398"/1.3-10.1 m 50-300" 50-300" 7. Appendix 50-300" 50-300" 50-300" NP45ZL: 39"-307"/1.0-7.8 m NP47ZL: 63"-508"/1.6-12.9 m NP49ZL: 169"-1780"/4.3-45.2 m 75 - Sharp NP-PX2201UL | User Manual - NEC - Page 96
Tables of screen sizes and dimensions 7. Appendix Screen height 16:10 screen size (diagonal) Screen width Size (inches) (cm) 50 127.0 70 177.8 100 254.0 120 304.8 150 381.0 180 457.2 200 508.0 220 558.8 250 635.0 280 711.2 300 762.0 350 889.0 400 1016.0 450 1143.0 - Sharp NP-PX2201UL | User Manual - NEC - Page 97
7. Appendix Lens shifting range This projector is equipped with a lens shift function for adjusting the position of the projected image by using the LENS SHIFT buttons (→ page 21). The lens can be shifted within the range shown below. NOTE: • Please do not use the lens shift function when projecting - Sharp NP-PX2201UL | User Manual - NEC - Page 98
7-2. Compatible Input Signal List Analog RGB VGA SVGA XGA XGA+ Signal WXGA Quad-VGA SXGA SXGA+ WXGA+ WXGA++ UXGA WSXGA+ WUXGA Full HD MAC 13" MAC 16" MAC 19" MAC 21" Resolution ( dots ) 640 × 480 800 × 600 1024 × 768 1152 × 864 1280 × 768 1280 × 800 1366 × 768 1280 × 960 1280 × 1024 1400 × - Sharp NP-PX2201UL | User Manual - NEC - Page 99
7. Appendix BNC Signal HDTV (1080p) HDTV (1080i) HDTV (720p) SDTV (480i/p) SDTV (576i/p) Resolution ( dots ) 1920 × 1080 1920 × 1080 1280 × 720 720 × 480 720 × 576 SDI Signal SD-SDI (480i) SD-SDI (576i) HD-SDI (1035i) HD-SDI (1080i) HD-SDI (1080p) HD-SDI (1080p) HD-SDI (720p) 3G-SDI (1080p) - Sharp NP-PX2201UL | User Manual - NEC - Page 100
Gbps No. lanes: 1 lane/2 lanes/4 lanes Deep Color (color depth): 8-/10-/12-bit compatible Colorimetry: RGB, YCbCr444, YCbCr422, REC709, REC601 Supports HDCP (*4) RJ-45 × 1, 10BASE-T/100BASE-TX Deep Color (color depth): 8-/10-/12-bit compatible Colorimetry: RGB, YCbCr444, YCbCr422, YCbCr420, REC709 - Sharp NP-PX2201UL | User Manual - NEC - Page 101
/intention of the HDCP community (Digital Content Protection, LLC). Video: Deep Color, 8/10/12-bit HDMI: Supports HDCP 1.4 DisplayPort: Supports HDCP 1.4 HDBaseT: Supports HDCP 1.4 *5 Depending on the altitude and temperature, the projector goes into "Forced ECO MODE". • These specifications - Sharp NP-PX2201UL | User Manual - NEC - Page 102
Option lens (sold separately) NP45ZL NP46ZL NP47ZL NP48ZL NP49ZL Power zoom and focus throw ratio 0.9-1.2:1, F2.2-2.53, f = 19.34-25.76 mm Power zoom and focus throw ratio 1.2-1.56:1, F2.18-2.66, f = 25.69-33.22 mm Power zoom and focus throw ratio 1.5-2.0:1, F2.17-2.65, f = 31.90-42.20 mm Power - Sharp NP-PX2201UL | User Manual - NEC - Page 103
by qualified technicians in order to ensure proper operation and reduce the risk of bodily injury. In addition, the ceiling must be strong enough to support the projector and the installation must be in accordance with any local building codes. Please consult your dealer for more information. 83 - Sharp NP-PX2201UL | User Manual - NEC - Page 104
7. Appendix 7-5. Pin assignments and signal names of main terminals HDMI 1 IN/HDMI 2 IN Terminal (Type A) 2 4 6 8 10 12 14 16 18 1 3 5 7 9 11 13 15 17 19 Pin No. 1 2 3 4 5 6 7 8 9 10 Signal TMDS Data 2+ TMDS Data 2 Shield TMDS Data 2− TMDS Data 1+ TMDS Data 1 Shield TMDS Data 1− TMDS Data 0+ - Sharp NP-PX2201UL | User Manual - NEC - Page 105
HDBaseT/LAN Port (RJ-45) 12345678 Pin No. 1 2 3 4 5 6 7 8 Signal TxD+/HDBT0+ TxD−/HDBT0− RxD+/HDBT1+ Disconnection/HDBT2+ Disconnection/HDBT2− RxD−/HDBT1− Disconnection/HDBT3+ Disconnection/HDBT3− PC CONTROL Port (D-Sub 9 Pin) 9876 54 3 21 Pin No. 1 2 3 4 5 6 7 8 9 Signal Unused TxD - Sharp NP-PX2201UL | User Manual - NEC - Page 106
page 69 for more information. Stereo mini cable (not supplied) Tip (12 V) Ring (0 V) Sleave (ground 0 V) NOTE: • Screen controllers are supplied and supported by screen manufacturers. NOTE: • Do not use these terminals for anything other than intended use. Connecting the wired remote control to - Sharp NP-PX2201UL | User Manual - NEC - Page 107
Troubleshooting This section helps you resolve problems you may encounter while setting up or using the projector. Problem guide accompanied with your computer or video card, or contact the support center any trouble and failure caused by this installation. • Signals may not be supported depending - Sharp NP-PX2201UL | User Manual - NEC - Page 108
the changes to take affect. For setting display modes other than those supported by your Mac and the projector, changing the DIP switch on a the unit unless "mirroring" is off on your MacBook. Refer to owner's manual supplied with your Mac computer for mirroring. • Folders or icons are hidden on - Sharp NP-PX2201UL | User Manual - NEC - Page 109
source, used time of the light source, and the status of [LIGHT MODE]. ④ TEMP. indicator This is the temperature indicator informing temperature trouble when the ambient temperature is too high/low. Indicator Message (Status message) POWER STATUS LIGHT TEMP. Off Off Off Off Orange Off - Sharp NP-PX2201UL | User Manual - NEC - Page 110
Message (Error message) POWER STATUS LIGHT TEMP. Projector status Temperature problem Red Off Off Off (Blink*4) Lens mounting error/Lens problem Red (Blink*4) Red (Light) Red (Light) Off Error requiring service support Red Status Status Off (Light) varies varies *4 Repetition to - Sharp NP-PX2201UL | User Manual - NEC - Page 111
7-8. PC Control Codes and Cable Connection PC Control Codes Function Code Data POWER ON 02H 00H 00H 00H 00H 02H POWER OFF 02H 01H 00H 00H 00H 03H INPUT SELECT HDMI 1 02H 03H 00H 00H 02H 01H A1H A9H INPUT SELECT HDMI 2 02H 03H 00H 00H 02H 01H A2H AAH INPUT SELECT COMPUTER 02H 03H 00H 00H - Sharp NP-PX2201UL | User Manual - NEC - Page 112
service personnel, check the following list to be sure repairs are needed also by referring to the "Troubleshooting" section in your user's manual. This checklist below will help us solve your problem . □ Input source's resolution and frequency are supported by the projector. □ Image is too dark - Sharp NP-PX2201UL | User Manual - NEC - Page 113
In the space below please describe your problem in detail. 7. Appendix Information on application and environment where your projector is used Projector Model number: Serial No.: Date of purchase: Light module operating time ( - Sharp NP-PX2201UL | User Manual - NEC - Page 114
© Sharp NEC Display Solutions, Ltd. 2022 7N953071
-
 1
1 -
 2
2 -
 3
3 -
 4
4 -
 5
5 -
 6
6 -
 7
7 -
8
-
9
-
10
-
11
-
12
-
13
-
14
-
15
-
16
-
17
-
18
-
19
-
20
-
21
-
22
-
23
-
24
-
25
-
26
-
27
-
28
-
29
-
30
-
31
-
32
-
33
-
34
-
35
-
36
-
37
-
38
-
39
-
40
-
41
-
42
-
43
-
44
-
45
-
46
-
47
-
48
-
49
-
50
-
51
-
52
-
53
-
54
-
55
-
56
-
57
-
58
-
59
-
60
-
61
-
62
-
63
-
64
-
65
-
66
-
67
-
68
-
69
-
70
-
71
-
72
-
73
-
74
-
75
-
76
-
77
-
78
-
79
-
80
-
81
-
82
-
83
-
84
-
85
-
86
-
87
-
88
-
89
-
90
-
91
-
92
-
93
-
94
-
95
-
96
-
97
-
98
-
99
-
100
-
101
-
102
-
103
-
104
-
105
-
106
-
107
-
108
-
109
-
110
-
111
-
112
-
113
-
114
 |
 |

Projector
PX2201UL
User’s Manual
Please visit our web site for User’s Manual in the latest version.
Model No.
NP-PX2201UL