Sharp PN-CD701 Setup Manual - Page 9
Supplied Components, Specifications, Preparing the Remote Control Unit
 |
View all Sharp PN-CD701 manuals
Add to My Manuals
Save this manual to your list of manuals |
Page 9 highlights
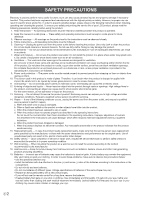
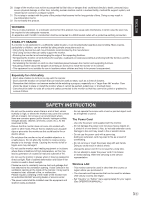
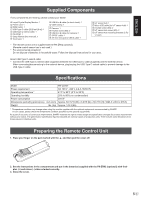
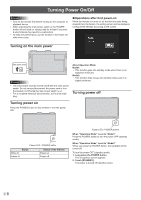
ENGLISH Supplied Components If any components are missing, please contact your dealer. Liquid Crystal Display Monitor: 1 Power cord: 1 HDMI cable: 1 USB Type C cable (26.2 feet [8 m]): 1 USB Type C extend cable: 1 CD-ROM: 1 Setup Manual (this manual): 1 Touch pen: 1 USB A to B cable (for touch back): 1 Cable clamp: 1 Camera: 1 Knurled screw (M3): 2 USB A to B cable (for camera): 1 S/PDIF cable: 1 3.5 mm mini jack to USB A cable: 1 IoT sensor hub: 1 Micro USB cable (for IoT sensor hub): 1 Knurled screw (M3): 2 IoT sensor hub screw (M3): 2 IoT sensor hub mounting brackets (L/R): x1 each * The remote control unit is supplied with the PN-ZR02 (optional). (Remote control sensor box is not used.) * For environmental protection! Do not dispose of batteries in household waste. Follow the disposal instructions for your area. About USB Type C extend cable • Connect the USB Type C extend cable (supplied) between the USB Type C cable (supplied) and the external device. When connecting/disconnecting to the external device, plug/unplug the USB Type C extend cable to prevent damage to the USB Type C cable. Specifications Model Power requirement Operating temperature * Operating humidity Power consumption Dimensions (excluding protrusions) Weight inch (mm) lbs. (kg) PN-CD701 AC 100 V - 240 V, 4.2 A, 50/60 Hz 41°F to 95°F (5°C to 35°C) 20% to 80% (no condensation) 370 W Approx. 63-15/16 (W) x 3-9/16 (D) x 38-7/16 (H) (1623.5 x 90.0 x 976.5) Approx. 143.3 (65) * Temperature condition may change when using the monitor together with the optional equipments recommended by SHARP. In such cases, please check the temperature condition specified by the optional equipments. As a part of our policy of continuous improvement, SHARP reserves the right to make design and specification changes for product improvement without prior notice. The performance specification figures indicated are nominal values of production units. There may be some deviations from these values in individual units. Preparing the Remote Control Unit 1. Place your finger on the part marked with the ▲, and then pull the cover off. 2. See the instructions in the compartment and put in the batteries (supplied with the PN-ZR02 (optional)) with their plus (+) and minus (-) sides oriented correctly. 3. Close the cover. 5E
-
 1
1 -
2
-
3
-
 4
4 -
 5
5 -
 6
6 -
 7
7 -
 8
8 -
 9
9 -
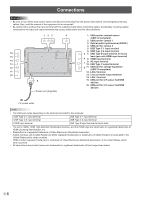 10
10 -
 11
11 -
 12
12 -
 13
13 -
 14
14 -
15
-
16
-
17
-
18
-
19
-
20
-
21
-
22
-
23
-
24
-
25
-
26
-
27
-
28
-
29
-
30
-
31
-
32
-
33
-
34
-
35
-
36
 |
 |