Sharp UP-820F UP-810F UP-820F Operation Manual - Page 271
Installing a paper roll UP-820F
 |
View all Sharp UP-820F manuals
Add to My Manuals
Save this manual to your list of manuals |
Page 271 highlights
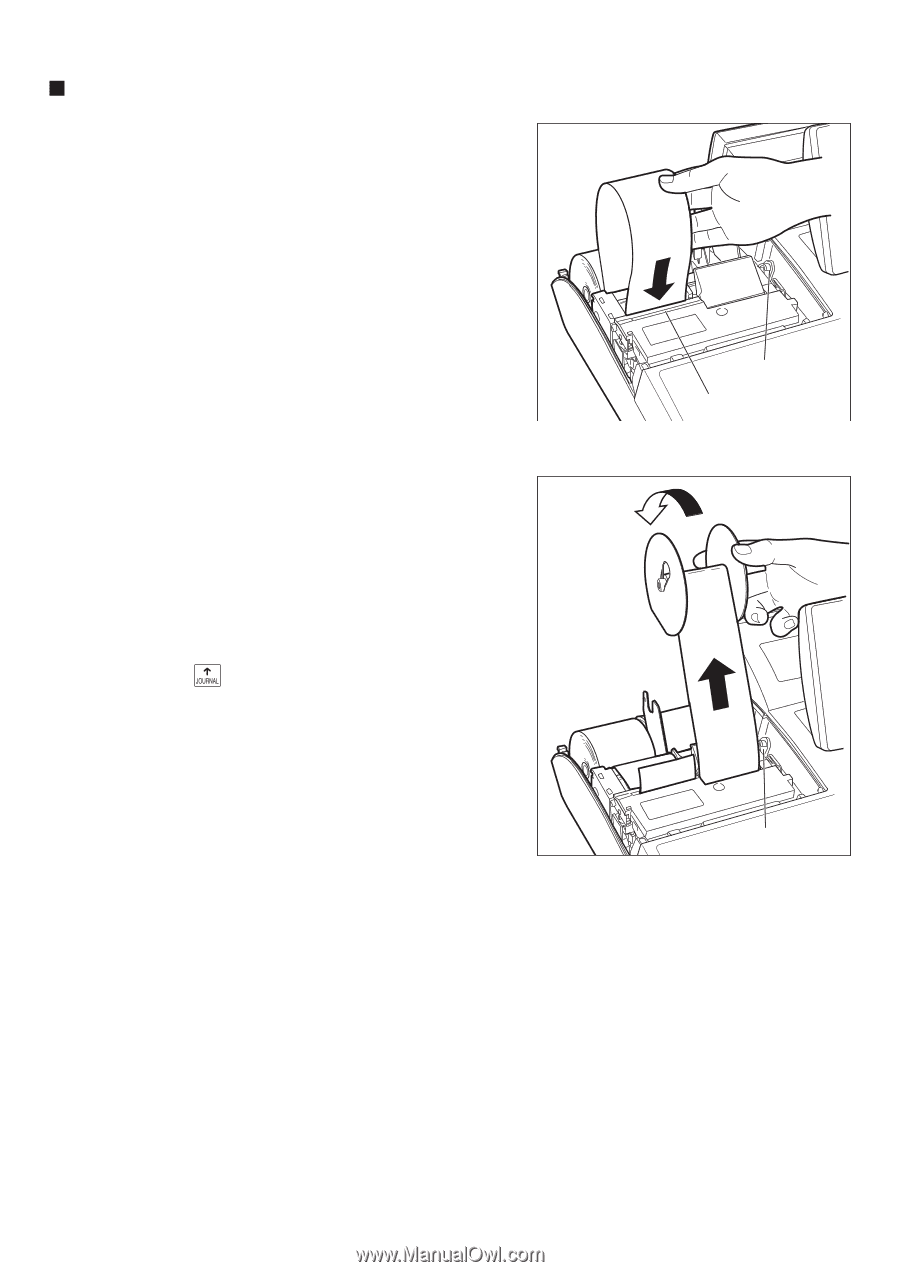
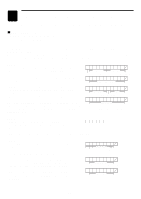
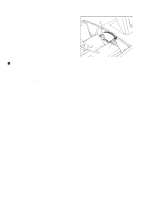
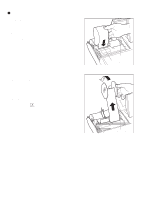
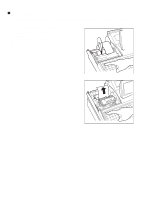
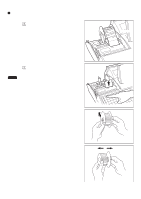
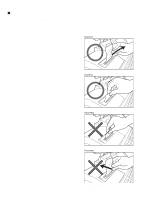
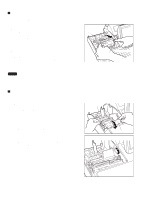
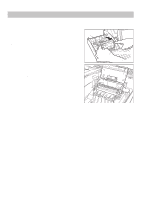
Installing a paper roll (UP-820F) Installing the receipt paper roll 1. Select the "REG" mode with the AC cord connected. 2. Remove the printer cover. 3. Check that the print head release lever is in its printing position. 4. Set the paper correctly as illustrated right in the paper roll location (receipt side) of the printer. 5. Insert the end of the paper into the paper chute as shown on the right. It will automatically be fed through the printer. 6. Cut off the excess paper that comes out of the printer with the manual cutter. 7. Replace the printer cover. Installing a journal paper roll 1. Select the "REG" mode with the AC cord connected. 2. Remove the printer cover. 3. Confirm that the print head release lever is in its printing position. 4. Set the paper correctly in the journal paper holder of the printer. (See the illustrations on the previous page.) 5. Insert the end of the paper into the paper chute as shown on the right. It will automatically be fed through the printer. 6. Insert the end of the paper into the slit in the paper take-up spool. (Press the key to feed paper more if required.) 7. Wind the paper around the spool shaft two or three turns. 8. Set the spool on the bearing. 9. Replace the printer cover. Printing position Manual cutter Printing position - 269 -
-
 1
1 -
2
-
3
-
4
-
5
-
6
-
7
-
8
-
9
-
10
-
11
-
12
-
13
-
14
-
15
-
16
-
17
-
18
-
19
-
20
-
21
-
22
-
23
-
24
-
25
-
26
-
27
-
28
-
29
-
30
-
31
-
32
-
33
-
34
-
35
-
36
-
37
-
38
-
39
-
40
-
41
-
42
-
43
-
44
-
45
-
46
-
47
-
48
-
49
-
50
-
51
-
52
-
53
-
54
-
55
-
56
-
57
-
58
-
59
-
60
-
61
-
62
-
63
-
64
-
65
-
66
-
67
-
68
-
69
-
70
-
71
-
72
-
73
-
74
-
75
-
76
-
77
-
78
-
79
-
80
-
81
-
82
-
83
-
84
-
85
-
86
-
87
-
88
-
89
-
90
-
91
-
92
-
93
-
94
-
95
-
96
-
97
-
98
-
99
-
100
-
101
-
102
-
103
-
104
-
105
-
106
-
107
-
108
-
109
-
110
-
111
-
112
-
113
-
114
-
115
-
116
-
117
-
118
-
119
-
120
-
121
-
122
-
123
-
124
-
125
-
126
-
127
-
128
-
129
-
130
-
131
-
132
-
133
-
134
-
135
-
136
-
137
-
138
-
139
-
140
-
141
-
142
-
143
-
144
-
145
-
146
-
147
-
148
-
149
-
150
-
151
-
152
-
153
-
154
-
155
-
156
-
157
-
158
-
159
-
160
-
161
-
162
-
163
-
164
-
165
-
166
-
167
-
168
-
169
-
170
-
171
-
172
-
173
-
174
-
175
-
176
-
177
-
178
-
179
-
180
-
181
-
182
-
183
-
184
-
185
-
186
-
187
-
188
-
189
-
190
-
191
-
192
-
193
-
194
-
195
-
196
-
197
-
198
-
199
-
200
-
201
-
202
-
203
-
204
-
205
-
206
-
207
-
208
-
209
-
210
-
211
-
212
-
213
-
214
-
215
-
216
-
217
-
218
-
219
-
220
-
221
-
222
-
223
-
224
-
225
-
226
-
227
-
228
-
229
-
230
-
231
-
232
-
233
-
234
-
235
-
236
-
237
-
238
-
239
-
240
-
241
-
242
-
243
-
244
-
245
-
246
-
247
-
248
-
249
-
250
-
251
-
252
-
253
-
254
-
255
-
256
-
257
-
258
-
259
-
260
-
261
-
262
-
263
-
264
-
265
-
 266
266 -
 267
267 -
 268
268 -
 269
269 -
 270
270 -
 271
271 -
 272
272 -
 273
273 -
 274
274 -
 275
275 -
 276
276 -
277
-
278
-
279
-
280
-
281
-
282
 |
 |