Sharp XL-DH229N XL-DH229N Operation Manual - Page 3
System connections, Remote control - micro system
 |
UPC - 074000369603
View all Sharp XL-DH229N manuals
Add to My Manuals
Save this manual to your list of manuals |
Page 3 highlights
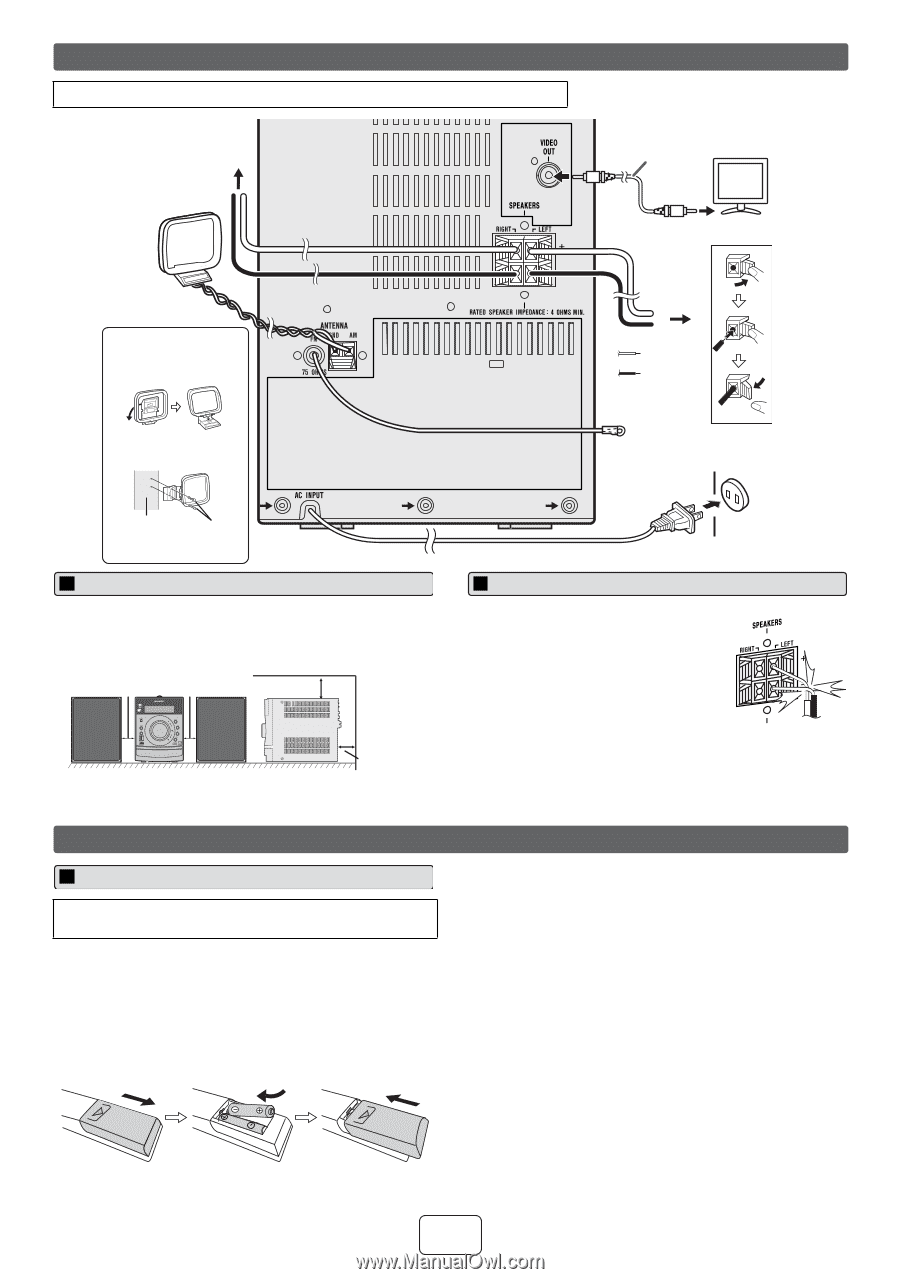
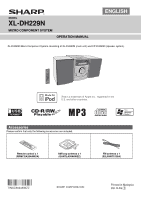
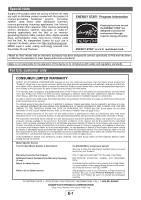
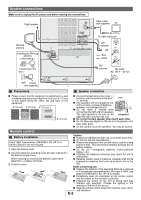
System connections Make sure to unplug the AC power cord before making any connections. Right speaker Video cable (not supplied) TV AM loop antenna Installing the AM loop antenna < Assembling > < Attaching to the wall > To video input jack Left speaker Red Black FM antenna AC outlet (AC 120 V ~ 60 Hz) wall screws (not supplied) Precautions Speaker connection ● Please ensure that the equipment is positioned in a well ventilated area and ensure that there is at least 4" (10 cm) of free space along the sides, top and back of the equipment. 4" (10 cm) 4" (10 cm) 4" (10 cm) MICRO COMPONENT SYSTEM XL-DH229 4" (10 cm) ● Connect the black wire to the minus (-) terminal, and the red wire to the plus (+) terminal. ● Use speakers with an impedance of 4 ohms or more, as lower impedance speakers can damage the unit. ● Do not make a mistake when connecting the right and left speakers. The right speaker is the one on the Incorrect right side when you face the unit. ● Do not let the bare speaker wires touch each other. ● Do not allow any objects to fall into or to be placed in the bass reflex ducts. ● Do not stand or sit on the speakers. You may be injured. Remote control Battery installation Caution: ● Replace all old batteries with new ones at the same time. ● Do not mix old and new batteries. Use 2 "AAA" size batteries (UM/SUM-4, R3, HP-16 or ● Remove the batteries if the unit will not be used for a long similar). Batteries are not included. period of time. This will prevent potential damage due to 1 Open the battery cover. battery leakage. ● Do not use rechargeable batteries (nickel-cadmium 2 Insert the batteries according to the direction indicated in the battery compartment. battery, etc.). ● Installing the batteries incorrectly may cause the unit to malfunction. When inserting or removing the batteries, push them toward the (-) battery terminals. ● Batteries (battery pack or batteries installed) shall not be exposed to excessive heat such as sunshine, fire or the 3 Close the cover. like. Notes concerning use: ● Replace the batteries if the operating distance is reduced or if the operation becomes erratic. Purchase 2 "AAA" size batteries (UM/SUM-4, R3, HP-16 or similar). ● Periodically clean the transmitter on the remote control and the sensor on the unit with a soft cloth. ● Exposing the sensor on the unit to strong light may interfere with operation. Change the lighting or the direction of the unit if this occurs. ● Keep the remote control away from moisture, heat, shock, and vibrations. E-2
-
 1
1 -
 2
2 -
 3
3 -
 4
4 -
 5
5 -
 6
6 -
 7
7 -
 8
8 -
 9
9 -
10
-
11
-
12
-
13
-
14
-
15
-
16
 |
 |