Singer 20U-109 Instruction Manual - Page 28
Singer 20U-109 Manual
 |
View all Singer 20U-109 manuals
Add to My Manuals
Save this manual to your list of manuals |
Page 28 highlights
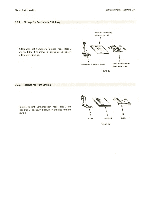
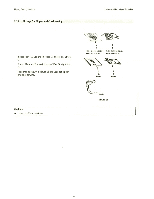
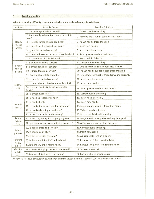
Zigzag Sewing Machine Knee operating presser foot lift Bell cranks '1' and '2' shown in Figure 34 are fastened to the underside of the bed bell crank '1' is used for lifting and lowering the presser loot with knee, and bell crank '2' is used for controlling the stitch width . To raise or lower the presser foot with knee, loosen screw '4' holding the knee lifter shaft arm '3' and move knee lifter shaft arm '3' just under the bell crank '1', and firmly tighten screw '4'. Loosen the lock nut holding screw '7' and turn screw '7' as required, so that the bent end '6' of knee lifter shaft arm '3' will be almost horizontal when knee lifter knee plate '5' is pushed as far as it will go in the direction indicated with arrow 'A', then firmly tighten the lock nut. With knee lifter shaft arm '3' set in position as described above, loosen screw '8' and move knee lifter shaft arm '3' up or down as required, so that height '10' from its bent end '6' to bracket '9' is 64 mm. Raise presser foot '12' with presser foot litter '11'.Then loosen the lock nut holding screw '14' and turn screw '14' as required, so that knee lifter knee plate '5' when pushed in the direction indicated with arrow will stop at a point (presser foot '12' raised approx. 9 mm from throat plate '13' surface) where presser bar lifter '11' will drop down from its raised position when presser bat is lifted a little higher than its normal up position Then firmly tighten the lock nut. When knee lifter knee plate '5' is pushed in the direction indicated with arrow 'B', the presser foot '12' will rise and when knee plate '5' is released, presser foot '12' will be lowered. Instruction Manual and Parts List 11 12 13 1 14 3 7 6 4 10 --64 virim 8 B Figure 34 te r- A 5 Caution: • Switch off the machine. • Set sewing head uprignv zgain using both hands_ • Danger of crushing between. sewing head and table top _27_
-
 1
1 -
2
-
3
-
4
-
5
-
6
-
7
-
8
-
9
-
10
-
11
-
12
-
13
-
14
-
15
-
16
-
17
-
18
-
19
-
20
-
21
-
22
-
 23
23 -
 24
24 -
 25
25 -
 26
26 -
 27
27 -
 28
28 -
 29
29 -
 30
30 -
 31
31 -
 32
32 -
 33
33 -
34
-
35
-
36
-
37
-
38
-
39
-
40
-
41
-
42
-
43
-
44
-
45
-
46
-
47
-
48
-
49
-
50
-
51
-
52
-
53
-
54
-
55
-
56
-
57
-
58
-
59
-
60
 |
 |
