Singer 85SCH and 850SCH SCHOLASTIC COMBO Instruction Manual - Page 22
Inserting the Bobbin
 |
View all Singer 85SCH and 850SCH SCHOLASTIC COMBO manuals
Add to My Manuals
Save this manual to your list of manuals |
Page 22 highlights
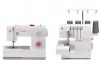
EN Inserting the Bobbin When inserting or removing the bobbin, raise the presser foot & make sure the needle is fully raised. 1. Remove the bobbin cover plate by pushing the small tab to the right of the cover towards the right. 2. Insert the bobbin in the bobbin case with the thread running counterclockwise direction (arrow). 3. Pull the thread through the slit (A). 4. Draw the thread clockwise until it slips into the notch (B), while holding the bobbin down with the tip of your finger. 5. Pull out about 15 cm (6 inches) of thread towards the 1 back of the plate and attach the bobbin cover plate. (C) Attention: Turn power switch to off ("O") before inserting or removing the bobbin. B 3 14 A 2 C 4
-
 1
1 -
2
-
3
-
4
-
5
-
6
-
7
-
8
-
9
-
10
-
11
-
12
-
13
-
14
-
15
-
16
-
 17
17 -
 18
18 -
 19
19 -
 20
20 -
 21
21 -
 22
22 -
 23
23 -
 24
24 -
 25
25 -
 26
26 -
 27
27 -
28
-
29
-
30
-
31
-
32
-
33
-
34
-
35
-
36
-
37
-
38
-
39
-
40
-
41
-
42
-
43
-
44
-
45
-
46
-
47
-
48
-
49
-
50
-
51
-
52
-
53
-
54
-
55
-
56
-
57
-
58
-
59
-
60
-
61
-
62
-
63
-
64
-
65
-
66
-
67
-
68
-
69
-
70
-
71
-
72
-
73
-
74
-
75
-
76
-
77
-
78
-
79
-
80
-
81
-
82
-
83
-
84
-
85
-
86
-
87
-
88
-
89
-
90
-
91
-
92
-
93
-
94
-
95
-
96
-
97
-
98
-
99
-
100
-
101
-
102
-
103
-
104
-
105
-
106
-
107
-
108
-
109
-
110
-
111
-
112
-
113
-
114
-
115
-
116
-
117
-
118
-
119
-
120
-
121
-
122
-
123
-
124
-
125
-
126
-
127
-
128
-
129
-
130
-
131
-
132
-
133
-
134
-
135
-
136
-
137
-
138
-
139
-
140
-
141
-
142
-
143
-
144
-
145
-
146
-
147
-
148
-
149
-
150
-
151
-
152
-
153
-
154
-
155
-
156
-
157
-
158
-
159
-
160
-
161
-
162
-
163
-
164
-
165
-
166
-
167
-
168
-
169
-
170
-
171
-
172
-
173
-
174
-
175
-
176
-
177
-
178
-
179
-
180
-
181
-
182
-
183
-
184
-
185
-
186
-
187
-
188
-
189
-
190
-
191
-
192
-
193
-
194
-
195
-
196
-
197
-
198
-
199
-
200
-
201
-
202
-
203
-
204
-
205
-
206
-
207
-
208
-
209
-
210
-
211
-
212
-
213
-
214
-
215
-
216
-
217
-
218
-
219
-
220
-
221
-
222
-
223
-
224
-
225
-
226
-
227
-
228
-
229
-
230
 |
 |

When inserting or removing the bobbin, raise the presser
foot & make sure the needle is fully raised.
Attention:
1. Remove the bobbin cover plate by pushing the small tab
to the right of the cover towards the right.
2. Insert the bobbin in the bobbin case with the thread
running counterclockwise direction (arrow).
3. Pull the thread through the slit (A).
4. Draw the thread clockwise until it slips into the notch (B),
while holding the bobbin down with the tip of your finger.
5. Pull out about 15 cm (6 inches) of thread towards the
back of the plate and attach the bobbin cover plate. (C)
Turn
power
switch
to
off
("O")
before
inserting
or
removing the bobbin.
Inserting the Bobbin
EN
14
When inserting or removing the bobbin, raise the presser
foot & make sure the needle is fully raised.
Attention:
1. Remove the bobbin cover plate by pushing the small tab
to the right of the cover towards the right.
2. Insert the bobbin in the bobbin case with the thread
running counterclockwise direction (arrow).
3. Pull the thread through the slit (A).
4. Draw the thread clockwise until it slips into the notch (B),
while holding the bobbin down with the tip of your finger.
5. Pull out about 15 cm (6 inches) of thread towards the
back of the plate and attach the bobbin cover plate. (C)
Turn
power
switch
to
off
("O")
before
inserting
or
removing the bobbin.
A
B
C
1
3
4
2