Singer Futura Quartet SEQS-6700 Instruction Manual - Page 16
Twin Needle Button, Thread Cutting Mode, Thread Tension Control Button
 |
View all Singer Futura Quartet SEQS-6700 manuals
Add to My Manuals
Save this manual to your list of manuals |
Page 16 highlights
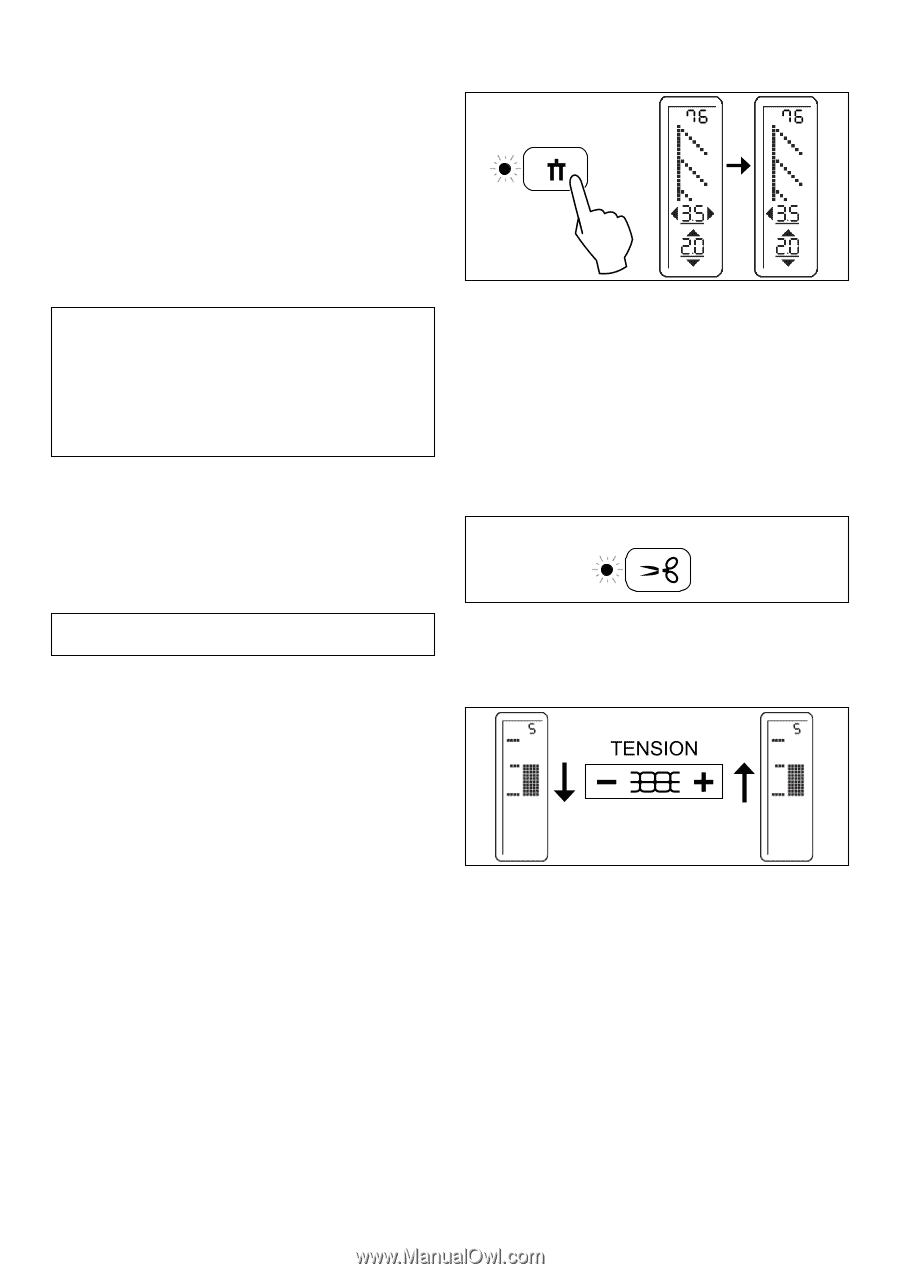
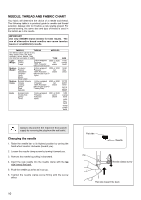
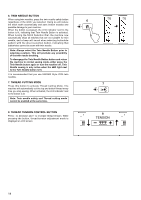
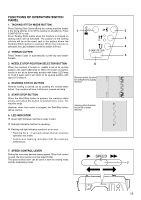
6. TWIN NEEDLE BUTTON When using twin needles, press the twin needle safety button regardless of the stitch you selected. Doing so will reduce the stitch width automatically and save broken needles and possible damage to your machine. When the button is pressed, the LED indicator next to the button is lit, indicating that Twin Needle Button is activated. When turning the Stitch Selection Dial, the machine now automatically skips all stitches that are not suitable for twin needle, and a beep will sound when selecting buttonhole pattern with the direct selection button, indicating that buttonholes cannot be sewn with twin needle. Note: Always select the Twin Needle Button prior to selecting a pattern. This will preclude any possibility of the twin needle breaking. To disengage the Twin Needle Button button and return the machine to normal sewing mode, either press the Twin Needle button again or turn the machine off. Twin Needle sewing is only active when the LED light next to the Twin Needle button is lit. It is recommended that you use SINGER Style 2025 twin needles. 7. THREAD CUTTING MODE Press this button to activate Thread Cutting Mode. The machine will automatically cut the top and bobbin thread every time you stop sewing. When activated, the LED indicator next to the button is lit. Note: Twin needle safety and Thread cutting mode cannot be enabled at the same time. 8. THREAD TENSION CONTROL BUTTON Press - to decrease and + to increase thread tension. While pressing the button, thread tension adjustment mode is displayed on LCD screen. 6 7 8 14
-
 1
1 -
2
-
3
-
4
-
5
-
6
-
7
-
8
-
9
-
10
-
 11
11 -
 12
12 -
 13
13 -
 14
14 -
 15
15 -
 16
16 -
 17
17 -
 18
18 -
 19
19 -
 20
20 -
 21
21 -
22
-
23
-
24
-
25
-
26
-
27
-
28
-
29
-
30
-
31
-
32
-
33
-
34
-
35
-
36
-
37
-
38
-
39
-
40
-
41
-
42
-
43
-
44
-
45
-
46
-
47
-
48
-
49
-
50
-
51
-
52
-
53
-
54
-
55
-
56
-
57
-
58
-
59
-
60
-
61
-
62
-
63
-
64
-
65
-
66
-
67
-
68
 |
 |