Singer H74 Instruction Manual 2 - Page 16
Winding The Bobbin - sew and cut foot
 |
View all Singer H74 manuals
Add to My Manuals
Save this manual to your list of manuals |
Page 16 highlights
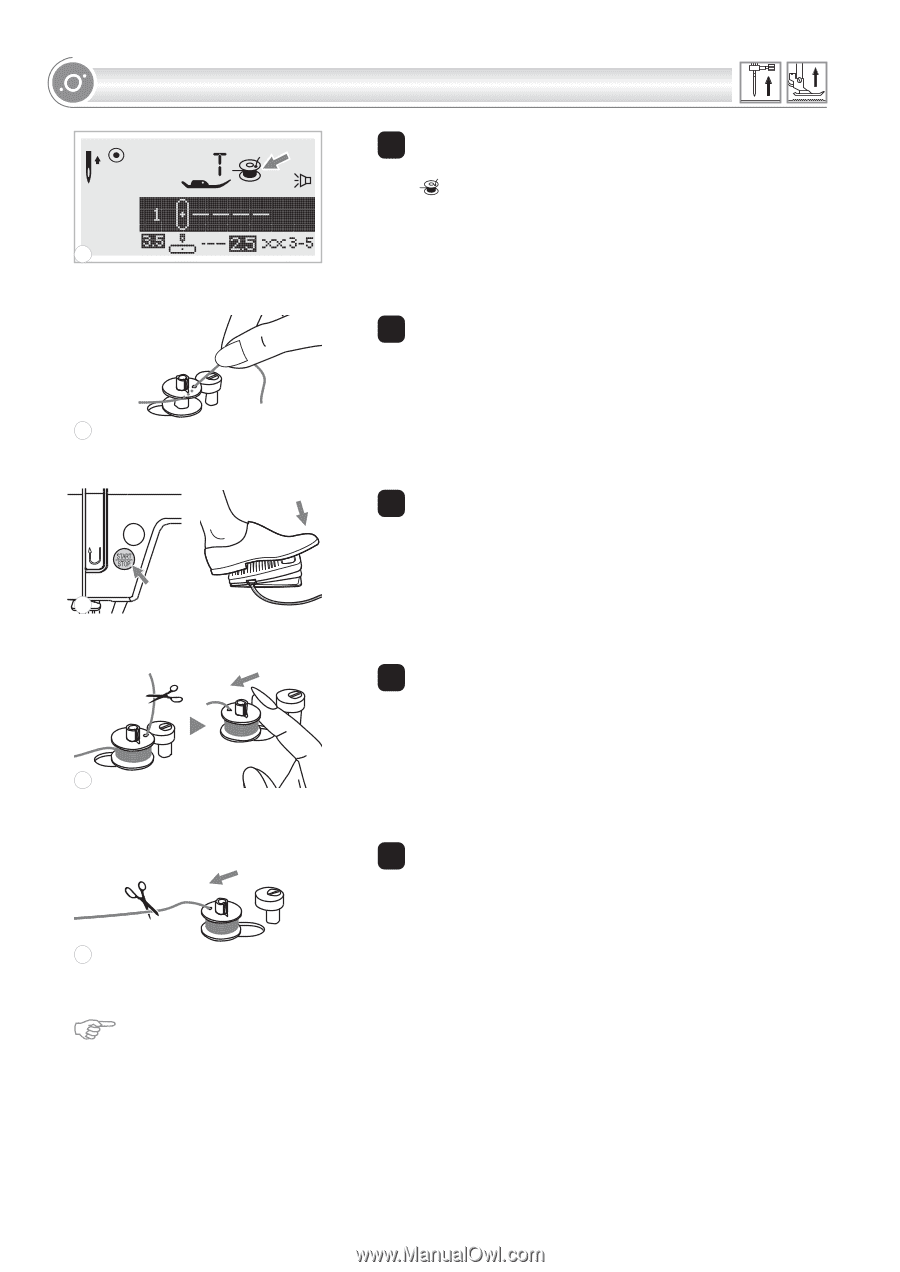
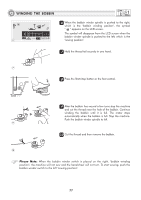
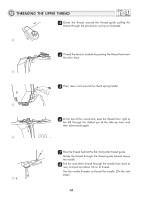
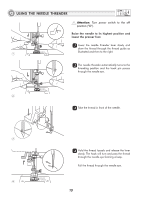
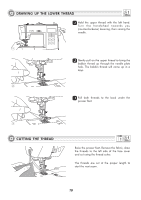
WINDING THE BOBBIN 6 When the bobbin winder spindle is pushed to the right, which is the "bobbin winding position", the symbol " " appears on the LCD screen. The symbol will disappear from the LCD screen when the bobbin winder spindle is pushed to the left, which is the 6 "sewing position". 7 Hold the thread tail securely in one hand. 7 8 Press the Start/stop button or the foot control. 8 9 After the bobbin has wound a few turns stop the machine and cut the thread near the hole of the bobbin. Continue winding the bobbin until it is full. The motor stops automatically when the bobbin is full. Stop the machine. Push the bobbin winder spindle to left. 9 10 Cut the thread and then remove the bobbin. 10 Please Note: When the bobbin winder switch is placed on the right, "bobbin winding position", the machine will not sew and the handwheel will not turn. To start sewing, push the bobbin winder switch to the left "sewing position". 11
-
 1
1 -
2
-
3
-
4
-
5
-
6
-
7
-
8
-
9
-
10
-
 11
11 -
 12
12 -
 13
13 -
 14
14 -
 15
15 -
 16
16 -
 17
17 -
 18
18 -
 19
19 -
 20
20 -
 21
21 -
22
-
23
-
24
-
25
-
26
-
27
-
28
-
29
-
30
-
31
-
32
-
33
-
34
-
35
-
36
-
37
-
38
-
39
-
40
-
41
-
42
-
43
-
44
-
45
-
46
-
47
-
48
-
49
-
50
-
51
-
52
-
53
-
54
-
55
-
56
-
57
-
58
-
59
-
60
-
61
-
62
-
63
-
64
-
65
-
66
-
67
-
68
-
69
-
70
-
71
-
72
-
73
-
74
-
75
-
76
-
77
-
78
-
79
-
80
-
81
-
82
-
83
-
84
-
85
-
86
 |
 |