Singer S16 I Studio Instruction Manual - Page 15
Thread and Needle Chart, Changing the Needle, To Check the Needle - s16 studio sewing machine
 |
View all Singer S16 I Studio manuals
Add to My Manuals
Save this manual to your list of manuals |
Page 15 highlights
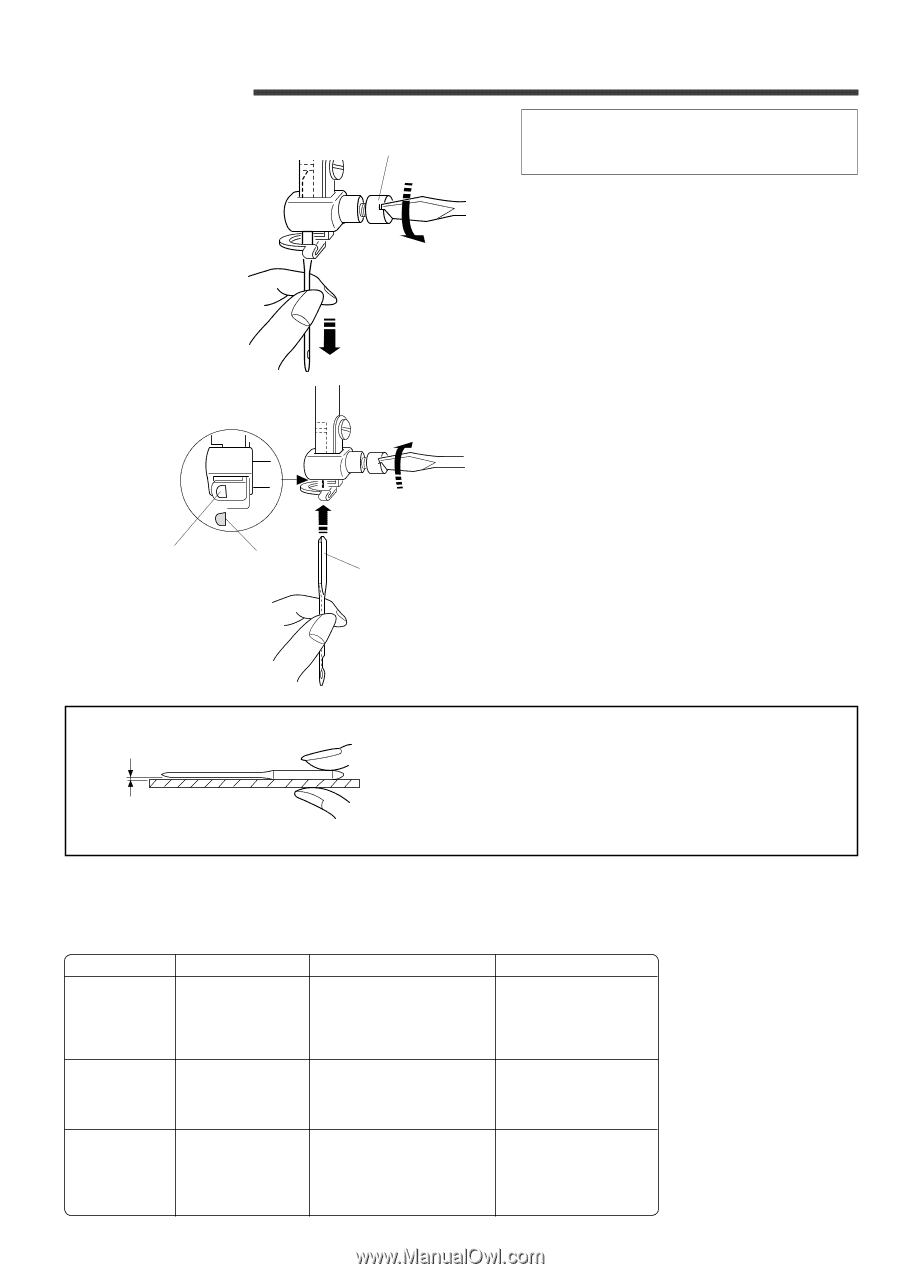
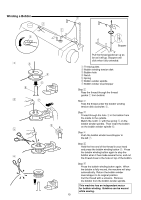
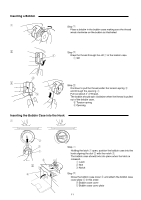
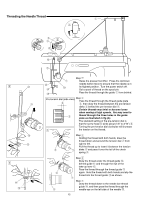
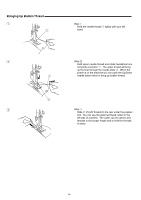
Changing the Needle z q x w e e CAUTION Turn the power switch off and unplug the machine before changing the needle. z Turn the power switch off. Lower the presser foot. Turn the needle clamp screw q counterclockwise with the large screwdriver. Loosen the screw and remove the needle from the needle clamp. q Needle clamp screw x Insert a new needle into the needle clamp w with the flat side e to the right, pushing it up as far as it will go. Tighten the clamp screw q firmly. w Needle clamp e Flat side * Remember to use only Style HL x 5 needles in your SINGER® Studio™ S16 sewing machine. To Check the Needle To determine if the needle is defective, place the flat side of needle on something flat (a needle plate, piece of glass, etc.). The gap between the needle and the flat surface should be consistent. Never use a blunt or burred needle, as it may cause skipped stitches or thread breakage. A defective needle can damage your fabrics. Thread and Needle Chart Light weight Fabrics Crepe de chine, Voile, Lawn, Organdy, Georgette, Tricot Thread All-purpose thread Silk thread Medium weight Linens, Cotton, Pique, Double Knits, Rayon All-purpose thread Polyester thread Heavy weight Denim, Tweed, Gabardine, Coating, Drapery and Upholstery Fabric All-purpose thread Polyester thread Topstitching thread 15 Needle (HL x 5) size 9 or 11 11 or 14 14, 16 or 18
-
 1
1 -
2
-
3
-
4
-
5
-
6
-
7
-
8
-
9
-
 10
10 -
 11
11 -
 12
12 -
 13
13 -
 14
14 -
 15
15 -
 16
16 -
 17
17 -
 18
18 -
 19
19 -
 20
20 -
21
-
22
-
23
 |
 |