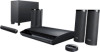
Sony BDV-T58 Operating Instructions - Page 21
Step 4: Performing the Easy Setup - instructions
 |
View all Sony BDV-T58 manuals
Add to My Manuals
Save this manual to your list of manuals |
Page 21 highlights
Getting Started Step 4: Performing the Easy Setup Before performing Step 4 Make sure all connections are secure, and then connect the AC power cord (mains lead). Follow the Steps below to make the basic adjustments for using the system. Displayed items vary depending on the country model. 123 456 789 0 "/1 C/X/x/c, HOME 1 Turn on the TV. 2 Connect the calibration mic to the A.CAL MIC jack on the rear panel. Set up the calibration mic at ear level using a tripod, etc. (not supplied). The front of each speaker should face the calibration mic, and there should be no obstruction between the speakers and the calibration mic. 3 Press [/1. 4 Switch the input selector on your TV so that the signal from the system appears on the TV screen. The Easy Setup Display for OSD language selection appears. 5 Perform the [Easy Setup]. Follow the on-screen instructions to make the basic settings using C/X/x/c, and . Depending on the connection method (page 15), perform the following setting. • HDMI cable connection: Follow the instructions that are displayed on the TV screen. • Component video cable connection: Select the picture quality. The available settings are as follows, from lowest to highest picture quality: 480i*, 480p**, 720p, and 1080i. * 480i/576i for Mexican and Latin American models. ** 480p/576p for Mexican and Latin American models. • BD-ROM playback of protected content via component video output is only supported at 480i* output resolution. For details, see "Copy Protection" (page 4). * 480i/576i for Mexican and Latin American models. • Video cord connection: Select [16:9] or [4:3] so that the picture is displayed correctly. For details about [Auto Calibration] settings in [Easy Setup], see "Calibrating the Appropriate Settings Automatically" (page 40). To recall the Easy Setup Display 1 Press HOME. The home menu appears on the TV screen. 2 Press C/c to select [Setup]. 3 Press X/x to select [Easy Setup], then press . 4 Press C/c to select [Start], then press . The Easy Setup Display appears. 21US
-
 1
1 -
2
-
3
-
4
-
5
-
6
-
7
-
8
-
9
-
10
-
11
-
12
-
13
-
14
-
15
-
 16
16 -
 17
17 -
 18
18 -
 19
19 -
 20
20 -
 21
21 -
 22
22 -
 23
23 -
 24
24 -
 25
25 -
 26
26 -
27
-
28
-
29
-
30
-
31
-
32
-
33
-
34
-
35
-
36
-
37
-
38
-
39
-
40
-
41
-
42
-
43
-
44
-
45
-
46
-
47
-
48
-
49
-
50
-
51
-
52
-
53
-
54
-
55
-
56
-
57
-
58
-
59
-
60
-
61
-
62
-
63
-
64
-
65
-
66
-
67
-
68
-
69
-
70
-
71
-
72
 |
 |
