Sony CSS-PHA Operating Instructions - Page 15
Viewing images on a TV screen, Connect the A/V connecting cable supplied to the A/V OUT MONO
 |
View all Sony CSS-PHA manuals
Add to My Manuals
Save this manual to your list of manuals |
Page 15 highlights
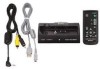
Viewing images on a TV screen 1 Connect the AC adaptor, then plug the adaptor into a wall outlet (wall socket). Connect the A/V connecting cable (supplied) to the A/V OUT (MONO) jack of the Cyber-shot Station and the audio/video input jacks of the TV. You must use either the AC adaptor (AC-LS5/LS5B) comes with the Cybershot, or an optional AC adaptor (AC-LS5). A/V connecting cable AC adaptor To a wall outlet (wall socket) DC plug Power cord (mains lead) If your TV has stereo input jacks, connect the audio plug (black) of the A/V connecting cable to the left audio jack. - Turn off both the camera and the TV before connecting the camera and the TV with the A/V connecting cable. 2 Place the camera on the Cyber-shot Station. - Make sure the camera is securely attached to the Cyber-shot Station. 3 Turn on the TV and set the TV/Video switch to "Video". 4 Set the mode dial of the camera to , and turn on the power. Press b/B on the Control buttons to select the desired image. You can also operate the camera using the Remote Commander. - The Cyber-shot Station is compatible with both NTSC and PAL TV systems. For further details, see the operating instructions supplied with the camera. 15-GB
-
 1
1 -
2
-
3
-
4
-
5
-
6
-
7
-
8
-
9
-
 10
10 -
 11
11 -
 12
12 -
 13
13 -
 14
14 -
 15
15 -
 16
16 -
 17
17 -
 18
18 -
 19
19 -
 20
20 -
21
-
22
-
23
-
24
-
25
-
26
-
27
-
28
-
29
-
30
-
31
-
32
-
33
-
34
-
35
-
36
-
37
-
38
-
39
-
40
-
41
-
42
-
43
-
44
-
45
-
46
-
47
-
48
-
49
-
50
-
51
-
52
 |
 |
