Sony DAV HDZ273 Operating Instructions - Page 20
Connecting the AC power cord (mains lead), About the demonstration, Press, on the unit. - menu tv
 |
UPC - 027242738775
View all Sony DAV HDZ273 manuals
Add to My Manuals
Save this manual to your list of manuals |
Page 20 highlights
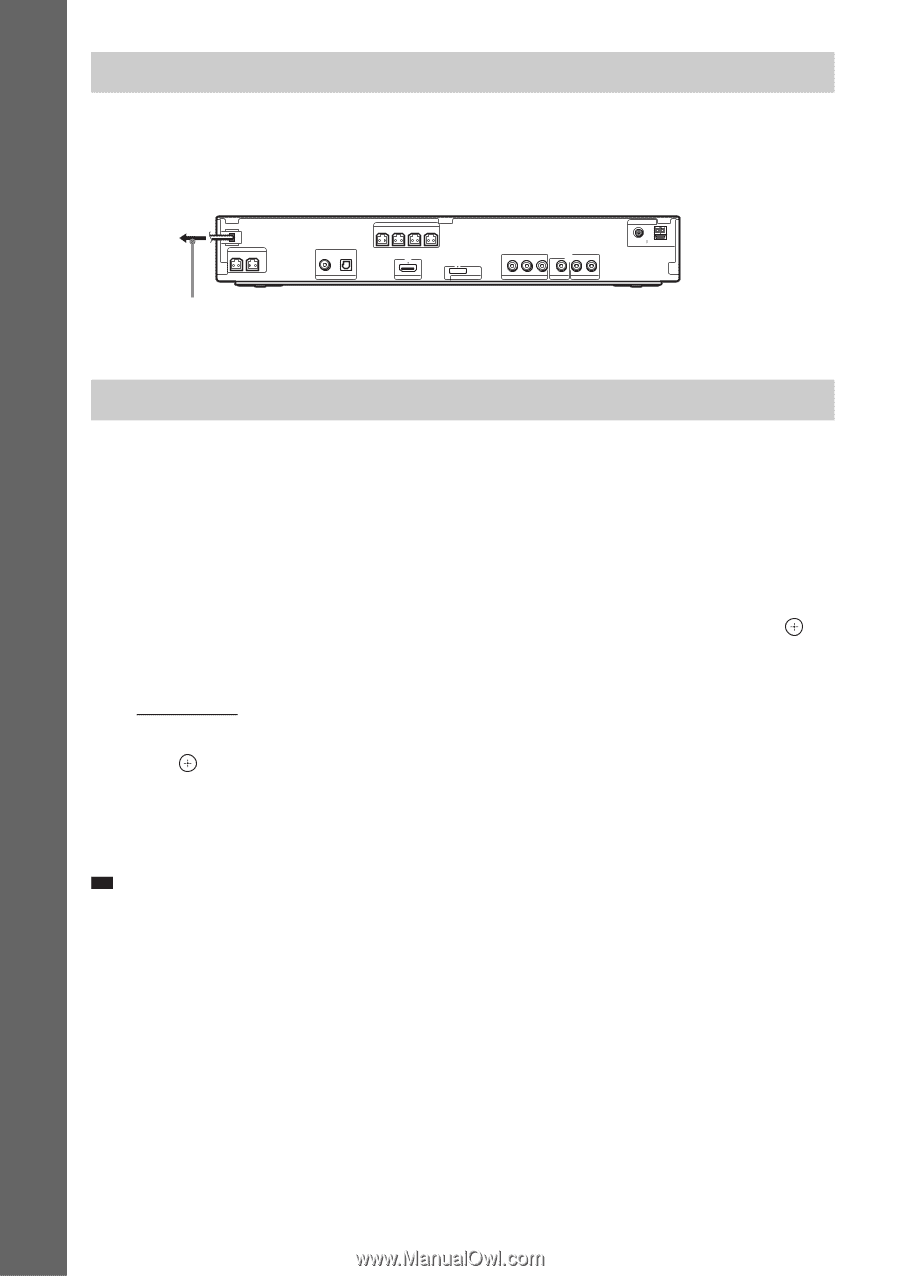
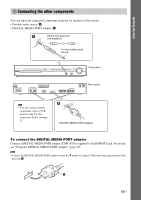
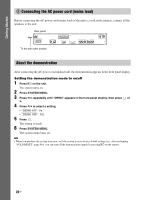
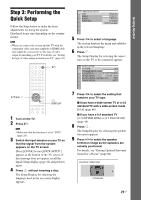
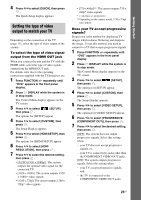
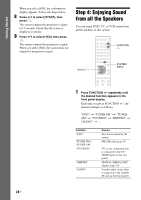
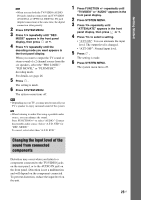
Getting Started 5 Connecting the AC power cord (mains lead) Before connecting the AC power cord (mains lead) of the unit to a wall outlet (mains), connect all the speakers to the unit. Rear panel SPEAKER CENTER SUBWOOFER DIGITAL IN COAXIAL OPTICAL TV/VIDEO SPEAKER FRONT R FRONT L SUR R SUR L HDMI OUT DC5V 0.7A MAX DMPORT To the wall outlet (mains) Y PB/CB PR/CR COMPONENT VIDEO OUT R AUDIO IN L VIDEO OUT TV/VIDEO ANTENNA COAXIAL 75 FM AM About the demonstration After connecting the AC power cord (mains lead), the demonstration appears in the front panel display. Setting the demonstration mode to on/off 1 Press [/1 on the unit. The system turns on. 2 Press SYSTEM MENU. 3 Press X/x repeatedly until "DEMO" appears in the front panel display, then press or c. 4 Press X/x to select a setting. • "DEMO ON": On. • "DEMO OFF": Off. 5 Press . The setting is made. 6 Press SYSTEM MENU. The system menu turns off. Tip • When you purchase the system from new, or if the system is at its factory default settings (ex., after performing "COLD RESET" (page 66)), you can turn off the demonstration simply by pressing [/1 on the remote. 20US
-
 1
1 -
2
-
3
-
4
-
5
-
6
-
7
-
8
-
9
-
10
-
11
-
12
-
13
-
14
-
 15
15 -
 16
16 -
 17
17 -
 18
18 -
 19
19 -
 20
20 -
 21
21 -
 22
22 -
 23
23 -
 24
24 -
 25
25 -
26
-
27
-
28
-
29
-
30
-
31
-
32
-
33
-
34
-
35
-
36
-
37
-
38
-
39
-
40
-
41
-
42
-
43
-
44
-
45
-
46
-
47
-
48
-
49
-
50
-
51
-
52
-
53
-
54
-
55
-
56
-
57
-
58
-
59
-
60
-
61
-
62
-
63
-
64
-
65
-
66
-
67
-
68
-
69
-
70
-
71
-
72
-
73
-
74
-
75
-
76
-
77
-
78
-
79
-
80
-
81
-
82
-
83
-
84
-
85
-
86
-
87
-
88
-
89
-
90
-
91
-
92
 |
 |