Sony DAV X10 Operating Instructions - Page 83
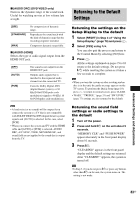
Returning to the Default Settings, Returning the settings on the Setup Display to the default
 |
View all Sony DAV X10 manuals
Add to My Manuals
Save this manual to your list of manuals |
Page 83 highlights
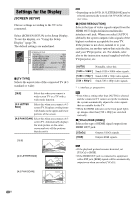
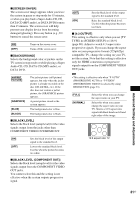
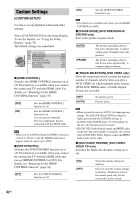
x [AUDIO DRC] (DVD VIDEO only) Narrows the dynamic range of the sound track. Useful for watching movies at low volume late at night. [OFF] [STANDARD] [MAX] No compression of dynamic range. Reproduces the sound track with the kind of dynamic range that the recording engineer intended. Compresses dynamic range fully. x [AUDIO (HDMI)] Selects the type of audio signal output from the HDMI OUT jack. [OFF] [AUTO] [PCM] The sound is not output from the HDMI OUT jack. Outputs audio signals that is matched to the requested audio stream from the connected TV. Converts Dolby Digital, DTS (digital theater system), or 96 kHz/24 bit PCM (pulse code modulation) signals to 48 kHz/ 16 bit PCM (pulse code modulation). Note • A loud noise (or no sound) will be output if you connect the system to a TV that is not compatible with DOLBY DIGITAL/DTS (digital theater system) signals and [AUTO] is selected. In this case, select [PCM]. • When you connect the system and TV with the HDMI cable and [AUTO] or [PCM] is selected, AUDIO DRC, A/V SYNC, TONE, MOVIE/MUSIC, and sound field are not applied to the sound that is output from the TV. Returning to the Default Settings Returning the settings on the Setup Display to the default 1 Select [RESET] in Step 4 of "Using the Setup Display" (page 78) and press . 2 Select [YES] using X/x. You can also quit the process and return to the Control Menu by selecting [NO] here. 3 Press . All the settings explained on pages 79 to 83 return to the default settings. Do not press [/1 while resetting the system as it takes a few seconds to complete. Note • When you turn the system on after resetting and no disc is in the unit, the guide message appears on the TV screen. To perform the Quick Setup (page 18), press , to return to normal screen, press CLEAR. • "BASS," "TREBLE," (page 33) and "SW LEVEL" (page 77) settings are also returned to the default. Returning the sound field settings or radio settings to the default 1 Turn off the power. 2 Press and hold "/1 on the unit about 5 seconds. "MEMORY CLR" and "PUSH POWER" appear alternately in the front panel display about 10 seconds. 3 Press "/1. "CLEARING" appears in the front panel display and the default settings are returned. After "CLEARED!" appears, the system is turned off. Note • In Step 3, if you do not press "/1 or press any buttons other than "/1 on the unit, the system turns on. The setting is not made. Advanced Settings and Adjustments 83US
-
 1
1 -
2
-
3
-
4
-
5
-
6
-
7
-
8
-
9
-
10
-
11
-
12
-
13
-
14
-
15
-
16
-
17
-
18
-
19
-
20
-
21
-
22
-
23
-
24
-
25
-
26
-
27
-
28
-
29
-
30
-
31
-
32
-
33
-
34
-
35
-
36
-
37
-
38
-
39
-
40
-
41
-
42
-
43
-
44
-
45
-
46
-
47
-
48
-
49
-
50
-
51
-
52
-
53
-
54
-
55
-
56
-
57
-
58
-
59
-
60
-
61
-
62
-
63
-
64
-
65
-
66
-
67
-
68
-
69
-
70
-
71
-
72
-
73
-
74
-
75
-
76
-
77
-
 78
78 -
 79
79 -
 80
80 -
 81
81 -
 82
82 -
 83
83 -
 84
84 -
 85
85 -
 86
86 -
 87
87 -
 88
88 -
89
-
90
-
91
-
92
-
93
-
94
-
95
-
96
-
97
-
98
-
99
-
100
-
101
-
102
-
103
-
104
-
105
-
106
-
107
 |
 |