Sony DCR-IP7BT MovieShaker v3.1 Operating Instructions - Page 14
Click Next if the displayed destination folder is acceptable., Click to select NTSC or PAL.
 |
View all Sony DCR-IP7BT manuals
Add to My Manuals
Save this manual to your list of manuals |
Page 14 highlights
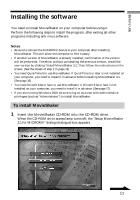
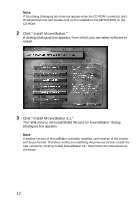
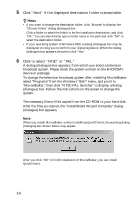
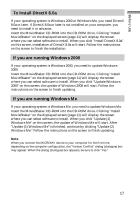
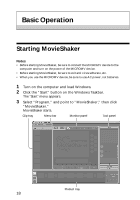
5 Click "Next" if the displayed destination folder is acceptable. z Hints • If you want to change the destination folder, click "Browse" to display the "Choose Folder" dialog (dialogue) box. Click a folder to select the folder to be the installation destination, and click "OK." You can also directly type a folder name in the path and click "OK" to select the destination folder. • If your operating system is Windows 2000, a dialog (dialogue) box may be displayed inviting you to confirm your digital signature. When the dialog (dialogue) box appears, be sure to click "Yes." 6 Click to select "NTSC" or "PAL." A dialog (dialogue) box appears, from which you select a television broadcast system. Please check the system written on the MICROMV device or package. To change the television broadcast system after installing MovieShaker, select "Programs" from the Windows "Start" menu, and point to "MovieShaker," then click "NTSC-PAL Switcher" to display a dialog (dialogue) box. Follow the instructions on the screen to change the system. The necessary files will be copied from the CD-ROM to your hard disk. After the files are copied, the "InstallShield Wizard Complete" dialog (dialogue) box appears. Note When you install MovieShaker without installing QuickTime 5, the warning dialog (dialogue) box shown below may appear. After you click "OK" to finish installation of MovieShaker, you can install QuickTime 5. 14
-
 1
1 -
2
-
3
-
4
-
5
-
6
-
7
-
8
-
 9
9 -
 10
10 -
 11
11 -
 12
12 -
 13
13 -
 14
14 -
 15
15 -
 16
16 -
 17
17 -
 18
18 -
 19
19 -
20
-
21
-
22
-
23
-
24
-
25
-
26
-
27
-
28
-
29
-
30
-
31
-
32
-
33
-
34
-
35
-
36
-
37
-
38
-
39
-
40
-
41
-
42
-
43
-
44
-
45
-
46
-
47
-
48
 |
 |
