Sony DCR-IP7BT MovieShaker v3.1 Operating Instructions - Page 19
Workflow
 |
View all Sony DCR-IP7BT manuals
Add to My Manuals
Save this manual to your list of manuals |
Page 19 highlights
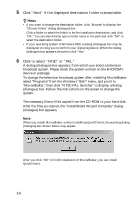
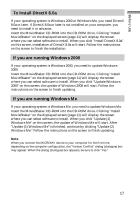
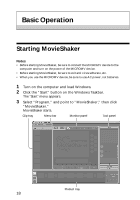
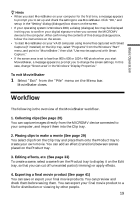
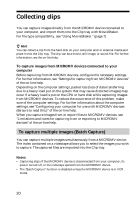
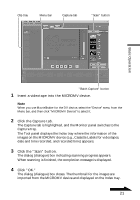
Basic Operation z Hints • When you start MovieShaker on your computer for the first time, a message appears to prompt you to set up and check the settings to use MovieShaker. Click "OK," and set up in the "Setting" dialog (dialogue) box shown on the screen. • If your operating system is Windows 2000, a dialog (dialogue) box may be displayed inviting you to confirm your digital signature when you connect the MICROMV device to the computer. After confirming the contents of this dialog (dialogue) box, follow the instructions on the screen. • To start MovieShaker on your VAIO computer using movie files captured with Smart Capture (if installed) on the Clip tray, select "Programs" from the Windows "Start" menu, and point to "MovieShaker," then click "Use movies captured with Smart Capture." • If the screen area is set to less than 800 x 600 or 1024 x 480 pixels when you start MovieShaker, a message appears to prompt you to change the screen settings. In this case, change "Screen area" in the Windows "Display Properties." To exit MovieShaker 1 Select "Exit" from the "File" menu on the Menu bar. MovieShaker closes. Workflow The following is the overview of the MovieShaker workflow. 1. Collecting clips (See page 20) You can capture images directly from the MICROMV device connected to your computer, and import them into the Clip tray. 2. Placing clips to make a movie (See page 29) You select clips from the Clip tray and place them onto the Product tray to create your own movie. You can add an effect (transition) between scenes placed on the Product tray. 3. Editing effects, etc. (See page 33) To create a scene, select a scene from the Product tray to display it on the Edit tray, so that you can cut off unwanted parts (trimming) or apply effects. 4. Exporting a final movie product (See page 41) You can save or export your final movie products. You can preview and check them before saving them. You can export your final movie product to a file for distribution or viewing by other people. 19
-
 1
1 -
2
-
3
-
4
-
5
-
6
-
7
-
8
-
9
-
10
-
11
-
12
-
13
-
 14
14 -
 15
15 -
 16
16 -
 17
17 -
 18
18 -
 19
19 -
 20
20 -
 21
21 -
 22
22 -
 23
23 -
 24
24 -
25
-
26
-
27
-
28
-
29
-
30
-
31
-
32
-
33
-
34
-
35
-
36
-
37
-
38
-
39
-
40
-
41
-
42
-
43
-
44
-
45
-
46
-
47
-
48
 |
 |
