Sony DCR-TRV525 Operating Instructions - Page 61
DV IN/OUT jack, If you record playback pause picture with
 |
View all Sony DCR-TRV525 manuals
Add to My Manuals
Save this manual to your list of manuals |
Page 61 highlights
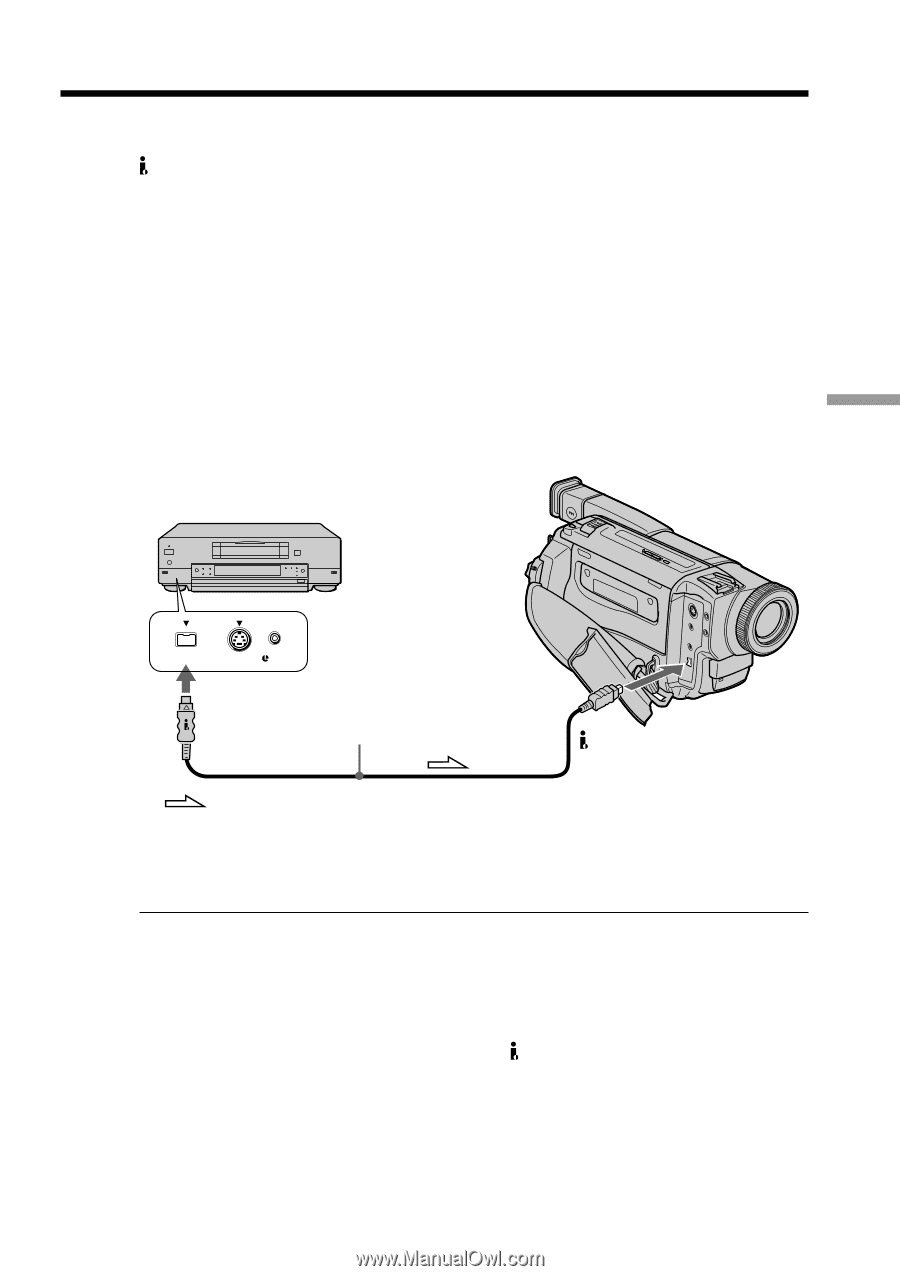
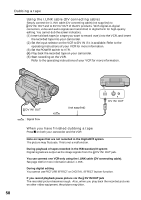
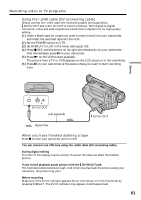
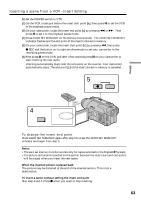
Recording video or TV programs Using the i.LINK cable (DV connecting cable) Simply connect the i.LINK cable (DV connecting cable) (not supplied) to DV IN/OUT and to DV IN/OUT of the DV products. With digital-to-digital connection, video and audio signals are transmitted in digital form for high-quality editing. (1) Insert a blank tape (or a tape you want to record over) into your camcorder, and insert the recorded tape into the VCR. (2) Set the POWER switch to VTR. (3) Set DISPLAY to LCD in the menu settings (p. 64). (4) Press z REC and the button on its right simultaneously on your camcorder, then immediately press X on your camcorder. (5) Press N on the VCR to start playback. The picture from a TV or VCR appears on the LCD screen or in the viewfinder. (6) Press X on your camcorder at the scene where you want to start recording from. Editing DV S VIDEO LANC DV IN/OUT (not supplied) : Signal flow DV IN/OUT When you have finished dubbing a tape Press x on both your camcorder and the VCR. You can connect one VCR only using the i.LINK cable (DV connecting cable). During digital editing The color of the display may be uneven. However this does not affect the dubbed picture. If you record playback pause picture with the DV IN/OUT jack The recorded picture becomes rough. And when you play back the picture using your camcorder, the picture may jitter. Before recording Make sure if the DV IN indicator appears the on LCD screen or in the viewfinder by pressing DISPLAY. The DV IN indicator may appear on both equipment. 61
-
 1
1 -
2
-
3
-
4
-
5
-
6
-
7
-
8
-
9
-
10
-
11
-
12
-
13
-
14
-
15
-
16
-
17
-
18
-
19
-
20
-
21
-
22
-
23
-
24
-
25
-
26
-
27
-
28
-
29
-
30
-
31
-
32
-
33
-
34
-
35
-
36
-
37
-
38
-
39
-
40
-
41
-
42
-
43
-
44
-
45
-
46
-
47
-
48
-
49
-
50
-
51
-
52
-
53
-
54
-
55
-
 56
56 -
 57
57 -
 58
58 -
 59
59 -
 60
60 -
 61
61 -
 62
62 -
 63
63 -
 64
64 -
 65
65 -
 66
66 -
67
-
68
-
69
-
70
-
71
-
72
-
73
-
74
-
75
-
76
-
77
-
78
-
79
-
80
-
81
-
82
-
83
-
84
-
85
-
86
-
87
-
88
-
89
-
90
-
91
-
92
-
93
-
94
-
95
-
96
-
97
-
98
-
99
-
100
-
101
-
102
-
103
-
104
-
105
-
106
-
107
-
108
-
109
-
110
-
111
-
112
-
113
-
114
-
115
-
116
-
117
-
118
-
119
-
120
-
121
-
122
-
123
-
124
-
125
-
126
-
127
-
128
-
129
-
130
-
131
-
132
 |
 |