Sony DG910 Instructions Manual - Page 37
When error codes appear, Save the measurement result.
 |
UPC - 027242707023
View all Sony DG910 manuals
Add to My Manuals
Save this manual to your list of manuals |
Page 37 highlights
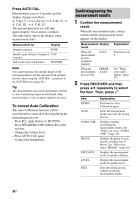
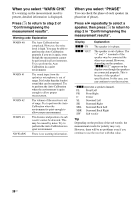
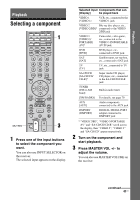
Getting Started 3 Save the measurement result. Select "SAVE" in step 2. The measurement results are saved and you can select the calibration type in the A. CAL menu. For details on calibration type, see page 39. Tip The size of a speaker (LARGE/SMALL) is determined by the low frequency characteristics. The measurement results may vary, depending on the position of the optimizer microphone and speakers, and the shape of the room. It is recommended that you follow the measurement results. However, you can change those settings in the SYSTEM menu (page 48). Save the measurement results first, then try to change the settings if you want. When error codes appear Try the remedies and perform the Auto Calibration again. Error code Cause and remedies ERROR 31 The SPEAKERS (OFF/A/B/ A+B) is set to off. Set it to others and perform the Auto Calibration again. ERROR 32 ERROR F 33 None of the speakers were detected. Make sure that the optimizer microphone is connected properly and perform the Auto Calibration again. If the optimizer microphone is connected properly but the error code appears, the optimizer microphone cable may be damaged or improperly connected. • None of the front speakers are connected or only one front speaker is connected. • The optimizer microphone is not connected. Error code Cause and remedies ERROR SR 33 • Either the left or right surround speakers is not connected. • Surround back speakers are connected even though surround speakers are not connected. Connect the surround speakers to the SPEAKERS SURROUND terminals. ERROR SB 33 The surround back speaker is connected only to the SPEAKERS SURROUND BACK R terminals. When you connect only one surround back speaker, connect it to the SPEAKERS SURROUND BACK L terminals. • CODE 31 1 Press RECEIVER. The RECEIVER indicator lights up and receiver operation is activated. 2 Press . 3 Perform the Auto Calibration again (page 35). • CODE 32, 33 1 Press RECEIVER. The RECEIVER indicator lights up and receiver operation is activated. 2 Press . "RETRY Y" appears on the display. 3 Press again. 4 Perform the Auto Calibration again (page 35). continued 37US
-
 1
1 -
2
-
3
-
4
-
5
-
6
-
7
-
8
-
9
-
10
-
11
-
12
-
13
-
14
-
15
-
16
-
17
-
18
-
19
-
20
-
21
-
22
-
23
-
24
-
25
-
26
-
27
-
28
-
29
-
30
-
31
-
 32
32 -
 33
33 -
 34
34 -
 35
35 -
 36
36 -
 37
37 -
 38
38 -
 39
39 -
 40
40 -
 41
41 -
 42
42 -
43
-
44
-
45
-
46
-
47
-
48
-
49
-
50
-
51
-
52
-
53
-
54
-
55
-
56
-
57
-
58
-
59
-
60
-
61
-
62
-
63
-
64
-
65
-
66
-
67
-
68
-
69
-
70
-
71
-
72
-
73
-
74
-
75
-
76
-
77
-
78
-
79
-
80
-
81
-
82
-
83
-
84
-
85
-
86
-
87
-
88
-
89
-
90
-
91
-
92
-
93
-
94
-
95
-
96
-
97
-
98
-
99
-
100
 |
 |
