Sony DMXWL1 Reference Guide - Page 7
Overview of the Button, Parts and Indicators, Receiver Unit - video
 |
UPC - 027242744592
View all Sony DMXWL1 manuals
Add to My Manuals
Save this manual to your list of manuals |
Page 7 highlights
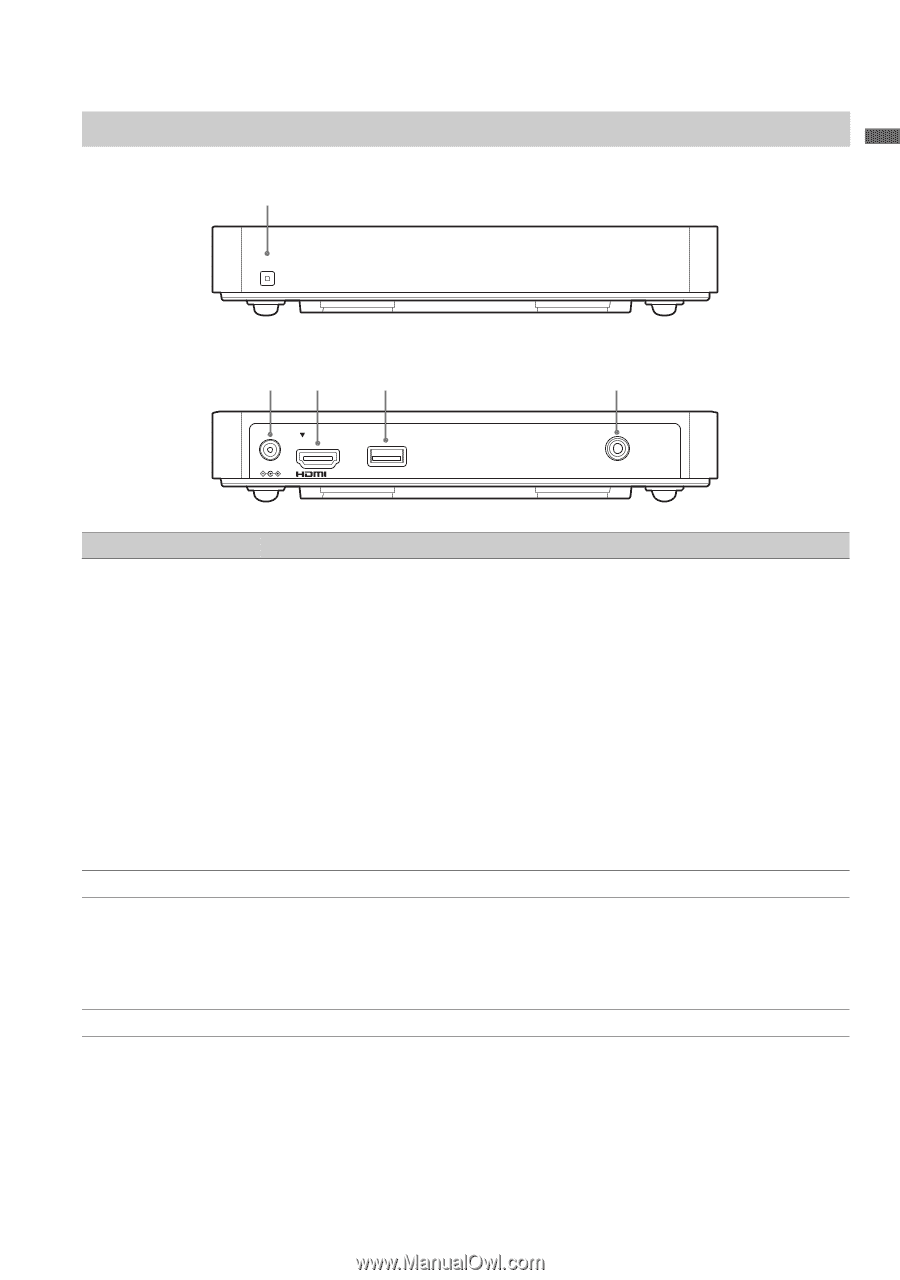
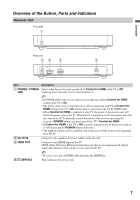
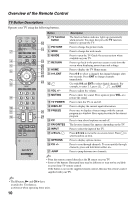
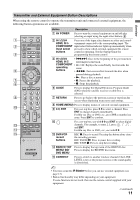
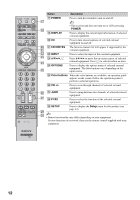
Overview Overview of the Button, Parts and Indicators Receiver Unit Front side 1 POWER Rear side 23 4 5 DC IN 9V OUT SERVICE SERVICE Item 1 POWER / POWER LED 2 DC IN 9V 3 HDMI OUT 4/5 SERVICE Description Press to turn the receiver unit on and off, if Control for HDMI of the TV is Off. Lights up green when the receiver unit is turned on. ~ • If POWER LED of the receiver unit does not light up, confirm Control for HDMI setting of the TV is On. • The power of the receiver unit turns on or off in conjunction with TV, if Control for HDMI setting of the TV is On and the unit is connected to the TV by HDMI cable. • When Control for HDMI is enabled on your TV, the power of the receiver unit will follow the power state of the TV. When the TV is turned on or off, the receiver unit will also turn on or off. To manually control the power of the receiver unit using the receiver's POWER button, you must turn off the TV's Control for HDMI. • If Control for HDMI of the TV is Off, you must turn the power of the receiver unit on or off by pressing the POWER button on the unit. • The supplied remote control cannot be used to turn on or off the receiver unit separately from the TV. Connects to the supplied AC power adapter with AC cord. Connects to any HDMI input on the TV. HDMI (High-Definition Multimedia Interface) provides an uncompressed, all-digital audio/video interface between the receiver unit and the TV. ~ • Be sure to use only an HDMI cable that bears the HDMI logo. These jacks are for service only. 7
-
 1
1 -
 2
2 -
 3
3 -
 4
4 -
 5
5 -
 6
6 -
 7
7 -
 8
8 -
 9
9 -
 10
10 -
 11
11 -
 12
12 -
13
-
14
-
15
-
16
-
17
-
18
-
19
-
20
-
21
-
22
-
23
-
24
 |
 |