Sony DPP-FP35 Operating Instructions - Page 17
Printing from a PictBridge camera (PictBridge mode), Printing images from the digital camera - software
 |
View all Sony DPP-FP35 manuals
Add to My Manuals
Save this manual to your list of manuals |
Page 17 highlights
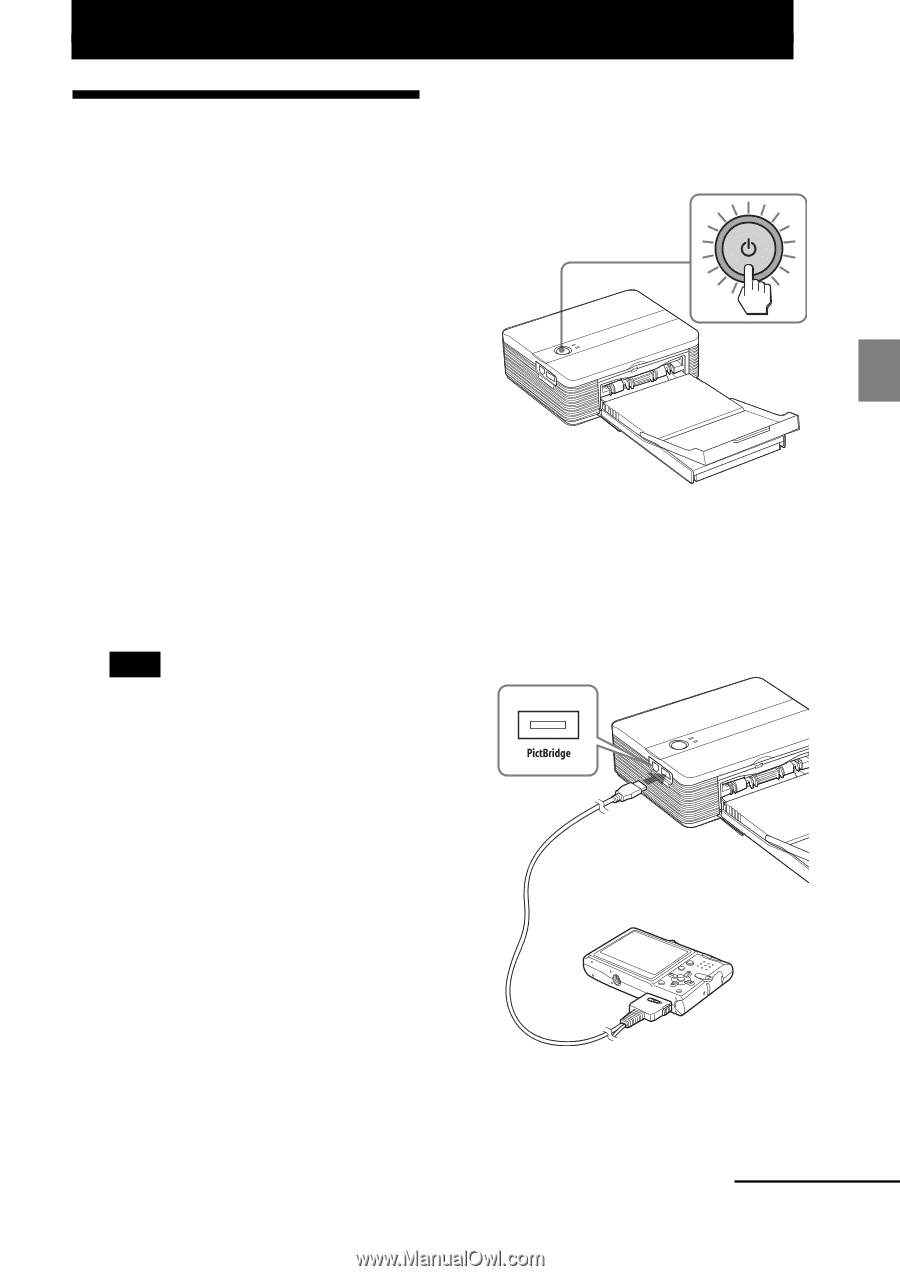
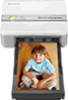
Printing from a PictBridge camera Printing from a PictBridge camera (PictBridge mode) Printing images from the digital camera You can connect a PictBridge-compliant digital camera and print an image directly from your digital camera. Before you begin You need preparations 1 through 4 (pages 10 to 15), and the following: 1 Set your digital camera ready for printing with a PictBridgecompliant printer. The settings and operations that are necessary before connection differ depending on the digital camera. For details, see the operating instructions of the digital camera you use. (In case of Sony Cyber-shot digital camera, for example, select "PictBridge" or "Auto" mode for the "USB Connect".) Note When you use a DSC-T1, you need to update software version. 2 Connect the printer to the AC power source (page 16). 1 Insert one plug of the supplied AC power cord to the supplied AC power adaptor. 2 Insert the other plug of the AC power cord to the wall outlet. 3 Insert the plug of the AC power adaptor to the DC IN 24V jack of the printer. The 1 (on/standby) indicator lights in red. 3 Press 1 (on/standby) switch to turn on the printer. The 1 (on/standby) indicator of the printer lights in yellow green. 4 Connect a PictBridge-compliant digital camera to the PictBridge connector of the printer. Use the USB cable supplied with the digital camera. To PictBridge connector (USB A-TYPE) Camera or other external device To USB connector Continued 17 GB
-
 1
1 -
2
-
3
-
4
-
5
-
6
-
7
-
8
-
9
-
10
-
11
-
 12
12 -
 13
13 -
 14
14 -
 15
15 -
 16
16 -
 17
17 -
 18
18 -
 19
19 -
 20
20 -
 21
21 -
 22
22 -
23
-
24
-
25
-
26
-
27
-
28
-
29
-
30
-
31
-
32
-
33
-
34
-
35
-
36
-
37
-
38
-
39
-
40
-
41
-
42
-
43
-
44
-
45
-
46
-
47
-
48
-
49
-
50
-
51
-
52
 |
 |