Sony DPP-FP75 Operating Instructions - Page 38
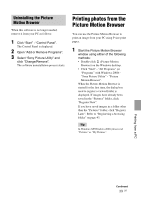
Installing the Picture Motion Browser, Click Installing Picture Motion
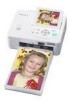 |
UPC - 027242734739
View all Sony DPP-FP75 manuals
Add to My Manuals
Save this manual to your list of manuals |
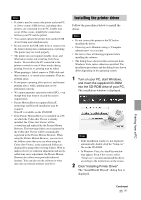
Page 38 highlights
Installing the Picture Motion Browser Follow the procedures below to install the Picture Motion Browser. Notes • Please log on to Windows using a "Computer administrator" user account. • Be sure to close all running programs before installing the software. • The dialog boxes shown in this section are from Windows Vista, unless otherwise specified. The installation procedures and the dialog boxes shown differ depending on the operating system. 1 Turn on your PC, start Windows, and insert the supplied CD-ROM into the CD-ROM drive of your PC. The installation window is displayed (page 35). 2 Click "Installing Picture Motion Browser". The "Choose Setup Language" dialog box is displayed. 3 Select your language and click "Next". The "InstallShield Wizard" dialog box is displayed. 4 Click "Next". The license agreement dialog box is displayed. 5 Read the agreement thoroughly, and if you agree, check "I accept the terms of the license agreement" and click "Next". The dialog box used to specify the destination is displayed. 6 Check the destination and then click "Next". The dialog box notifying you that the program is ready to be installed is displayed. 7 Click "Install" and follow the instructions on the screen to proceed with installation. When you are prompted to restart your PC, follow the displayed instructions to restart it. 8 When the installation is complete, remove the CD-ROM from your PC and keep it for future use. Notes • If the installation fails, perform the installation procedures from step 2 again. • The supplied CD-ROM will be required when you uninstall or re-install the Picture Motion Browser. Keep it in a safe place for possible future use. 38 GB
-
 1
1 -
2
-
3
-
4
-
5
-
6
-
7
-
8
-
9
-
10
-
11
-
12
-
13
-
14
-
15
-
16
-
17
-
18
-
19
-
20
-
21
-
22
-
23
-
24
-
25
-
26
-
27
-
28
-
29
-
30
-
31
-
32
-
 33
33 -
 34
34 -
 35
35 -
 36
36 -
 37
37 -
 38
38 -
 39
39 -
 40
40 -
 41
41 -
 42
42 -
 43
43 -
44
-
45
-
46
-
47
-
48
-
49
-
50
-
51
-
52
-
53
-
54
-
55
-
56
-
57
-
58
-
59
-
60
-
61
-
62
-
63
-
64
-
65
-
66
-
67
-
68
-
69
-
70
-
71
-
72
 |
 |
