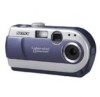
Sony DSC P20 Operating Instructions - Page 33
For Windows 98/98SE/Me and Windows 2000 users, Playback, Viewing images
 |
UPC - 027242592568
View all Sony DSC P20 manuals
Add to My Manuals
Save this manual to your list of manuals |
Page 33 highlights
B Playback Viewing images When viewing moving images on a Windows system, RealPlayer, Windows Media Player or other moving image playback applications must be installed. When viewing moving images on a Macintosh system, QuickTime 3.0 or later must be installed. 1 Turn on the power of your personal computer and allow Windows or Mac OS to load. 2 Connect the USB jack (mini-B) on the camera with the USB connector on your personal computer using the supplied USB cable. to the USB connector to the USB jack (mini-B) Personal computer Push the USB cable connector in as far as it will go. 3 Insert a "Memory Stick" into your camera, and connect the AC power adaptor (not supplied) to your camera and then to a wall outlet (mains). 4 Turn on the power of your camera. "USB MODE" appears on the LCD screen of the camera. For Windows 98/98SE/Me and Windows 2000 users 5 Open " My Computer" on Windows and double click the newly recognized drive. (Example: "Removable Disk (E:)") The folders inside the "Memory Stick" are displayed. If the drive is not recognized, see "Troubleshooting" on page 71. 33
-
 1
1 -
2
-
3
-
4
-
5
-
6
-
7
-
8
-
9
-
10
-
11
-
12
-
13
-
14
-
15
-
16
-
17
-
18
-
19
-
20
-
21
-
22
-
23
-
24
-
25
-
26
-
27
-
 28
28 -
 29
29 -
 30
30 -
 31
31 -
 32
32 -
 33
33 -
 34
34 -
 35
35 -
 36
36 -
 37
37 -
 38
38 -
39
-
40
-
41
-
42
-
43
-
44
-
45
-
46
-
47
-
48
-
49
-
50
-
51
-
52
-
53
-
54
-
55
-
56
-
57
-
58
-
59
-
60
-
61
-
62
-
63
-
64
-
65
-
66
-
67
-
68
-
69
-
70
-
71
-
72
-
73
-
74
-
75
-
76
-
77
-
78
-
79
-
80
-
81
-
82
-
83
-
84
-
85
-
86
-
87
-
88
 |
 |
