Sony DSC-W560 Cyber-shot® Handbook - Page 116
Troubleshooting - battery repair
 |
UPC - 027242809086
View all Sony DSC-W560 manuals
Add to My Manuals
Save this manual to your list of manuals |
Page 116 highlights
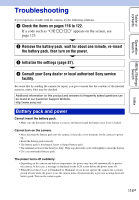
Table of contents Operation Search MENU/Settings Search Index Troubleshooting If you experience trouble with the camera, try the following solutions. 1 Check the items on pages 116 to 122. If a code such as "C/E:ss:ss" appears on the screen, see page 123. 2 Remove the battery pack, wait for about one minute, re-insert the battery pack, then turn on the power. 3 Initialize the settings (page 87). 4 Consult your Sony dealer or local authorized Sony service facility. Be aware that by sending the camera for repair, you give consent that the contents of the internal memory, music files may be checked. Additional information on this product and answers to frequently asked questions can be found at our Customer Support Website. http://www.sony.net/ Battery pack and power Cannot insert the battery pack. • Make sure the direction of the battery is correct, and insert it until the battery eject lever is locked. Cannot turn on the camera. • After inserting the battery pack into the camera, it may take a few moments for the camera to power up. • Insert the battery pack correctly. • The battery pack is discharged. Insert a charged battery pack. • The terminal section of the battery is dirty. Wipe any dust with a soft cloth lightly to clean the battery. • Use a recommended battery pack. The power turns off suddenly. • Depending on the camera and battery temperature, the power may turn off automatically to protect the camera. In this case, a message is displayed on the LCD screen before the power turns off. • When [Power Save] is set to [Standard] or [Stamina], if you do not operate the camera for a certain period of time while the power is on, the camera turns off automatically to prevent wearing down the battery pack. Turn on the camera again. 116GB
-
 1
1 -
2
-
3
-
4
-
5
-
6
-
7
-
8
-
9
-
10
-
11
-
12
-
13
-
14
-
15
-
16
-
17
-
18
-
19
-
20
-
21
-
22
-
23
-
24
-
25
-
26
-
27
-
28
-
29
-
30
-
31
-
32
-
33
-
34
-
35
-
36
-
37
-
38
-
39
-
40
-
41
-
42
-
43
-
44
-
45
-
46
-
47
-
48
-
49
-
50
-
51
-
52
-
53
-
54
-
55
-
56
-
57
-
58
-
59
-
60
-
61
-
62
-
63
-
64
-
65
-
66
-
67
-
68
-
69
-
70
-
71
-
72
-
73
-
74
-
75
-
76
-
77
-
78
-
79
-
80
-
81
-
82
-
83
-
84
-
85
-
86
-
87
-
88
-
89
-
90
-
91
-
92
-
93
-
94
-
95
-
96
-
97
-
98
-
99
-
100
-
101
-
102
-
103
-
104
-
105
-
106
-
107
-
108
-
109
-
110
-
 111
111 -
 112
112 -
 113
113 -
 114
114 -
 115
115 -
 116
116 -
 117
117 -
 118
118 -
 119
119 -
 120
120 -
 121
121 -
122
-
123
-
124
-
125
-
126
-
127
-
128
-
129
-
130
-
131
-
132
-
133
-
134
-
135
-
136
-
137
-
138
-
139
-
140
-
141
 |
 |