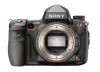
Sony DSLRA850 Operating Instructions - Page 72
Setting ISO, Press the ISO button to display, the ISO screen., Select the desired value
 |
UPC - 027242772410
View all Sony DSLRA850 manuals
Add to My Manuals
Save this manual to your list of manuals |
Page 72 highlights
Setting ISO Sensitivity to light is expressed by the ISO number (recommended exposure index). The larger the number, the higher the sensitivity. 1 Press the ISO button to display the ISO screen. ISO button 2 Select the desired value with v/V on the multi-selector. • You can use the front or rear control dial instead. The number is incremented by 1 step using the front control dial and it is incremented by 1/3 step using the rear control dial. Notes • The available luminosity limits for an image (dynamic range) are a little narrower in the range less than ISO 200. When ISO 3200 or higher is selected, the range is treated as an expanded range and the noise is more noticeable. Adjust the ISO number after you check the amount of noise on the image. • The [AUTO] setting is not provided in exposure mode M. If you change the exposure mode to M with the [AUTO] setting, it is switched to [200]. Set the ISO according to your shooting conditions. • You can adjust the range of [AUTO] with [ISO Auto Range] in the Recording menu (page 108). 72
-
 1
1 -
2
-
3
-
4
-
5
-
6
-
7
-
8
-
9
-
10
-
11
-
12
-
13
-
14
-
15
-
16
-
17
-
18
-
19
-
20
-
21
-
22
-
23
-
24
-
25
-
26
-
27
-
28
-
29
-
30
-
31
-
32
-
33
-
34
-
35
-
36
-
37
-
38
-
39
-
40
-
41
-
42
-
43
-
44
-
45
-
46
-
47
-
48
-
49
-
50
-
51
-
52
-
53
-
54
-
55
-
56
-
57
-
58
-
59
-
60
-
61
-
62
-
63
-
64
-
65
-
66
-
 67
67 -
 68
68 -
 69
69 -
 70
70 -
 71
71 -
 72
72 -
 73
73 -
 74
74 -
 75
75 -
 76
76 -
 77
77 -
78
-
79
-
80
-
81
-
82
-
83
-
84
-
85
-
86
-
87
-
88
-
89
-
90
-
91
-
92
-
93
-
94
-
95
-
96
-
97
-
98
-
99
-
100
-
101
-
102
-
103
-
104
-
105
-
106
-
107
-
108
-
109
-
110
-
111
-
112
-
113
-
114
-
115
-
116
-
117
-
118
-
119
-
120
-
121
-
122
-
123
-
124
-
125
-
126
-
127
-
128
-
129
-
130
-
131
-
132
-
133
-
134
-
135
-
136
-
137
-
138
-
139
-
140
-
141
-
142
-
143
-
144
-
145
-
146
-
147
-
148
-
149
-
150
-
151
-
152
-
153
-
154
-
155
-
156
-
157
-
158
-
159
-
160
-
161
-
162
-
163
-
164
-
165
-
166
-
167
-
168
-
169
-
170
-
171
 |
 |
