Sony DVP-S360 Operating Instructions (CD/DVD Component) - Page 17
Operation, Additional operations - remote control
 |
View all Sony DVP-S360 manuals
Add to My Manuals
Save this manual to your list of manuals |
Page 17 highlights
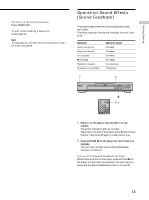
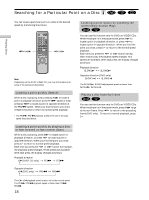
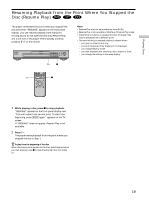
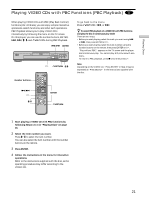
Playing Discs To turn on the player Press ! on the player. The player enters standby mode and the power indicator lights up in red. Then press @/1 on the remote. The player turns on and the power indicator lights up in green. In standby mode, the player also turns on by pressing A on the player or by pressing H. To turn off the player Press @/1 on the remote. The player enters standby mode and the power indicator lights up in red. To disconnect the power of the player, press ! on the player. Notes on playing DTS sound tracks on a CD • Do not play DTS sound tracks without first connecting the player to an audio component having a built-in DTS decoder. The player outputs the DTS signal via the DIGITAL OUT OPTICAL and COAXIAL connectors even if "DTS" in "AUDIO SETUP" is set to "OFF" in the setup display, and may affect your ears or cause your speakers to be damaged. • Set the sound to "STEREO" when you play DTS sound tracks on a CD. (See "Changing the Sound" on page 30.) If you set the sound to "1/L" or "2/R", no sound will come from the DIGITAL OUT OPTICAL and COAXIAL connectors. • If you play a CD with a DTS sound track, a loud noise may come out from the AUDIO OUT connectors, affecting your ears or causing the speakers to be damaged. Notes on playing DTS sound tracks on a DVD The signals of the DTS sound tracks are output from the DIGITAL OUT OPTICAL and COAXIAL connectors only. No sound will be output from the AUDIO OUT connectors. • If the player is connected to an audio component lacking a built-in DTS decoder, do not set "DTS" in "DIGITAL OUT" to "ON" in the setup display. Otherwise, when you play the DTS sound track, a loud noise will come out from the speakers, affecting your ears or causing the speakers to be damaged. • When you set "DTS" in "AUDIO SETUP" to "OFF", no sound will come out from the DIGITAL OUT OPTICAL and COAXIAL connectors even if you play DTS sound tracks on DVDs. Notes • If you leave the player or the remote in pause or stop mode for 15 minutes, the screen saver image appears automatically. To make the screen saver image go away, press H. (If you want to set the screen saver function to off, see page 47.) • While playing a disc, do not turn off the player by pressing !. Doing so may cancel the settings of the menu. When you turn off the player, press x first to stop playback and then press @/1 on the remote. After the power indicator lights up in red and the player enters standby mode, press ! on the player. Additional operations A ./> H Xx Z 123 456 789 0 ./> H x X To Stop Pause Resume play after pause Go to the next chapter, track or scene in continuous play mode Go back to the preceding chapter, track or scene in continuous play mode Stop play and remove the disc Operation Press x Press X Press X or H Press > Press . Press Z You can play discs in various modes such as Program Play using the on-screen menu (Control Menu). For Control Menu operations, see page 24. 17
-
 1
1 -
2
-
3
-
4
-
5
-
6
-
7
-
8
-
9
-
10
-
11
-
 12
12 -
 13
13 -
 14
14 -
 15
15 -
 16
16 -
 17
17 -
 18
18 -
 19
19 -
 20
20 -
 21
21 -
 22
22 -
23
-
24
-
25
-
26
-
27
-
28
-
29
-
30
-
31
-
32
-
33
-
34
-
35
-
36
-
37
-
38
-
39
-
40
-
41
-
42
-
43
-
44
-
45
-
46
-
47
-
48
-
49
-
50
-
51
-
52
-
53
-
54
-
55
-
56
-
57
-
58
-
59
-
60
-
61
-
62
-
63
-
64
-
65
-
66
-
67
-
68
 |
 |
