Sony ECM-S1 Help Guide - Page 21
Recording with the connected computer or smartphone via the wireless connection
 |
View all Sony ECM-S1 manuals
Add to My Manuals
Save this manual to your list of manuals |
Page 21 highlights
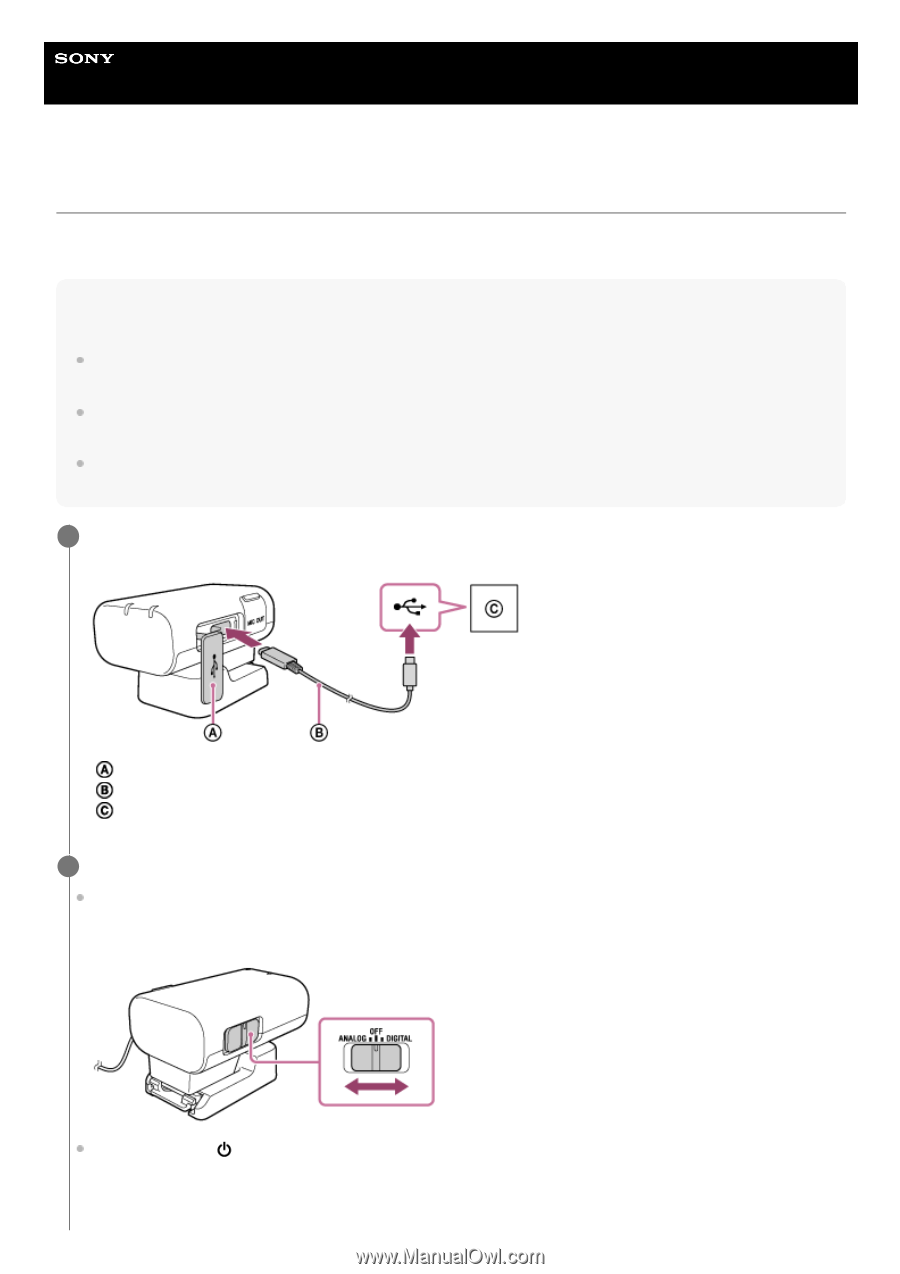
Help Guide Wireless/Streaming Microphone ECM-S1 Recording with the connected computer or smartphone via the wireless connection Use the receiver connected to a device with a USB audio input capability, such as a computer or a smartphone, and the microphone at hand for audio recording. Note For operations on the computer or smartphone, refer to the operating instructions of your device. Before connecting the receiver and the microphone to the computer or smartphone, charge the built-in batteries sufficiently enough. For audio recording with the receiver and the connected computer or smartphone, your device must be compatible with USB Audio Class 1.0. When connecting the receiver to the computer or smartphone, be sure to check the port type on your device and use a compatible cable or an appropriate adaptor. 1 Open the lid of the USB Type-C port on the receiver, and then connect the receiver and a computer or a smartphone that is up and running with a USB Type-C cable (commercially available). Lid USB Type-C cable Computer or smartphone 2 Turn on the receiver and the microphone. Select "ANALOG" or "DIGITAL" with the slide switch (ANALOG/OFF/DIGITAL) on the receiver. When the receiver and the computer or smartphone are connected via the USB connection, the receiver outputs digital signals regardless of the switch selection: "ANALOG" or "DIGITAL." Press and hold the (power) button on the microphone for about 2 seconds. 21
-
 1
1 -
2
-
3
-
4
-
5
-
6
-
7
-
8
-
9
-
10
-
11
-
12
-
13
-
14
-
15
-
 16
16 -
 17
17 -
 18
18 -
 19
19 -
 20
20 -
 21
21 -
 22
22 -
 23
23 -
 24
24 -
 25
25 -
 26
26 -
27
-
28
-
29
-
30
-
31
-
32
-
33
-
34
-
35
-
36
-
37
 |
 |