Sony ECM-W3 Help Guide - Page 5
Microphone
 |
View all Sony ECM-W3 manuals
Add to My Manuals
Save this manual to your list of manuals |
Page 5 highlights
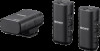
12. Screw hole for tripod attachment (1/4 in. in diameter) Microphone 1. LINK lamp Indicates the connection state between the receiver and the microphone. Hint On the nameplate under the clip of the microphone, you will find either the number "1" or "2" indicated for microphone identification. The number "1" indicates the microphone No. 1; and the number "2" indicates the microphone No. 2. To identify which microphone connection is active with the receiver, check the state of the LINK1 lamp for the microphone No. 1 and the LINK2 lamp for the microphone No. 2 on the receiver. (Applicable to ECM-W3) 2. Power lamp (Green: Powered, Orange: Charging the battery) Indicates the power state of the microphone or the battery charge state. When the power lamp stays blinking in orange, battery charging is needed. 3. Power switch When you do not intend to use the microphone, select "OFF" with this switch to conserve the battery power. 4. ATT switch Select the option suitable for the audio recording volume. To record loud sounds while minimizing distortion, select "20dB." To record quiet sounds, select "0dB." "10dB" is the recommended volume level for recording human voices. It is recommended that you select an option while monitoring the volume level meter on the camera or the audio recording volume with headphones. 5. Internal microphone 6. External microphone input jack (monaural) Connecting an external microphone (not supplied) to this jack automatically switches the audio input source to the connected external microphone. 7. Filter switch (NC/LC/OFF) NC: Select this option to use the noise cut filter function. Unpleasant noises are effectively eliminated by digital signal processing. If the sound quality does not seem appropriate, select "OFF." 5
-
 1
1 -
 2
2 -
 3
3 -
 4
4 -
 5
5 -
 6
6 -
 7
7 -
 8
8 -
 9
9 -
 10
10 -
 11
11 -
12
-
13
-
14
-
15
-
16
-
17
-
18
-
19
-
20
-
21
-
22
-
23
-
24
-
25
-
26
-
27
-
28
-
29
-
30
-
31
-
32
-
33
-
34
-
35
-
36
-
37
 |
 |
