Sony HCD-DZ100 Operating Instructions
Sony HCD-DZ100 - Super Audio Cd/dvd Receiver Manual
 |
View all Sony HCD-DZ100 manuals
Add to My Manuals
Save this manual to your list of manuals |
Sony HCD-DZ100 manual content summary:
- Sony HCD-DZ100 | Operating Instructions - Page 1
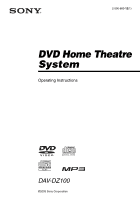
2-590-880-12(1) DVD Home Theatre System Operating Instructions DAV-DZ100 ©2005 Sony Corporation - Sony HCD-DZ100 | Operating Instructions - Page 2
(servicing) instructions in the literature accompanying the appliance. Owner's Record The model and serial numbers are located at the rear of the unit. Record the serial number in the space provided below. Refer to them whenever you call upon your Sony dealer regarding this product. Model No. DAV - Sony HCD-DZ100 | Operating Instructions - Page 3
unit itself has been turned off. • Unplug the unit from the wall outlet ( Sony Corporation has determined that this product meets the ENERGY STAR® guidelines for energy efficiency. Welcome! Thank you for purchasing Sony DVD Home Theatre System. Before operating this system, please read this manual - Sony HCD-DZ100 | Operating Instructions - Page 4
of Contents Welcome 3 About This Manual 6 This System Can Play the Following Discs 6 Guide to the Control Menu Display........ 9 Getting Started Unpacking 12 Inserting Batteries into the Remote....... 12 Hookup Overview 13 Step 1: Speaker System Hookup........... 14 Step 2: Antenna (Aerial - Sony HCD-DZ100 | Operating Instructions - Page 5
Additional Information Precautions 74 Notes about the Discs 75 Troubleshooting 75 Self-diagnosis Function 78 (When letters/numbers appear in the display) Specifications 79 Glossary 80 Language Code List 83 Index to Parts and Controls 84 DVD Setup Display List 88 AMP Menu List 90 Index 91 - Sony HCD-DZ100 | Operating Instructions - Page 6
instructions in this manual describe the controls on the remote. You can also use the controls on the system if they have the same or similar names as those on the remote. • The Control Menu items may be different depending on the area. • "DVD" may be used as a general term for DVD VIDEOs, DVD+RWs - Sony HCD-DZ100 | Operating Instructions - Page 7
first session will be played back. Region code Your system has a region code printed on the back of the unit and will only play DVDs labeled with the same region code. DVD VIDEOs labeled ALL will also play on this system. If you try to play any other DVD VIDEO, the message [Playback prohibited by - Sony HCD-DZ100 | Operating Instructions - Page 8
VIDEO, no region code indication may be given even though playing the DVD VIDEO is prohibited by area restrictions. Note on playback operations of DVDs and VIDEO CDs Some playback operations of DVDs and VIDEO CDs may be intentionally set by software producers. Since this system plays DVDs and VIDEO - Sony HCD-DZ100 | Operating Instructions - Page 9
Guide to the Control Menu Display DISPLAY Use the Control Menu to select a function and to view related information. Press DISPLAY repeatedly to turn on or change the Control Menu display as follows: , Control Menu display 1 m Control Menu display 2 (appears for certain discs only) m Control Menu - Sony HCD-DZ100 | Operating Instructions - Page 10
a DVD VIDEO. Control Menu items Selected item Currently playing title number*1 Currently playing chapter number*2 Total number of titles*1 Total number of be played. [ORIGINAL/PLAY LIST] (page 34) Selects the type of titles (DVD-RW) to be played, the [ORIGINAL] one, or an edited [PLAY LIST]. - Sony HCD-DZ100 | Operating Instructions - Page 11
) repeatedly or one title/chapter/track/album repeatedly. [A/V SYNC] (page 41) Adjusts the delay between the picture and sound. [PARENTAL CONTROL] (page 55) Sets to prohibit playback on this system. [SETUP] (page 66) [QUICK] Setup (page 26) Use Quick Setup to choose the desired language of the on - Sony HCD-DZ100 | Operating Instructions - Page 12
pads* • Operating Instructions • Speaker and TV connections (card) (1) * To prevent speaker vibration or movement while listening, attach the supplied foot pads to the bottom face of the speakers. Inserting Batteries into the Remote You can control the system using the supplied remote. Insert two - Sony HCD-DZ100 | Operating Instructions - Page 13
Overview Perform all connections and settings by following Steps 1 to 7. "Step 1: Speaker System Hookup" (page 14) "Step 2: Antenna (Aerial) Hookup" (page 18) by this system and output from the speakers of this system. You can also enjoy sound of other sources, such as TV programs, in addition - Sony HCD-DZ100 | Operating Instructions - Page 14
the colors of the jacks to those of the cords. Do not connect any speakers other than those supplied with this system. To obtain the best possible surround sound, specify the speaker parameters (distance, level, etc.) on page 71. Required cords Speaker cords The connector and the color tube of the - Sony HCD-DZ100 | Operating Instructions - Page 15
/SAT R AUDIO IN L COMPONENT VIDEO OUT DVD ONLY Y PB/CB PR/CR S VIDEO (DVD ONLY) AM VIDEO MONITOR OUT COAXIAL FM 75 Surround speaker (R) Subwoofer Surround speaker (L) Note • Do not set the speakers in an inclined position. • Do not place the speakers in locations that are: - Extremely hot - Sony HCD-DZ100 | Operating Instructions - Page 16
Short-circuiting of the speakers may damage the system. To prevent this, be sure to follow these precautions when connecting the speakers. Make sure the bare wire of each speaker cord does not touch another speaker terminal or the bare wire of another speaker cord. Examples of poor conditions - Sony HCD-DZ100 | Operating Instructions - Page 17
the screws securely to a beam and fasten them to the wall. Install the speakers on a vertical and flat wall where reinforcement is applied. • Contact a screw installer regarding the wall material or screws to be used. • Sony is not responsible for accident or damage caused by improper installation, - Sony HCD-DZ100 | Operating Instructions - Page 18
(aerial) Note • To prevent noise pickup, keep the AM loop antenna (aerial) away from the system and other components. • Be sure to fully extend the FM wire antenna (aerial). • After connecting the FM wire antenna (aerial), keep it as horizontal as possible. Tip • When you connect the supplied AM - Sony HCD-DZ100 | Operating Instructions - Page 19
the video connection, and then audio connection. With your TV's audio output connected to this system, you can listen to TV sound through the system speakers. Connecting the video cords Sends a played back DVD image to a TV. Check the jacks of your TV, and choose the A, B or C connection. Picture - Sony HCD-DZ100 | Operating Instructions - Page 20
progressive signals. PROGRESSIVE FUNCTION "P AUTO" or "P VIDEO" appears in the front panel display when the system outputs progressive signals. 1 Press FUNCTION repeatedly to select "DVD." 2 Press PROGRESSIVE. Each time you press PROGRESSIVE, the display changes as follows: t P AUTO (PROGRESSIVE - Sony HCD-DZ100 | Operating Instructions - Page 21
in progressive format, the progressive signals need to be converted to match the type of DVD software that you are watching. Note • When you play video-based software in progressive interlace format. Connecting the audio cords Outputs TV sound through the speakers of this system. continued 21GB - Sony HCD-DZ100 | Operating Instructions - Page 22
II MOVIE," or "Dolby Pro Logic II MUSIC" sound field (page 51). • When you select the "NIGHT" sound field (page 51), the sound is output from the front speakers only. To change the color system (PAL or NTSC) (Asian, Australian, and Middle Eastern models only) Depending on the TV to be connected, you - Sony HCD-DZ100 | Operating Instructions - Page 23
PAL from NTSC, turn on the system by pressing "/1 while pressing X on the system. You need to hold X until the set powers on. To reset to NTSC, turn off the system and then turn on again by pressing "/1 while pressing and holding X on the system. If the color system of the TV is NTSC Do - Sony HCD-DZ100 | Operating Instructions - Page 24
Outputs the other component through the speakers of this system. VCR, digital satellite receiver, or PlayStation 2, etc. AUDIO OUT L R FRONT R FRONT L SURR R SURR L CENTER WOOFER SPEAKER To VIDEO/SAT (AUDIO IN) VIDEO/SAT R AUDIO IN L COMPONENT VIDEO OUT DVD ONLY Y PB/CB PR/CR S VIDEO - Sony HCD-DZ100 | Operating Instructions - Page 25
the AC power cord (mains lead), the demonstration appears in the front panel display. When you press "/1 on the remote, the demonstration turns off. Note • When you press "/1 on the system, the demonstration does not turn off. • When you set the demonstration mode in the AMP menu to on, the - Sony HCD-DZ100 | Operating Instructions - Page 26
the minimum number of basic adjustments for using the system. To skip is set to "DVD." 3 Switch the input selector on your TV so that the signal from the system appears on the Display for selecting the speaker distance appears. 9 Press X/x to select the front speaker distance from the listening - Sony HCD-DZ100 | Operating Instructions - Page 27
SPEAKER SETUP SIZE: DISTANCE: LEVEL(FRONT): LEVEL(SURROUND): TEST TONE: OFF FRONT: CENTER: SURROUND: 3.0m 3.0m 3.0m Note • If you want to change each setting, see "Using the Setup Display" (page 66). To recall the Quick Setup display 1 Press DISPLAY when the system is in stop mode. The Control - Sony HCD-DZ100 | Operating Instructions - Page 28
Setup Positioning the speakers For the best possible surround sound, all the speakers other than the subwoofer should be the same distance from the listening position (A). However, this system allows you to place the center speaker up to 1.6 meters (5 ft) closer (B) and the surround speakers up to - Sony HCD-DZ100 | Operating Instructions - Page 29
may appear on the TV screen. You can play the disc interactively by following the instructions on the menu. (DVD: page 33), (VIDEO CD: page 34). To save the power in standby mode Press "/1 while the system turns on. To cancel standby mode, press "/1 once. Additional operations To Stop Pause Resume - Sony HCD-DZ100 | Operating Instructions - Page 30
/DVD-RWs/DVD-Rs only. *2 DVD VIDEOs/DVD-RWs/DVD-Rs/DVD+RWs only. *3 DATA CDs only. Note • If there is no disc in the system, "NO DISC" appears in the front panel display. Tip • The Instant Replay function is useful when you want to review a scene or dialogue that you missed. • The Instant Advance - Sony HCD-DZ100 | Operating Instructions - Page 31
Menu Press DISPLAY repeatedly until the Control Menu is turned off. To change or cancel a program 1 Follow steps 1 to 3 of "Creating your own program (Program Play)." 2 Select the program number of the track you want to change or cancel using X/x. If you want to delete the track from the program - Sony HCD-DZ100 | Operating Instructions - Page 32
turn off the Control Menu Press DISPLAY repeatedly until the Control Menu is turned off. Tip • You can set Shuffle Play while the system is stopped. the item to be repeated. The default setting is underlined. x When playing a DVD VIDEO or DVDRW • [OFF]: does not play repeatedly. • [DISC]: repeats all - Sony HCD-DZ100 | Operating Instructions - Page 33
turn off the Control Menu Press DISPLAY repeatedly until the Control Menu is turned off. Tip • You can set Repeat Play while the system is stopped. After DVDs that allow you to select items such as the language for the subtitles and the language for the sound, select these items using MENU. Number - Sony HCD-DZ100 | Operating Instructions - Page 34
titles that can be created on recordable DVD players for editing ([PLAY LIST]). You can ENTER DISPLAY 1 Press DISPLAY when the system is in stop mode. The Control Menu appears. 2 Press X/x to select the item number you want by the number buttons. 3 Press ENTER. 4 Follow the instructions in - Sony HCD-DZ100 | Operating Instructions - Page 35
instructions supplied with the disc. In this case, press H. Tip • To play without using PBC, press ./> or the number buttons while the system is stopped to select a track, then press H or ENTER. [Play without PBC] appears on the TV screen and the system starts continuous play. You cannot play still - Sony HCD-DZ100 | Operating Instructions - Page 36
data may generate a loud noise which could damage your speaker system. • The system does not conform to audio in MP3PRO format. Playback order (or files) (such as album E) do not appear in the list. Tip • If you add numbers (01, 02, 03, etc.) to the front of the track/file names when you store the - Sony HCD-DZ100 | Operating Instructions - Page 37
BOSSA NOVA 2 Press X/x to select the album you want and press H. The system starts playing the selected album. To stop playback Press x. To play the next or list. To play the next or previous JPEG image file Press C/c when the Control Menu is not displayed. Note that you can select the next album by - Sony HCD-DZ100 | Operating Instructions - Page 38
16 3 Press C/X/x/c to select the image you want to view and press ENTER. To play the next or previous JPEG image file Press C/c when the Control Menu is not displayed. Note that you can select the next album by continuing to press c after the last image on the first album, but - Sony HCD-DZ100 | Operating Instructions - Page 39
can play a slide show with sound by first placing both MP3 and JPEG files in the same album on a DATA CD. When you play back the DATA CD, select [AUTO] mode as explained below. X/x ENTER H MENU DISPLAY 1 Load a DATA CD. 2 Press DISPLAY. The Control Menu appears. 3 Press X/x to select [MODE - Sony HCD-DZ100 | Operating Instructions - Page 40
select the album you want and press H. The system starts playing the selected album. You can turn the track, the image slide show continues without sound. • When the MP3 audio track is to appear on the screen. 1 Press DISPLAY twice. The Control Menu for JPEG appears. 2 Press X/x to select [INTERVAL - Sony HCD-DZ100 | Operating Instructions - Page 41
can adjust the delay between the picture and sound. X/x ENTER DISPLAY 1 Press DISPLAY in stop mode. The Control Menu appears. 2 Press X/x to select OFF OFF ON DVD-RW 3 Press X/x to select the setting. • [OFF]: does not adjust. • [ON]: adjusts the difference between picture and sound. Note • - Sony HCD-DZ100 | Operating Instructions - Page 42
the "2M"/ "2m" and the "2M"/"2m" playback speed is faster than "1M"/"1m." Watching frame by frame (Slow-motion Play) (DVD, DVD-RW, VIDEO CD only) Press m or M when the system is in pause mode. To return to the normal playback speed, press H. Each time you press m or M during Slow-motion Play - Sony HCD-DZ100 | Operating Instructions - Page 43
search for a scene using the time code. Number buttons CLEAR X/x ENTER DISPLAY 1 Press DISPLAY. (When playing a DATA CD with JPEG image files, press DISPLAY twice.) The Control Menu appears. 2 Press X/x to select the search method. x When playing a DVD VIDEO/DVD-RW [TITLE] [CHAPTER] [TIME/TEXT - Sony HCD-DZ100 | Operating Instructions - Page 44
• When the Control Menu display is turned off, you can search for a chapter (DVD VIDEO/DVD-RW) or track (CD) by pressing the number buttons and ENTER. Note • You cannot search for a scene on a DVD+RW using the time code. • The title, chapter or track number displayed is the same number recorded on - Sony HCD-DZ100 | Operating Instructions - Page 45
may not be able to select some items. 2 Press PICTURE NAVI repeatedly to select an item. • [TITLE VIEWER] (DVD VIDEO only): displays the first scene of each title. • [CHAPTER VIEWER] (DVD VIDEO only): displays the first scene of each chapter. • [TRACK VIEWER] (VIDEO CD/ Super VCD only): displays - Sony HCD-DZ100 | Operating Instructions - Page 46
Viewing the Playing Time and Remaining Time in the Front Panel Display You can check disc information, such as the remaining time, total number of titles in a DVD, tracks in a VIDEO CD, CD, or MP3 using the front panel display (page 85). Press DISPLAY. Each time you press DISPLAY while playing - Sony HCD-DZ100 | Operating Instructions - Page 47
the index number are displayed after the Disc name. • You can also check the time information and text using the Control Menu. Note • If the disc does not contain text, the Disc name or the Track (file) name is displayed "NO TEXT." • The system can only display the first level of the DVD/CD - Sony HCD-DZ100 | Operating Instructions - Page 48
system can only display a limited number of characters. Also, depending on the disc, not all text characters will be displayed. Checking the play information of the Disc To check DVD recorded in the JPEG image data. Press DISPLAY twice during playback. The Control Menu appears. 1 ( 8 ) 1 ( 2 0 ) 01/ - Sony HCD-DZ100 | Operating Instructions - Page 49
, they indicate a language code. Refer to "Language Code List" (page 83) to see which language the code represents. When the same language is displayed two or more times, the DVD VIDEO is recorded in multiple audio formats. x When playing a DVD-RW The types of sound tracks recorded on a disc - Sony HCD-DZ100 | Operating Instructions - Page 50
x When playing a DVD VIDEO Example: Dolby Digital 5.1 ch Surround (L/R) LFE (Low speaker. • Front (L) • Front (R) • Center 50GB • Surround (L) • Surround (R) • Surround (Monaural): This signal can be either the Dolby Surround Sound processed signals or the Dolby Digital sound's monaural Surround - Sony HCD-DZ100 | Operating Instructions - Page 51
Enjoying Surround Sound by Using Sound Field You can take advantage of surround sound simply by selecting one of system's preprogrammed sound fields. They bring the exciting and powerful sound of movie theaters into your home. SOUND FIELD C/c Press SOUND FIELD. Each time you press SOUND FIELD - Sony HCD-DZ100 | Operating Instructions - Page 52
would in a movie theater, even at low volume. It is useful for watching movies at night. In this mode, the sound is output from the front speakers only. When a 2 channel source is played, this function is not effective. To turn the surround effect off Press SOUND FIELD repeatedly until "A.F.D. AUTO - Sony HCD-DZ100 | Operating Instructions - Page 53
Adjustments Enjoying TV or VCR Sound from All Speakers You can enjoy TV or VCR sound from all speakers of this system. For details, see "Step 3: TV Hookup" (page 19) and "Step 4: Other Component Hookup" (page 24). Using the Sound Effect DSGX FUNCTION SOUND FIELD 1 Press FUNCTION repeatedly until - Sony HCD-DZ100 | Operating Instructions - Page 54
turn on the subtitles for better understanding. SUBTITLE ANGLE Press ANGLE during playback. Each time you press ANGLE, the angle changes. Note • Depending on the DVD VIDEO, you may not be able to change the angle even if multi-angles are recorded on the - Sony HCD-DZ100 | Operating Instructions - Page 55
You can set playback restrictions so that the system will not play inappropriate discs. • Parental Control Playback of some DVD VIDEOs can be limited according to a predetermined level such as the age of the users. Scenes may be blocked or replaced with different scenes. The same password is used - Sony HCD-DZ100 | Operating Instructions - Page 56
some DVD VIDEOs can be limited according to a predetermined level such as the age of the users. The [PARENTAL CONTROL] function allows you to set a playback limitation level. 1 Press DISPLAY while the system is in stop mode. The Control Menu appears. 56GB Enter a 4-digit password using the number - Sony HCD-DZ100 | Operating Instructions - Page 57
to [OFF] in Step 8. To play a disc for which Parental Control is set 1 Insert the disc and press H. The display for entering your password appears. 2 Enter your 4-digit password using the number buttons, then press ENTER. The system starts playback. Tip • If you forget your password, remove the disc - Sony HCD-DZ100 | Operating Instructions - Page 58
2254 Japan 2276 Korea 2304 Standard Code number Malaysia 2363 Mexico 2362 Netherlands 2376 number. Changing the password 1 Press DISPLAY while the system is in stop mode. The Control Menu appears. 2 Press X/x to select [PARENTAL CONTROL], then press ENTER. The options for [PARENTAL CONTROL - Sony HCD-DZ100 | Operating Instructions - Page 59
Other Operations Other Operations Controlling the TV with the Supplied Remote You can control your TV (SONY only) with the supplied remote. TV ?/1 TV/VIDEO You can select the TV channels by using the number buttons. To select the TV channels, press the number buttons, then ENTER. Note • Depending - Sony HCD-DZ100 | Operating Instructions - Page 60
SYNC allows you to turn on your SONY TV and this system, changes the system mode to "DVD," and then switches the TV's input source you set with one button push. TV/VIDEO THEATRE SYNC Number buttons CLEAR ALBUM -/+ TV CH + Preparing for the THEATRE SYNC function Register the TV's input source - Sony HCD-DZ100 | Operating Instructions - Page 61
function may not work on some SONY TVs.) • If distance between TV and this system is too far, this function may not work. Install the system near the TV. • Keep the remote pointed in the direction of the TV and this system while entering the code. Enjoying the Sound of Other Components AMP MENU - Sony HCD-DZ100 | Operating Instructions - Page 62
components with a high audio output level Connect the satellite receiver to the VIDEO/ SAT jacks on the rear panel. . 2 Press and hold TUNING + or - until the auto scanning starts. Scanning stops when the system tunes in a station. "TUNED" and "ST" (for stereo program) appear in the front panel - Sony HCD-DZ100 | Operating Instructions - Page 63
number Restart from Step 1. To change the AM tuning interval (except for Middle Eastern model received station is tuned in. 2 Press PRESET + or - repeatedly to select the preset station you want. Each time you press the button, the system Use manual or automatic tuning in Step 2. For manual tuning, - Sony HCD-DZ100 | Operating Instructions - Page 64
a character, then press c to move the cursor to the next position. Letters, numbers, and other symbols can be input for a radio station name. If you make ENTER. The station name is stored. Using the Sleep Timer You can set the system to turn off at a preset time, so you can fall asleep listening to - Sony HCD-DZ100 | Operating Instructions - Page 65
parameters, such as preset stations, to the default settings. "/1 AMP MENU Ax X/x/c ENTER 1 Press "/1 to turn on the system. 2 Press x, A, and "/1 on the system at the same time. "COLD RESET" appears in the front panel display and the default settings are returned. 1 Press AMP MENU. 2 Press - Sony HCD-DZ100 | Operating Instructions - Page 66
, you can make various adjustments to items such as picture and sound. You can also set a language for the subtitles and the Setup system is in stop mode. The Control Menu appears. 2 Press X/x to select then press ENTER. [SETUP], The options for [SETUP] appear. 1 2 ( 2 7 ) 1 8 ( 3 4 ) : : DVD - Sony HCD-DZ100 | Operating Instructions - Page 67
for the sound track. Tip • If you select [OTHERS t] in [MENU], [AUDIO], and [SUBTITLE], select and enter a language code from "Language Code List" (page 83) using the number buttons. Note • When you select a language in [MENU], [AUDIO], or [SUBTITLE] that is not recorded on the DVD VIDEO, one - Sony HCD-DZ100 | Operating Instructions - Page 68
BOX] [4:3 PAN SCAN] [16:9] Note • Depending on the DVD, [4:3 LETTER BOX] may be selected automatically instead of [4:3 PAN SCAN] or vice versa. x [COLOR SYSTEM] (Asian, Australian, and Middle Eastern models only) Select the color system when you play a VIDEO CD. [AUTO] [PAL] [NTSC] Outputs - Sony HCD-DZ100 | Operating Instructions - Page 69
LEVEL (COMPONENT OUT)] (Except for Asian, Australian, and Middle Eastern models) Selects the black level (setup level) for the video signals output jacks. You cannot select this and the setting is not effective when the system outputs progressive signal. [OFF] [ON] Sets the black level of the - Sony HCD-DZ100 | Operating Instructions - Page 70
TRACK SELECTION] (DVD VIDEO only) Gives the sound track which contains the highest number of channels priority when you play a DVD VIDEO on current disc in the system. x [AUDIO DRC] (Dynamic Range Control) (DVD VIDEO/DVD-RW only) Narrows the dynamic range of the sound track. Useful for watching - Sony HCD-DZ100 | Operating Instructions - Page 71
SETUP] To obtain the best possible surround sound, set for the size of the speakers you have connected and their distance from your listening position. Then use the test tone to adjust the level and the balance of the speakers to the same level. Select [SPEAKER SETUP] in the Setup Display. For - Sony HCD-DZ100 | Operating Instructions - Page 72
set the distance, the sound cuts off for a moment. • If all front and surround speakers are not placed at an speakers at one time Use the VOLUME control on the system, or press VOLUME +/- on the remote. x [TEST TONE] The speakers will emit a test tone to adjust [LEVEL (FRONT)] and [LEVEL (SURROUND - Sony HCD-DZ100 | Operating Instructions - Page 73
Settings and Adjustments 7 From your listening position, adjust the value of [LEVEL (FRONT)] or [LEVEL (SURROUND)] using C/X/x/c. The test tone is emitted from only the speaker which you are adjusting. 8 Press ENTER when you have finished making adjustments. 9 Press X/x repeatedly to select [TEST - Sony HCD-DZ100 | Operating Instructions - Page 74
or benzine. If you have any questions or problems concerning your system, please consult your nearest Sony dealer. On cleaning discs • Do not use a commercially available CD/DVD cleaning disc. It may cause a malfunction. On your TV's color • If the speakers should cause the TV screen to have color - Sony HCD-DZ100 | Operating Instructions - Page 75
using the system, use this troubleshooting guide to help remedy the problem before requesting repairs. Should any problem persist, consult your nearest Sony dealer. Power The power is not turned on. • Check that the AC power cord (mains lead) is connected securely. If "PROTECT" and "UNPLUG" appears - Sony HCD-DZ100 | Operating Instructions - Page 76
batteries in the remote are weak. The disc does not play. • There is no disc inserted. • The disc is upside down. Insert the disc with the playback side facing down. • The disc is skewed on the disc tray. • The system cannot play CD-ROMs, etc. (page 6). • The region code on the DVD does not match - Sony HCD-DZ100 | Operating Instructions - Page 77
has been selected. During stop, press x on the system or the remote and then start playback (page 30). • The title, DVD or PBC menu automatically appears on the TV screen. The system starts playing the disc automatically. • The DVD features an auto playback function. Playback stops automatically - Sony HCD-DZ100 | Operating Instructions - Page 78
. ,Restart the system, then re-insert the disc correctly. E XX To prevent a malfunction, the (xx is a number) system has performed the self- diagnosis function. ,Contact your nearest Sony dealer or local authorized Sony service facility and give the 5character service number. Example: E 61 - Sony HCD-DZ100 | Operating Instructions - Page 79
120 W (with SS-CT31) Surround*: 120 W + 120 W (with SS-TS31B) Subwoofer*: 120 W (with SS-WS31) * Depending on the sound field settings and the source, there may be no sound output. Inputs VIDEO/SAT (AUDIO IN) Sensitivity: 250/450 mV Impedance: 50 kilohms DVD system Laser Semiconductor laser - Sony HCD-DZ100 | Operating Instructions - Page 80
JPEG files. Chapter Subdivision of a title on a DVD. A title is composed of several chapters. Dolby Digital This movie theater sound format for is more advanced than Dolby Surround Pro Logic. In this format, the surround speakers output stereo sound with an expanded frequency range, and a subwoofer - Sony HCD-DZ100 | Operating Instructions - Page 81
Logic, you should have one pair of surround speakers and a center speaker. The surround speakers output monaural sound. DTS Digital audio compression technology developed by Digital Theater Systems, Inc. This technology conforms to 5.1-channel surround. This format comprises of stereo rear channel - Sony HCD-DZ100 | Operating Instructions - Page 82
format. Region Code This system is used to protect copyrights. A region number is allocated on each DVD system or DVD disc according to the sales region. Each region code is shown on the system as well as on the disc packaging. The system can play discs that match its region code. The system can - Sony HCD-DZ100 | Operating Instructions - Page 83
Gaelic Galician Guarani Gujarati Hausa Hindi Croatian Hungarian Armenian Interlingua Interlingue Code 1245 1248 1253 1254 1257 1261 1269 1283 1287 1297 1298 1408 1417 1428 1435 1436 1463 1481 1482 1483 Language Code Inupiak Indonesian Icelandic Italian Hebrew Japanese Yiddish Javanese Georgian - Sony HCD-DZ100 | Operating Instructions - Page 84
Index to Parts and Controls For more information, refer to the pages indicated in parentheses. Front panel A "/1 (on/standby) (25, 29, 65) B Disc tray (29) C A (open/close) (29, 65) D H (play) (29) E X (pause) (29) F x (stop) (29, 65) G ./> (29) H FUNCTION (29) I VOLUME (29) J (remote sensor) (12) - Sony HCD-DZ100 | Operating Instructions - Page 85
C Monaural/Stereo effect (Radio only) (63) D Lights up when 2 channel source is output from the surround speakers. (52) E Current sound effect (53) F Current surround format (Except for JPEG) (50) G Current mode (DVD function only) H Playing status (DVD function only) Additional Information 85GB - Sony HCD-DZ100 | Operating Instructions - Page 86
Rear panel FRONT R FRONT L SURR R SURR L CENTER WOOFER SPEAKER VIDEO/SAT R AUDIO IN L COMPONENT VIDEO OUT DVD ONLY Y PB/CB PR/CR S VIDEO (DVD ONLY) AM VIDEO MONITOR OUT COAXIAL FM 75 A SPEAKER jacks (14) B VIDEO/SAT AUDIO IN jacks (21, 24) C COMPONENT VIDEO OUT jacks (19) D MONITOR - Sony HCD-DZ100 | Operating Instructions - Page 87
SLOW, TUNING - (42, 62) P H (play) (29) The H button has a tactile dot.* Q TV (59) R THEATRE SYNC (60) S "/1 (on/standby) (25, 29, 63) T AMP MENU (25, 61, 65) U DSGX (53) V FUNCTION (20, 29, 53, 61) W SOUND FIELD (51) X DISPLAY (63) Y PICTURE NAVI (38) wh AUDIO (49) wj SUBTITLE (54) wk - Sony HCD-DZ100 | Operating Instructions - Page 88
the following items with the DVD Setup Display. The order you want to use from the displayed language list.) COLOR SYSTEM*2 SCREEN SAVER BACKGROUND SUBTITLE (Select the language you want model. *2 Asian, Australian, and Middle Eastern models only. *3 Except for Asian, Australian, and - Sony HCD-DZ100 | Operating Instructions - Page 89
SPEAKER SETUP SIZE DISTANCE FRONT YES CENTER YES NONE SURROUND BEHIND SIDE NONE SUBWOOFER YES FRONT 1.0 m - 7.0 m/ 4 ft - 23 ft CENTER 0.0 m - 7.0 m/ 0 ft - 23 ft SURROUND 0.0 m - 7.0 m/ 0 ft - 23 ft LEVEL (FRONT) LEVEL (SURROUND) TEST TONE L R CENTER SUBWOOFER L R OFF ON -6 dB - 0 - Sony HCD-DZ100 | Operating Instructions - Page 90
AMP Menu List You can set the following items with AMP MENU on the remote. AMP menu DIMMER DEMO ATTENUATE DIMMER ON DIMMER OFF DEMO ON DEMO OFF ATT ON ATT OFF 90GB - Sony HCD-DZ100 | Operating Instructions - Page 91
Hookup 24 P PARENTAL CONTROL 56, 81 PAUSE MODE 70 PBC Playback 7, 34, 81 PICTURE NAVI 38, 45 PLAY LIST 34 Preset Station 62 Program Play 31 PROGRESSIVE AUTO 20 Progressive format 20, 82 PROGRESSIVE VIDEO 21 Q Quick Setup 26 R Radio 63 Rear Panel 86 Region Code 7, 82 Remote 12, 59, 87 Repeat - Sony HCD-DZ100 | Operating Instructions - Page 92
71 SLEEP 64 Slide show 39 Slow-motion play 42 Sound Field 51 SPEAKER SETUP 71 Speaker setup 28 Speaker System Hookup 14 SUBTITLE 54, 67 T TEST TONE 72 THEATRE SYNC 60 TIME/TEXT 44 TITLE 43 Title 82 TRACK 43 Track 82 TRACK SELECTION 70 Troubleshooting 75 TUNER MENU 62 TV Hookup 19 TV TYPE 68
-
 1
1 -
 2
2 -
 3
3 -
 4
4 -
 5
5 -
 6
6 -
 7
7 -
8
-
9
-
10
-
11
-
12
-
13
-
14
-
15
-
16
-
17
-
18
-
19
-
20
-
21
-
22
-
23
-
24
-
25
-
26
-
27
-
28
-
29
-
30
-
31
-
32
-
33
-
34
-
35
-
36
-
37
-
38
-
39
-
40
-
41
-
42
-
43
-
44
-
45
-
46
-
47
-
48
-
49
-
50
-
51
-
52
-
53
-
54
-
55
-
56
-
57
-
58
-
59
-
60
-
61
-
62
-
63
-
64
-
65
-
66
-
67
-
68
-
69
-
70
-
71
-
72
-
73
-
74
-
75
-
76
-
77
-
78
-
79
-
80
-
81
-
82
-
83
-
84
-
85
-
86
-
87
-
88
-
89
-
90
-
91
-
92
 |
 |

©2005 Sony Corporation
2-590-880-
12
(1)
DVD Home Theatre
System
Operating Instructions
DAV-DZ100