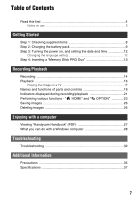
Sony HDR CX7 Operating Guide - Page 10
Available running time for the, supplied battery pack, To remove the battery pack - high definition
 |
UPC - 027242720282
View all Sony HDR CX7 manuals
Add to My Manuals
Save this manual to your list of manuals |
Page 10 highlights
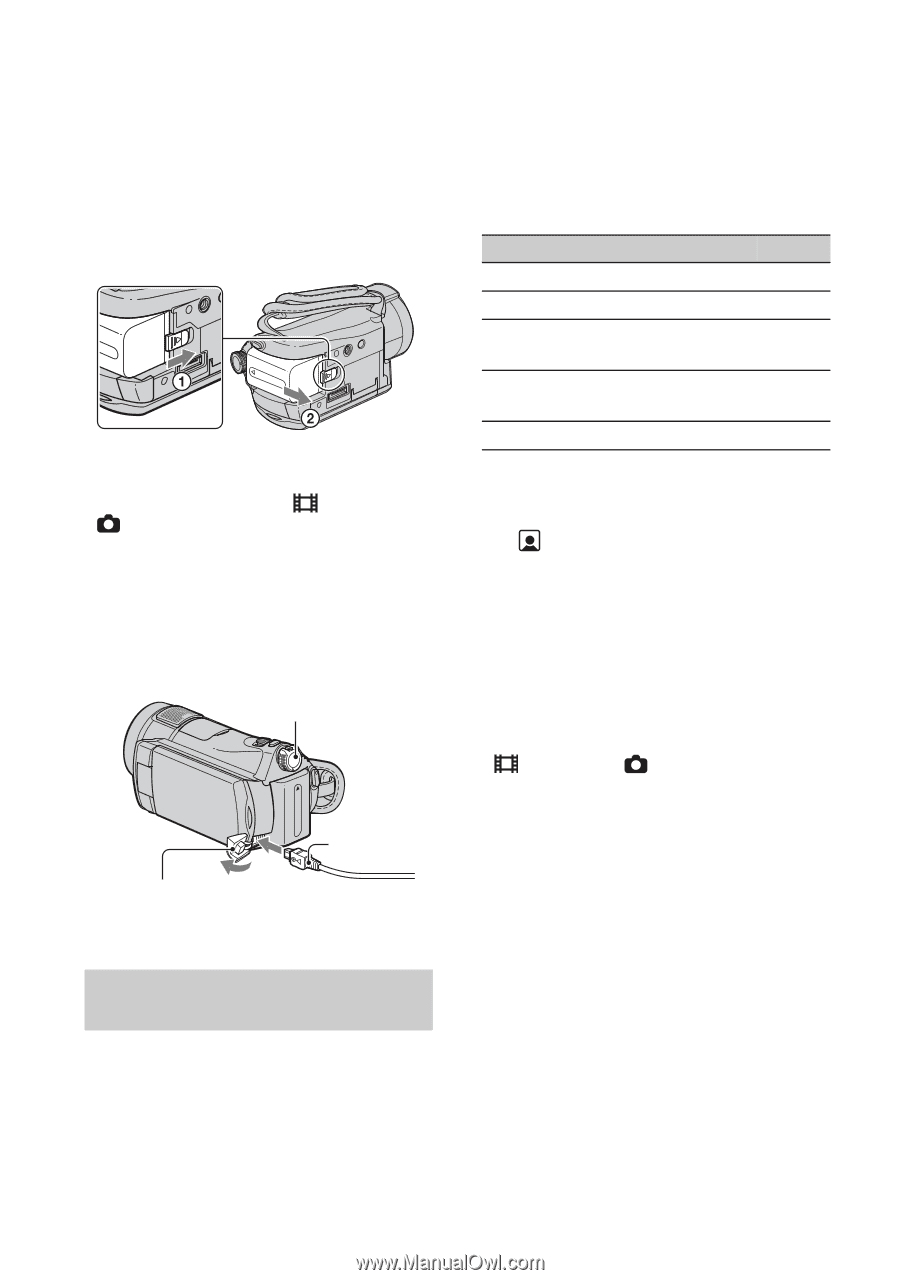
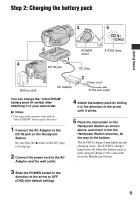
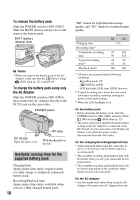
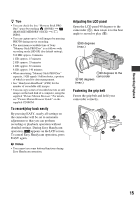
To remove the battery pack Slide the POWER switch to OFF (CHG). Slide the BATT (battery release) lever and remove the battery pack. BATT (battery release) lever b Notes • When you remove the battery pack or the AC Adaptor, make sure that the (Movie) lamp/ (Still) lamp (p. 12) is turned off. To charge the battery pack using only the AC Adaptor Slide the POWER switch to OFF (CHG), then connect the AC Adaptor directly to the DC IN jack on the camcorder. POWER switch DC plug DC IN jack Open the jack cover. With the v mark on the left Available running time for the supplied battery pack Charging time: Approximate time (min.) required when you fully charge a completely exhausted battery pack. Recording/Playback time: Approximate time (min.) available when you use a fully charged battery pack. 10 "HD" stands for high definition image quality, and "SD" stands for standard image quality. (Unit:min.) HD SD Charging time 135 Recording time*1 Continuous recording 95 110 time 95 115 Typical recording time*2 45 55 45 55 Playback time*3 160 190 *1 All times are measured under following conditions. - Recording mode: SP - [ INDEX]: [OFF] - LCD backlight: [ON] (top), [OFF] (bottom) *2 Typical recording time shows the time when you repeat recording start/stop, turning the power on/off and zooming. *3 When the LCD backlight is on. On the battery pack • Before changing the battery pack, slide the POWER switch to OFF (CHG) and turn off the (Movie) lamp/ (Still) lamp (p. 12). • The power will not be supplied from the battery as long as the AC Adaptor is connected to the DC IN jack of your camcorder or the Handycam Station, even when the power cord is disconnected from the wall outlet. On the charging/recording/playback time • Times measured when using the camcorder at 25°C (77°F) (10°C to 30°C (50°F to 86°F) is recommended). • The available recording and playback time will be shorter when you use your camcorder in low temperatures. • The available recording and playback time will be shorter depending on the conditions under which you use your camcorder. On the AC Adaptor • Use the nearby wall outlet when using the AC Adaptor. Disconnect the AC Adaptor from the
-
 1
1 -
2
-
3
-
4
-
 5
5 -
 6
6 -
 7
7 -
 8
8 -
 9
9 -
 10
10 -
 11
11 -
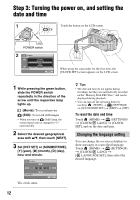 12
12 -
 13
13 -
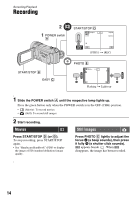 14
14 -
 15
15 -
16
-
17
-
18
-
19
-
20
-
21
-
22
-
23
-
24
-
25
-
26
-
27
-
28
-
29
-
30
-
31
-
32
-
33
-
34
-
35
-
36
-
37
-
38
-
39
-
40
 |
 |