Sony HDR TG1E Operation Guide - Page 23
Saving images, Items of the OPTION MENU, Using a computer, Connecting your camcorder to, other devices
 |
View all Sony HDR TG1E manuals
Add to My Manuals
Save this manual to your list of manuals |
Page 23 highlights
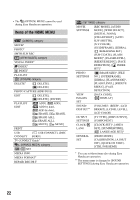
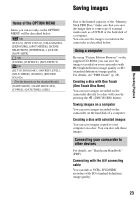
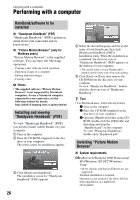
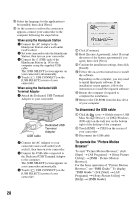
Recording/Playback Saving images Items of the OPTION MENU Items you can set only on the OPTION MENU will be described below. tab [FOCUS], [SPOT FOCUS], [TELE MACRO], [EXPOSURE], [SPOT METER], [SCENE SELECTION], [WHITE BAL.], [COLOR SLOW SHTR] tab [FADER], [D.EFFECT], [PICT.EFFECT] tab [BLT-IN ZOOM MIC], [MICREF LEVEL], [SELF-TIMER], [TIMING], [RECORD SOUND] - (The tab depends on the situation/No tab) [SLIDE SHOW], [SLIDE SHOW SET], [COPIES], [DATE/TIME], [SIZE] Due to the limited capacity of the "Memory Stick PRO Duo," make sure that you save the image data to some type of external media such as a DVD-R or the hard disk of a computer. You can save the images recorded on the camcorder as described below. Using a computer By using "Picture Motion Browser" on the supplied CD-ROM, you can save the images recorded on your camcorder with HD (high definition) image quality or SD (standard definition) image quality. For details, see "PMB Guide" (p. 28). Creating a disc with One Touch (One Touch Disc Burn) You can save images recorded on the camcorder directly to a disc with ease by pressing the (DISC BURN) button. Saving images on a computer You can save images recorded on the camcorder on the hard disk of a computer. Creating a disc with selected images You can save images copied to your computer on a disc. You can also edit those images. Connecting your camcorder to other devices For details, see "Handycam Handbook" (PDF). Connecting with the A/V connecting cable You can dub to VCRs, DVD/HDD recorders with SD (standard definition) image quality. 23
-
 1
1 -
2
-
3
-
4
-
5
-
6
-
7
-
8
-
9
-
10
-
11
-
12
-
13
-
14
-
15
-
16
-
17
-
 18
18 -
 19
19 -
 20
20 -
 21
21 -
 22
22 -
 23
23 -
 24
24 -
 25
25 -
 26
26 -
 27
27 -
 28
28 -
29
-
30
-
31
-
32
-
33
-
34
-
35
-
36
 |
 |