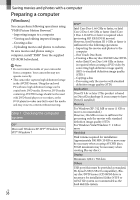
Sony HDR-XR150 Operating Guide - Page 38
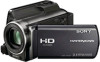
displayed on the camcorder, Touch the one of the media types - usb cable
 |
UPC - 027242788787
View all Sony HDR-XR150 manuals
Add to My Manuals
Save this manual to your list of manuals |
Page 38 highlights
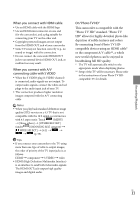
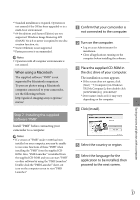
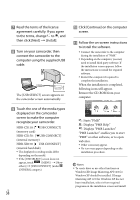
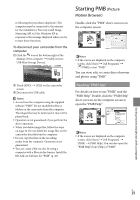
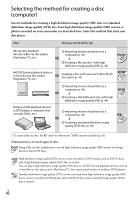
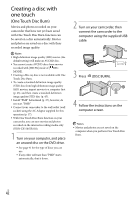
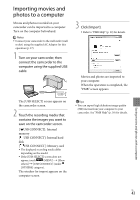
Read the terms of the license agreement carefully. If you agree to the terms, change to , and then click [Next] [Install]. Turn on your camcorder, then connect the camcorder to the computer using the supplied USB cable. The [USB SELECT] screen appears on the camcorder screen automatically. Touch the one of the media types displayed on the camcorder screen to make the computer recognize your camcorder. HDR-CX110: [ USB CONNECT] (memory card) HDR-CX150 : [ USB CONNECT] (internal memory) HDR-XR150: [ USB CONNECT] (internal hard disk) The displayed recording media differ depending on the model. If the [USB SELECT] screen does not appear, touch (MENU) [Show others] [USB CONNECT] (under [OTHERS] category). US 38 Click [Continue] on the computer screen. Follow the on-screen instructions to install the software. Connect the camcorder to the computer during the installation of "PMB." Depending on the computer, you may need to install third party software. If the installation screen appears, follow the instructions to install the required software. Restart the computer if required to complete the installation. When the installation is completed, following icons will appear. Remove the CD-ROM from your computer. : Starts "PMB." : Displays "PMB Help." : Displays "PMB Launcher." "PMB Launcher" enables you to start "PMB" or other software, or to open web sites. Other icons may appear. No icon may appear depending on the installation procedure. Notes To create discs or use other functions on Windows XP, Image Mastering API v2.0 for Windows XP should be installed. If Image Mastering API v2.0 for Windows XP has not been installed yet, select it from required programs on the installation screen and install
-
 1
1 -
2
-
3
-
4
-
5
-
6
-
7
-
8
-
9
-
10
-
11
-
12
-
13
-
14
-
15
-
16
-
17
-
18
-
19
-
20
-
21
-
22
-
23
-
24
-
25
-
26
-
27
-
28
-
29
-
30
-
31
-
32
-
 33
33 -
 34
34 -
 35
35 -
 36
36 -
 37
37 -
 38
38 -
 39
39 -
 40
40 -
 41
41 -
 42
42 -
 43
43 -
44
-
45
-
46
-
47
-
48
-
49
-
50
-
51
-
52
-
53
-
54
-
55
-
56
-
57
-
58
-
59
-
60
-
61
-
62
-
63
-
64
-
65
-
66
-
67
-
68
-
69
-
70
-
71
-
72
-
73
-
74
-
75
-
76
-
77
-
78
-
79
-
80
-
81
-
82
-
83
-
84
-
85
-
86
-
87
-
88
-
89
-
90
-
91
-
92
-
93
-
94
-
95
-
96
-
97
-
98
-
99
-
100
-
101
-
102
-
103
-
104
-
105
-
106
-
107
-
108
-
109
-
110
-
111
-
112
-
113
-
114
-
115
-
116
-
117
-
118
-
119
-
120
-
121
-
122
-
123
-
124
-
125
-
126
-
127
-
128
-
129
-
130
-
131
-
132
-
133
-
134
-
135
-
136
-
137
-
138
-
139
-
140
-
141
-
142
-
143
-
144
-
145
-
146
-
147
-
148
-
149
-
150
-
151
 |
 |