Sony ICD-PX440 Help Guide (Printable PDF) - Page 165
Erasing a file
 |
View all Sony ICD-PX440 manuals
Add to My Manuals
Save this manual to your list of manuals |
Page 165 highlights
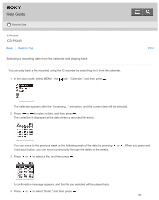
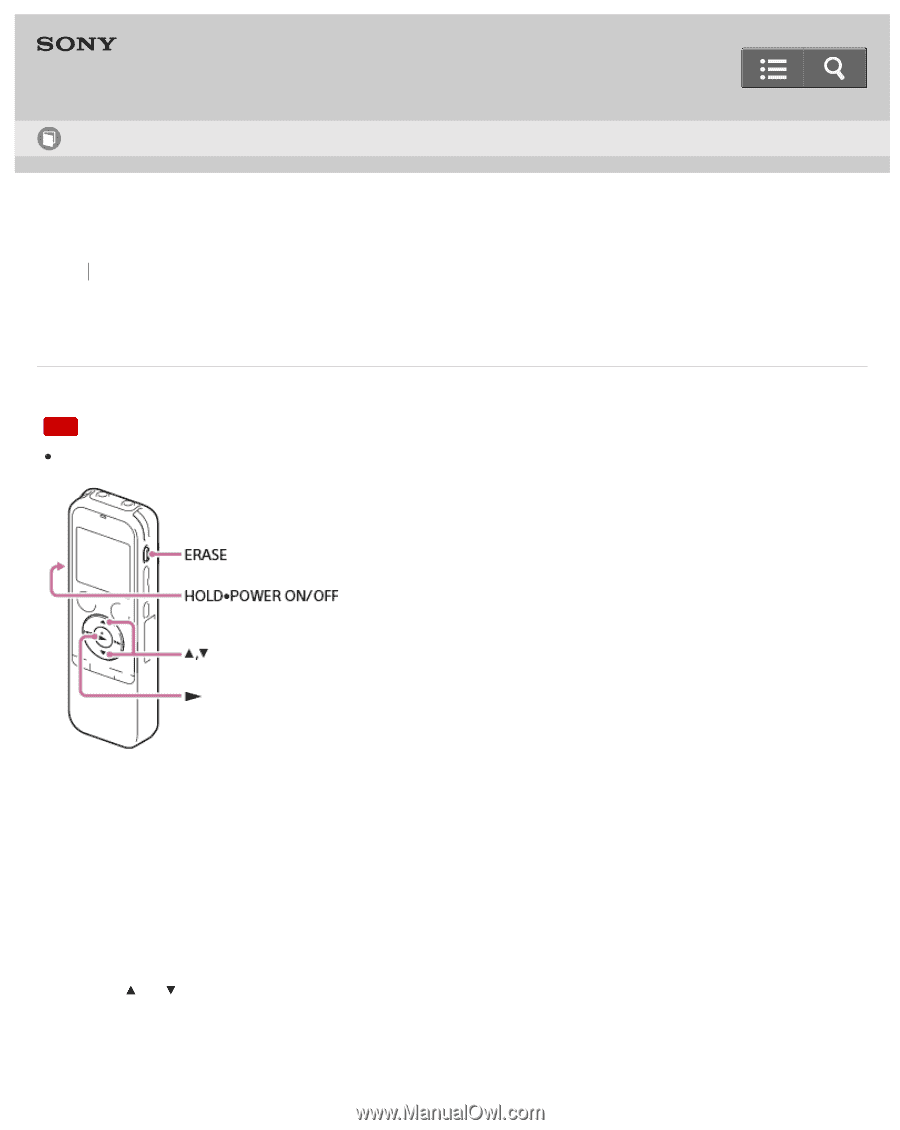
Help Guide How to Use IC Recorder ICD-PX440 Back Back to Top Erasing a file You can select a file and erase it. Note Once a file has been erased, you cannot retrieve it. Print 1. Slide the HOLD・POWER ON/OFF switch in the direction of "POWER ON/OFF" to turn on the IC recorder, or towards the center to release the IC recorder from the HOLD status. The stop mode window appears. 2. Select the file you want to erase when the IC recorder is in the stop or playback mode. 3. Press ERASE. "Erase?" appears and the specified file is played back for confirmation. 4. Press or to select "Execute." 157
-
 1
1 -
2
-
3
-
4
-
5
-
6
-
7
-
8
-
9
-
10
-
11
-
12
-
13
-
14
-
15
-
16
-
17
-
18
-
19
-
20
-
21
-
22
-
23
-
24
-
25
-
26
-
27
-
28
-
29
-
30
-
31
-
32
-
33
-
34
-
35
-
36
-
37
-
38
-
39
-
40
-
41
-
42
-
43
-
44
-
45
-
46
-
47
-
48
-
49
-
50
-
51
-
52
-
53
-
54
-
55
-
56
-
57
-
58
-
59
-
60
-
61
-
62
-
63
-
64
-
65
-
66
-
67
-
68
-
69
-
70
-
71
-
72
-
73
-
74
-
75
-
76
-
77
-
78
-
79
-
80
-
81
-
82
-
83
-
84
-
85
-
86
-
87
-
88
-
89
-
90
-
91
-
92
-
93
-
94
-
95
-
96
-
97
-
98
-
99
-
100
-
101
-
102
-
103
-
104
-
105
-
106
-
107
-
108
-
109
-
110
-
111
-
112
-
113
-
114
-
115
-
116
-
117
-
118
-
119
-
120
-
121
-
122
-
123
-
124
-
125
-
126
-
127
-
128
-
129
-
130
-
131
-
132
-
133
-
134
-
135
-
136
-
137
-
138
-
139
-
140
-
141
-
142
-
143
-
144
-
145
-
146
-
147
-
148
-
149
-
150
-
151
-
152
-
153
-
154
-
155
-
156
-
157
-
158
-
159
-
 160
160 -
 161
161 -
 162
162 -
 163
163 -
 164
164 -
 165
165 -
 166
166 -
 167
167 -
 168
168 -
 169
169 -
 170
170 -
171
-
172
-
173
-
174
-
175
-
176
-
177
-
178
-
179
-
180
-
181
-
182
-
183
-
184
-
185
-
186
-
187
-
188
-
189
-
190
-
191
-
192
-
193
-
194
-
195
-
196
-
197
-
198
-
199
-
200
-
201
-
202
-
203
-
204
-
205
-
206
-
207
-
208
-
209
-
210
-
211
-
212
-
213
-
214
-
215
-
216
-
217
-
218
-
219
-
220
-
221
-
222
-
223
-
224
-
225
-
226
-
227
-
228
-
229
-
230
-
231
-
232
-
233
-
234
-
235
-
236
-
237
-
238
-
239
-
240
-
241
-
242
-
243
-
244
-
245
-
246
-
247
-
248
-
249
-
250
-
251
-
252
-
253
-
254
-
255
-
256
-
257
-
258
-
259
-
260
-
261
-
262
-
263
-
264
-
265
-
266
-
267
-
268
-
269
-
270
-
271
-
272
-
273
-
274
-
275
-
276
-
277
-
278
-
279
-
280
-
281
-
282
-
283
-
284
-
285
-
286
-
287
-
288
-
289
-
290
-
291
-
292
 |
 |
Back
Back to Top
Print
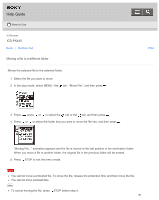
IC Recorder
ICD-PX440
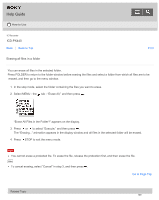
Erasing a file
You can select a file and erase it.
Note
Once a file has been erased, you cannot retrieve it.
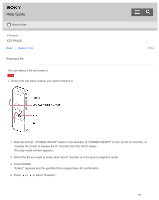
1. Slide the HOLD
・
POWER ON/OFF switch in the direction of “POWER ON/OFF” to turn on the IC recorder, or
towards the center to release the IC recorder from the HOLD status.
The stop mode window appears.
2. Select the file you want to erase when the IC recorder is in the stop or playback mode.
3. Press ERASE.
“Erase?” appears and the specified file is played back for confirmation.
4. Press
or
to select “Execute.”
Help Guide
How to Use
157