Sony KP-53S75 Operating Instructions - Page 24
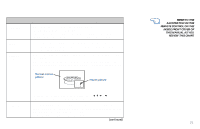
Using Your New Projection TV, Watching the TV - tv front screen
 |
View all Sony KP-53S75 manuals
Add to My Manuals
Save this manual to your list of manuals |
Page 24 highlights
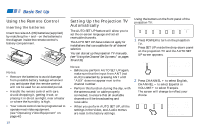
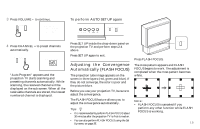
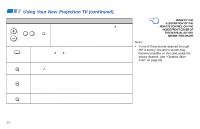
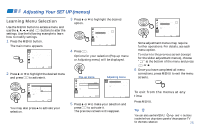
Using Your New Projection TV (continued) Watching the TV Many TV features can be accessed directly through the remote control. The following chart will explain the function of some buttons found on your remote control. Using the White Labeled Buttons for Projection TV Operations TV (FUNCTION) TV POWER 0-9 and ENTER CH +/- VOL +/- MUTING Activates the remote control for use with the projection TV. Turns the projection TV on and off. If a video input indication (e.g., VIDEO 1, VIDEO 2) appears on the screen, press TV/VIDEO until a channel number appears. Use for direct channel selection. Press 0-9 to select a channel (for example, to select channel 10, press 1 and 0). The channel will change after 2 seconds, or you can press ENTER for immediate selection. Press to scan through the channels (+ up or - down). Speed Surf 1 Press and hold CH + or - to change the channel number rapidly. 2 Release to display the desired channel. Press to adjust the volume (+ up or - down). Press to mute the sound. "Muting" will appear on the screen and will dim three seconds later. To restore sound, press again or press VOL +. 20 PICTURE MODE Press PICTURE MODE repeatedly to directly choose one of five different video modes that best suits the program you are watching. Vivid: Select for enhanced picture contrast and sharpness. Standard: Select to display a standard picture for normal viewing environments. Movie: Select to display a finely detailed picture for low light environments. Personal 1, Personal 2: Select to customize the "Picture Adjustment" of the Video menu according to your personal preference. When you select "Movie," "Personal 1" and "Personal 2," you can also perform the "Picture Adjustment" (such as "Brightness," "Color," etc.) to suit your taste. For details, see "Mode" on page 26.
-
 1
1 -
2
-
3
-
4
-
5
-
6
-
7
-
8
-
9
-
10
-
11
-
12
-
13
-
14
-
15
-
16
-
17
-
18
-
 19
19 -
 20
20 -
 21
21 -
 22
22 -
 23
23 -
 24
24 -
 25
25 -
 26
26 -
 27
27 -
 28
28 -
 29
29 -
30
-
31
-
32
-
33
-
34
-
35
-
36
-
37
-
38
-
39
-
40
-
41
-
42
-
43
-
44
-
45
-
46
-
47
-
48
-
49
-
50
-
51
-
52
-
53
-
54
-
55
-
56
-
57
-
58
 |
 |