Sony KV-36HS20 Primary User Manual - Page 12
Button Descriptions, Button, Description - remote control
 |
View all Sony KV-36HS20 manuals
Add to My Manuals
Save this manual to your list of manuals |
Page 12 highlights
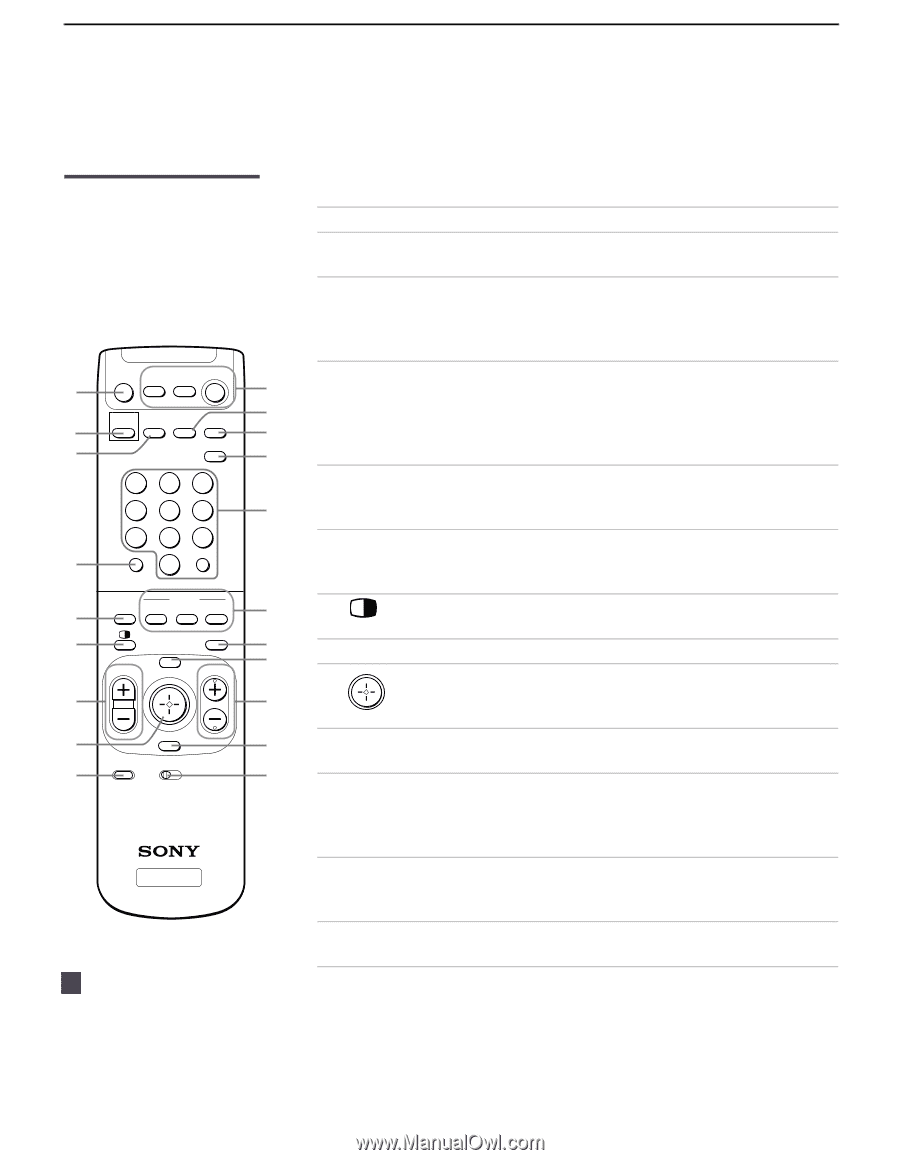
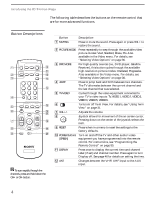
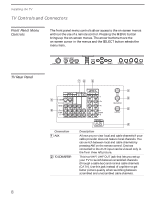
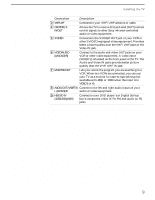
Introducing the FD Trinitron Wega The following table describes the buttons on the remote control that are for more advanced functions. Button Descriptions MUTING VCR/DVD POWER SAT/CABLE 1 TV 0 PICTURE qa MODE DRC MODE DISPLAY ANT 2 qs 3 MTS/SAP qd GUIDE 123 456 qf 789 JUMP ENTER 4 0 5 FUNCTION TV/VIDEO VCR/DVD SAT/CABLE TV qg FREEZE 6 qh qj VOL MENU CH 7 qk FAVORITES 8 ql RESET AV 1 2 3 DVD RM -Y183 9 w; TV z To scan rapidly through the channels, press and hold down the CH+ or CH- button. Button 1 MUTING 2 PICTURE MODE 3 DRC MODE 4 JUMP 5 TV/VIDEO 6 7 VOL +/8 9 RESET 0 POWER buttons (GREEN) qa DISPLAY qs ANT Description Press to mute the sound. Press again or press VOL + to restore the sound. Press repeatedly to step through the available video picture modes: Vivid, Standard, Movie, Pro. Also available in the Video menu. For details, see "Selecting Video Options" on page 36. For high quality sources (i.e., DVD player, Satellite Receiver), this button cycles through the available high-resolution picture modes: Interlaced, Progressive. Also available in the Video menu. For details, see "Selecting Video Options" on page 36. Press to jump back and forth between two channels. The TV alternates between the current channel and the last channel that was selected. Cycles through the video equipment connected to your TV's video inputs: TV, VIDEO 1, VIDEO 2, VIDEO 3, VIDEO 4, VIDEO 5, VIDEO 6. Turns on/off Twin View. For details, see "Using Twin View" on page 31. Adjusts the volume. Joystick allows for movement of the on-screen cursor. Pressing down on the center of the joystick selects the item. Press when in a menu to reset the settings to the factory defaults. Turn on and off the TV and other audio/video equipment you have programmed into the remote control. For instructions, see "Programming the Remote Control" on page 50. Press once to display the current time and channel label (if set) and channel number. Press again to turn Display off. See page 46 for details on setting the time. Changes between the VHF/UHF input to the AUX input. 4
-
 1
1 -
2
-
3
-
4
-
5
-
6
-
 7
7 -
 8
8 -
 9
9 -
 10
10 -
 11
11 -
 12
12 -
 13
13 -
 14
14 -
 15
15 -
 16
16 -
 17
17 -
18
-
19
-
20
-
21
-
22
-
23
-
24
-
25
-
26
-
27
-
28
-
29
-
30
-
31
-
32
-
33
-
34
-
35
-
36
-
37
-
38
-
39
-
40
-
41
-
42
-
43
-
44
-
45
-
46
-
47
-
48
-
49
-
50
-
51
-
52
-
53
-
54
-
55
-
56
-
57
-
58
-
59
-
60
-
61
-
62
-
63
-
64
-
65
-
66
-
67
-
68
-
69
-
70
-
71
-
72
 |
 |