Sony MHC-771 Operating Instructions - Page 16
Recording a CD, Recording a CD, Selecting Tape, Length, Automatically tape, select edit - no sound
 |
View all Sony MHC-771 manuals
Add to My Manuals
Save this manual to your list of manuals |
Page 16 highlights
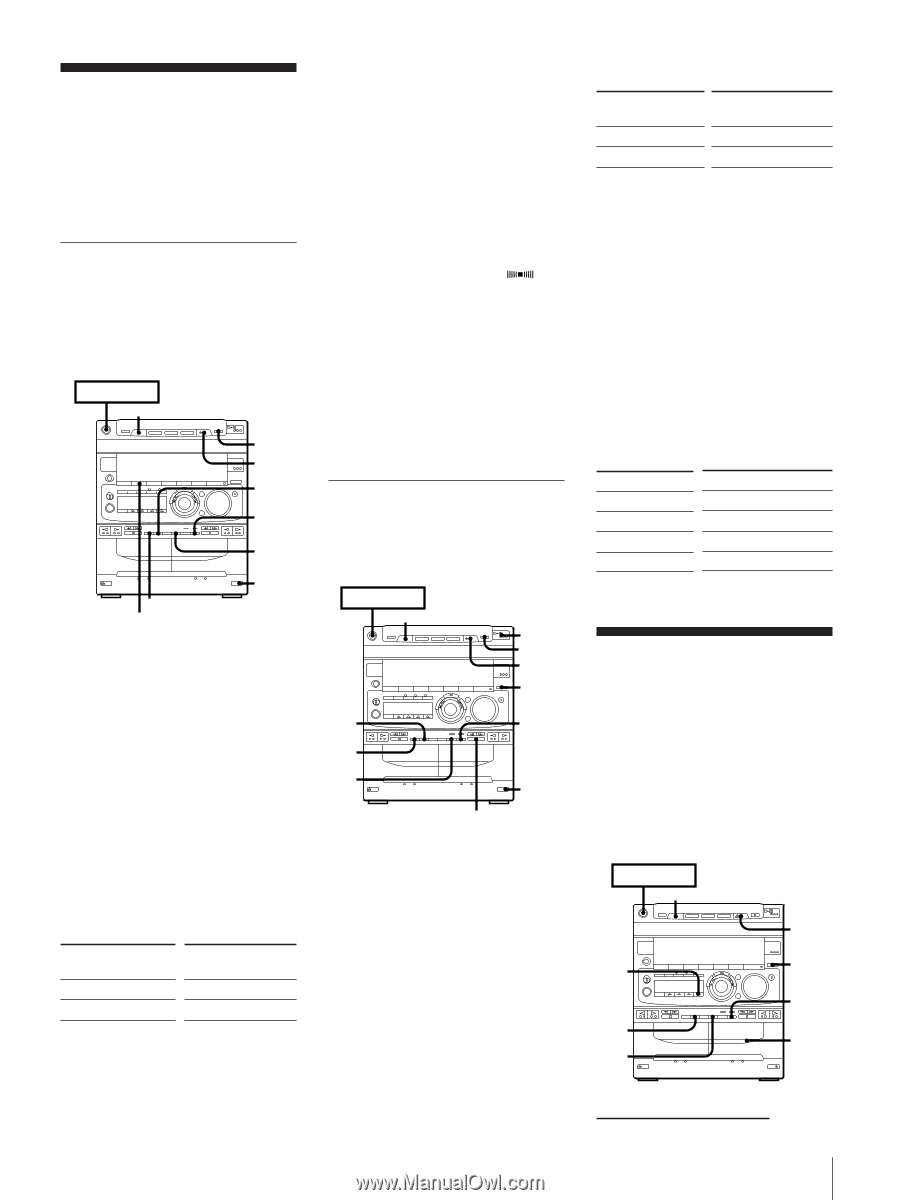
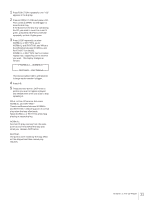
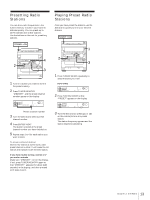
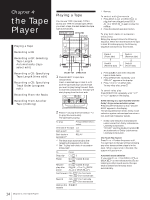
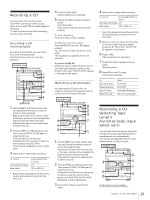
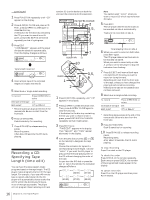
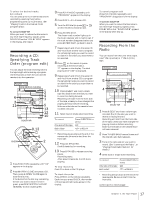
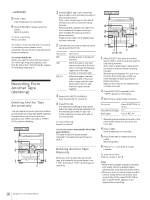
Recording a CD You can record from a CD to a tape. Use TYPE I (normal) or TYPE II (CrO2) tapes. Do not use TYPE IV (metal) tapes for recording. To listen to other sources while recording, you must stop recording. Recording a CD Automatically By using CD SYNCHRO, you can record from a CD to a tape quickly. Use the buttons on the unit to do this operation. POWERnON DISC SKIP EX-CHANGE π 2 3 5 4 1 DOLBY NR SURROUND 1 Press § EJECT and insert a blank tape into deck B with the side you want to record on facing forward. Recording will start from the front side of the tape, unless you have changed the playing direction before recording. Make sure the tabs on the cassette have not been removed. 2 Press § OPEN/CLOSE and place a CD. Then, press § OPEN/CLOSE again to close the disc tray. If the indicator for the disc tray containing the CD you want to record is not lit green, press DISC SKIP EX-CHANGE repeatedly so that it lights green. 3 Select dual or single-sided recording. To record One side of the tape Both sides* Press DIRECTION to select A ß or RELAY * Recording always stops at the end of the reverse side. Be sure to start from the front side. 4 Press CD SYNCHRO. Deck B stands by for recording. 5 Press ∏ PAUSE to release recording pause. Recording starts. After about 10 seconds, the CD starts playing. To stop recording Press π on deck or the CD player. To add the surround effect Press SURROUND so that "SUR " appears. You can record the sound with surround effect. The equalizer you adjusted will not be recorded. To activate DOLBY NR When you want to reduce the hiss noise in low-level high-frequency signals, press DOLBY NR so that "DOLBY NR B" appears in the display after step 3. Recording a CD Manually You can record a CD as you like, for instance, record just the songs you want or record from the middle of the tape. POWERnON DISC SKIP EX-CHANGE 8 π 2 3 4 7 5 6 1 π 1 Press § EJECT and insert a blank tape into deck B with the side you want to record on facing forward. Recording will start from the front side of the tape, unless you have changed the playing direction before recording. Make sure the tabs on the cassette have not been removed. 2 Press § OPEN/CLOSE and place a CD. Then, press § OPEN/CLOSE again to close the disc tray. If the button for the disc tray containing the CD you want to record is not lit green, press DISC SKIP EX-CHANGE repeatedly so that it lights green. 3 Press FUNCTION to select the CD player. 4 Select dual or single-sided recording. To record Press DIRECTION to select One side of the tape A Both sides* ß or RELAY * Recording always stops at the end of the reverse side. Be sure to start from the front side. 5 When you want to reduce the hiss noise in low-level high-frequency signals, press DOLBY NR so that "DOLBY NR B" appears in the display. 6 Press ® REC. Deck B stands by for recording. 7 Press ∏ PAUSE to release recording pause. Recording starts. 8 Press fl on the CD player. The CD starts playing. To Press Stop recording π on deck EN Pause recording ∏ PAUSE Stop CD play π on the CD player Pause CD play fl on the CD player Recording a CD: Selecting Tape Length Automatically (tape select edit) You can have the stereo system select and indicate the most suitable tape length for recording each disc automatically. You cannot use Tape Select Edit for discs which contain 21 tracks or more. POWERnON DISC SKIP EX-CHANGE 2 3 1 7 5 4 6 continue to next page 15 Chapter 4: the Tape Player
-
 1
1 -
2
-
3
-
4
-
5
-
6
-
7
-
8
-
9
-
10
-
 11
11 -
 12
12 -
 13
13 -
 14
14 -
 15
15 -
 16
16 -
 17
17 -
 18
18 -
 19
19 -
 20
20 -
 21
21 -
22
-
23
-
24
-
25
-
26
-
27
-
28
-
29
-
30
-
31
-
32
 |
 |