Sony MZ-N1 Operating Instructions - Page 70
Protecting your hearing (AVLS), Jog dial, DISPLAY, Control
 |
View all Sony MZ-N1 manuals
Add to My Manuals
Save this manual to your list of manuals |
Page 70 highlights
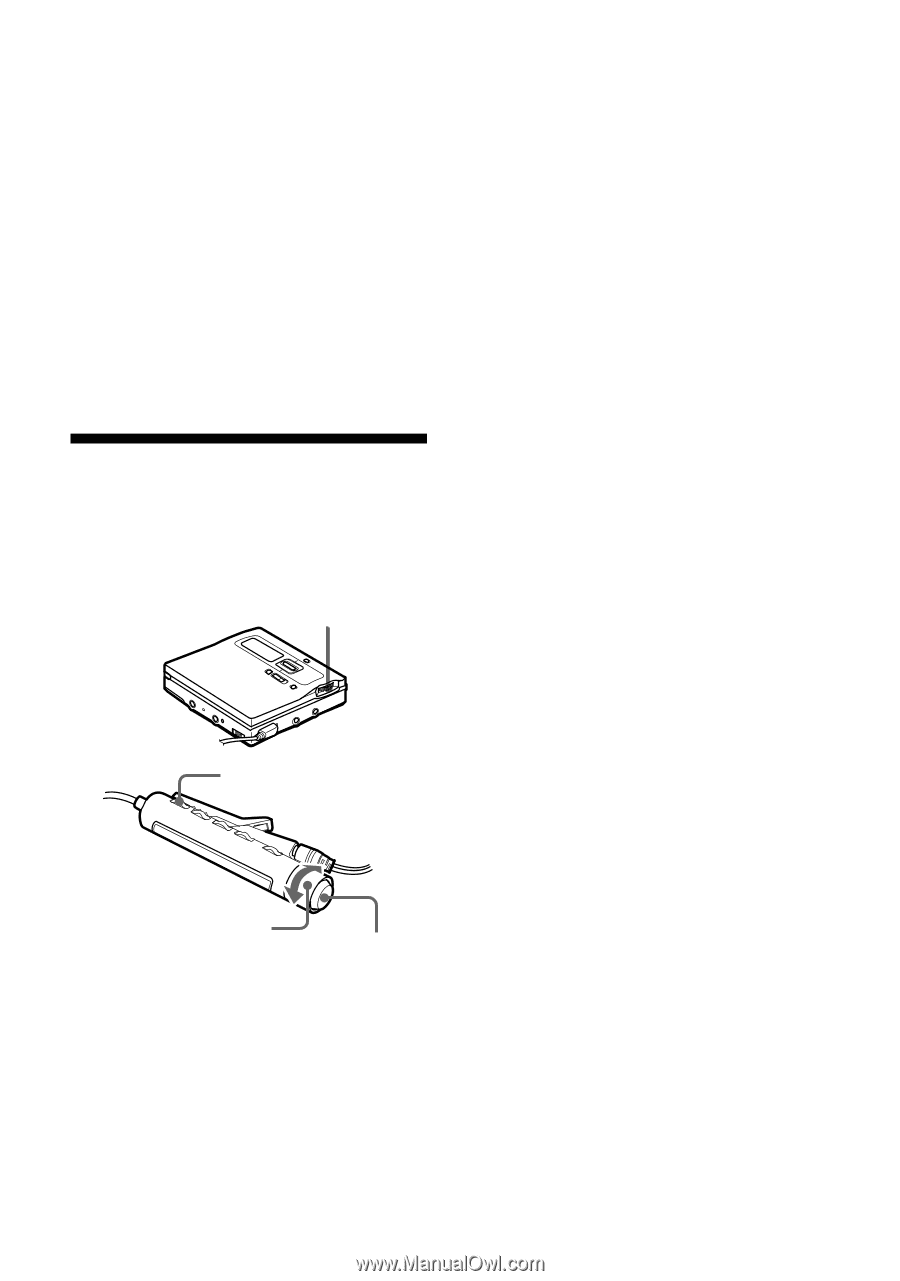
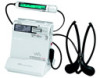
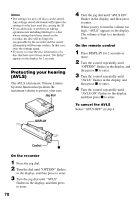
Notes • The settings for up to 20 discs can be stored. Any settings stored afterwards will replace the settings for the least used disc among the 20. • If you add tracks or perform an editing operation (not including labeling) to a disc whose settings have been stored on the recorder, the disc will no longer be recognizable by the recorder and the stored information will become useless. In this case, store the settings again. • If you try to erase the disc information of a disc that have never been stored, "No Entry!" appears in the display for 2 seconds. Protecting your hearing (AVLS) The AVLS (Automatic Volume Limiter System) function keeps down the maximum volume to protect your ears. Jog dial 4 Turn the jog dial until "AVLS ON" flashes in the display, and then press to enter. When you try to turn the volume too high, "AVLS" appears in the display. The volume is kept to a moderate level. On the remote control 1 Press DISPLAY for 2 seconds or more. 2 Turn the control repeatedly until "OPTION" flashes in the display, and then press x to enter. 3 Turn the control repeatedly until "AVLS" flashes in the display, and then press x to enter. 4 Turn the control repeatedly until "AVLS ON" flashes in the display, and then press x to enter. To cancel the AVLS Select "AVLS OFF" in step 4. DISPLAY Control x On the recorder 1 Press the jog dial. 2 Turn the dial until "OPTION" flashes in the display, and then press to enter. 3 Turn the jog dial until "AVLS" flashes in the display, and then press to enter. 70
-
 1
1 -
2
-
3
-
4
-
5
-
6
-
7
-
8
-
9
-
10
-
11
-
12
-
13
-
14
-
15
-
16
-
17
-
18
-
19
-
20
-
21
-
22
-
23
-
24
-
25
-
26
-
27
-
28
-
29
-
30
-
31
-
32
-
33
-
34
-
35
-
36
-
37
-
38
-
39
-
40
-
41
-
42
-
43
-
44
-
45
-
46
-
47
-
48
-
49
-
50
-
51
-
52
-
53
-
54
-
55
-
56
-
57
-
58
-
59
-
60
-
61
-
62
-
63
-
64
-
 65
65 -
 66
66 -
 67
67 -
 68
68 -
 69
69 -
 70
70 -
 71
71 -
 72
72 -
 73
73 -
 74
74 -
 75
75 -
76
-
77
-
78
-
79
-
80
-
81
-
82
-
83
-
84
-
85
-
86
-
87
-
88
-
89
-
90
-
91
-
92
-
93
-
94
-
95
-
96
 |
 |