Sony NEX-VG30 "Handycam" Handbook - Page 56
Importing movies and photos to a computer
 |
View all Sony NEX-VG30 manuals
Add to My Manuals
Save this manual to your list of manuals |
Page 56 highlights
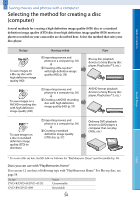
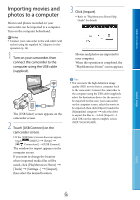
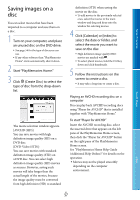
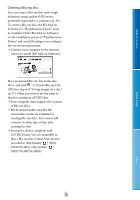
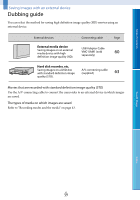
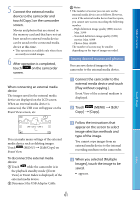
Table of Contents Importing movies and photos to a computer Movies and photos recorded on your camcorder can be imported to a computer. Turn on the computer beforehand. Notes Connect your camcorder to the wall outlet (wall socket) using the supplied AC Adaptor for this operation (p. 16). 1 Turn on your camcorder, then connect the camcorder to the computer using the USB cable (supplied). The [USB Select] screen appears on the camcorder screen. 2 Touch [USB Connect] on the camcorder screen. If the [USB Select] screen does not appear, touch (MENU) [Setup] [ ( Connection)] [USB Connect]. The window for import appears on the computer screen. If you want to change the location where imported media files will be saved, click [PlayMemories Home] [Tools] [Settings...] [Import], then select the desired location. 3 Click [Import]. Refer to "PlayMemories Home Help Guide" for details. Movies and photos are imported to your computer. When the operation is completed, the "PlayMemories Home" screen appears. Tips You can move the high definition image quality (HD) movies from a computer back to the camcorder. Connect the camcorder to the computer using the USB cable (supplied), select the destination device for the movie to be exported (in this case, your camcorder) on the computer screen, select the movie to be exported, then click [Export] (under the [Manipulate] category) select the drive to export the files to click [Export] click [OK] on the export complete screen (NEX-VG30/VG30H). Search image Index US 56
-
 1
1 -
2
-
3
-
4
-
5
-
6
-
7
-
8
-
9
-
10
-
11
-
12
-
13
-
14
-
15
-
16
-
17
-
18
-
19
-
20
-
21
-
22
-
23
-
24
-
25
-
26
-
27
-
28
-
29
-
30
-
31
-
32
-
33
-
34
-
35
-
36
-
37
-
38
-
39
-
40
-
41
-
42
-
43
-
44
-
45
-
46
-
47
-
48
-
49
-
50
-
 51
51 -
 52
52 -
 53
53 -
 54
54 -
 55
55 -
 56
56 -
 57
57 -
 58
58 -
 59
59 -
 60
60 -
 61
61 -
62
-
63
-
64
-
65
-
66
-
67
-
68
-
69
-
70
-
71
-
72
-
73
-
74
-
75
-
76
-
77
-
78
-
79
-
80
-
81
-
82
-
83
-
84
-
85
-
86
-
87
-
88
-
89
-
90
-
91
-
92
-
93
-
94
-
95
-
96
-
97
-
98
-
99
-
100
-
101
-
102
-
103
-
104
-
105
-
106
-
107
-
108
-
109
-
110
-
111
-
112
-
113
-
114
-
115
-
116
 |
 |
