Sony PCM-D50 Operating Instructions - Page 24
When recording level adjustment is, unnecessary, PLAY/ENTER button. - digital input
 |
UPC - 027242720831
View all Sony PCM-D50 manuals
Add to My Manuals
Save this manual to your list of manuals |
Page 24 highlights
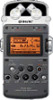
Recording (continued) 4 Press the FF/ and FR/ buttons to select the desired folder, and press the PLAY/ENTER button. Folders 01 to 10 are for saving recorded tracks. You can record a maximum of 99 tracks in each folder 5 Press the REC button. The recorder stands by for recording, and flashes on the display. When checking the level on the peak level lamps The peak level lamps for left and right channels light according to the input signal levels. If the "OVER" lamp lights up in red (when the recording level exceeds -1dB), distortion may occur. 6 Turn the REC LEVEL dial to adjust the recording level while referring to the display. You can check the recording level on both the peak meter of the display and the peak level lamps. Adjust the level closer to -12dB, into an appropriate range that is suitable for your sound source. When checking the level on the peak meter of the display When recording sound that has "sharp attack" parts such as percussive sound, use the peak meter to check the level. If appears when the maximum peak value is output, distortion may occur. Peak indicator (crest value of input signal) Peak level lamps -12 dB (green): Distortion will not occur. (Recording level is -12 to -1dB.) OVER (red): Recording level is more than -1dB. Lower the level. Note During digital recording, the peak level lamps do not light. 7 Press PLAY/ENTER (or PAUSE) button. The standby for recording is made released, and recording starts. The lights on the display while recording is in progress. When recording level adjustment is unnecessary In step 5, press the PLAY/ENTER button while pressing and holding the REC button. Recording starts immediately. Maximum peak value 24
-
 1
1 -
2
-
3
-
4
-
5
-
6
-
7
-
8
-
9
-
10
-
11
-
12
-
13
-
14
-
15
-
16
-
17
-
18
-
 19
19 -
 20
20 -
 21
21 -
 22
22 -
 23
23 -
 24
24 -
 25
25 -
 26
26 -
 27
27 -
 28
28 -
 29
29 -
30
-
31
-
32
-
33
-
34
-
35
-
36
-
37
-
38
-
39
-
40
-
41
-
42
-
43
-
44
-
45
-
46
-
47
-
48
-
49
-
50
-
51
-
52
-
53
-
54
-
55
-
56
-
57
-
58
-
59
-
60
 |
 |
