Sony PCM-D50 Operating Instructions - Page 27
Recording with an external, microphone, PLAY/ENTER or - external memory
 |
UPC - 027242720831
View all Sony PCM-D50 manuals
Add to My Manuals
Save this manual to your list of manuals |
Page 27 highlights
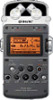
Recording The recorder stands by for recording, and appears on the display. Sounds for the last 5 seconds are buffered in the memory. Number of seconds to be buffered in the memory 5 Press the PLAY/ENTER (or PAUSE) button The standby for recording mode is released, and recording starts. Sounds are saved for the 5 seconds prior to the point the button is pressed. Notes When the remaining recordable time is less than 10 seconds, the pre-recording function is disabled. During digital recording, the pre-recording function is disabled. If it does not take 5 seconds between steps 4 and 5, prerecording is done only for these seconds. Recording with an external microphone You can connect an optional external microphone to the recorder. 1 Connect an external microphone to the (microphone) jack of the recorder, and adjust the position of the microphone. For the characteristics of the microphone, refer to the operating instructions supplied with it. External microphone (not supplied) to the jack When you connect an external microphone to the (microphone) jack of the recorder in stop mode, the PLUG IN PWR menu is displayed. To use a plug in power microphone, select "ON." If you select "OFF," the plug in power function is disabled. 2 Follow steps 1 and 7 of "Recording using the built-in microphones" (pages 23 and 24) to start recording. Notes When an external microphone is connected to the (microphone) jack of the recorder, the built-in microphones cannot be used for recording. When "PLUG IN PWR" is set to "ON, " the recorder supplies power to a connected plug-in power microphone. Continued on the next page 27
-
 1
1 -
2
-
3
-
4
-
5
-
6
-
7
-
8
-
9
-
10
-
11
-
12
-
13
-
14
-
15
-
16
-
17
-
18
-
19
-
20
-
21
-
 22
22 -
 23
23 -
 24
24 -
 25
25 -
 26
26 -
 27
27 -
 28
28 -
 29
29 -
 30
30 -
 31
31 -
 32
32 -
33
-
34
-
35
-
36
-
37
-
38
-
39
-
40
-
41
-
42
-
43
-
44
-
45
-
46
-
47
-
48
-
49
-
50
-
51
-
52
-
53
-
54
-
55
-
56
-
57
-
58
-
59
-
60
 |
 |
