Sony PCWA-A500 Access Point Help File - Page 15
When the Wireless Access Point Setup - Finish Screen appears, wait about 30 seconds.
 |
View all Sony PCWA-A500 manuals
Add to My Manuals
Save this manual to your list of manuals |
Page 15 highlights
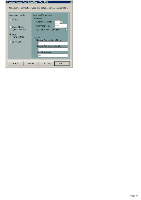
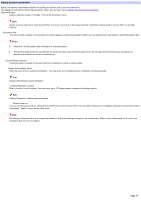
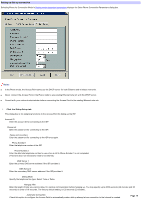
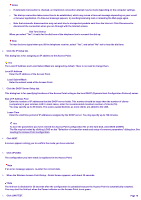
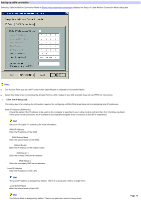
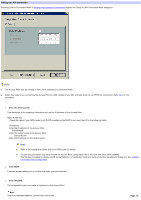
Notes o If Automatic Connection is checked, an intentional connection attempt may be made depending on the computer settings. o The dial-up connection takes some time to be established, which may cause a time-out message depending on your e-mail or browser application. If a time-out message appears, try sending/receiving mail or reloading the Web page again. o Note that automatic disconnection may not work due to unexpected packets sent from the Internet. Click Disconnect to disconnect the connection when you are through with the Internet access. Dial Tone Detect When you select "Yes", it waits for the dial tone of the telephone line to connect the dial-up. Note To hear the tone signal when you lift the telephone receiver, select "Yes", and select "No" not to hear the dial tone. 2. Click the IP Setup tab. This dialog box is for assigning an IP address to the Access Point. Hint The Local IP Address and Local Subnet Mask are assigned by default. There is no need to change them. Local IP Address Enter the IP address of the Access Point. Local Subnet Mask Enter the subnet mask of the Access Point. 3. Click the DHCP Server Setup tab. This dialog box is for specifying functions of the Access Point acting as the local DHCP (Dynamic Host Configuration Protocol) server. Size of IP Address Pool Enter the number of IP addresses that the DHCP server holds. This number should be larger than the number of clients (computers) in your wireless LAN. In most cases, enter the recommended maximum number of clients (16). You may specify up to 49 clients. The access speed declines as more clients are added to the LAN. Lease Time Enter the valid time period of IP addresses assigned by the DHCP server. You may specify up to 720 minutes. Hint To save the parameters you have entered the Access Point configuration file on the hard disk, click SAVE CONFIG. The file may be loaded by clicking LOAD on the "Selection of connection mode and setup of common parameters" dialog box. See Loading the Access Point configuration. 4. Click NEXT. A screen appears asking you to confirm the mode you have selected. 5. Click UPLOAD. The configuration you have made is registered in the Access Point. Note If an error message appears, re-enter the correct data. 6. When the Wireless Access Point Setup - Finish Screen appears, wait about 30 seconds. Note The link test is disabled for 30 seconds after the configuration is uploaded because the Access Point is automatically restarted. You may start the link test when the Power indicator on the Access Point turns green. 7. Click LINK TEST. Page 15
-
 1
1 -
2
-
3
-
4
-
5
-
6
-
7
-
8
-
9
-
 10
10 -
 11
11 -
 12
12 -
 13
13 -
 14
14 -
 15
15 -
 16
16 -
 17
17 -
 18
18 -
 19
19 -
 20
20 -
21
-
22
-
23
-
24
-
25
-
26
-
27
-
28
-
29
-
30
-
31
-
32
-
33
-
34
-
35
-
36
-
37
-
38
-
39
-
40
-
41
-
42
-
43
-
44
-
45
-
46
-
47
-
48
-
49
-
50
-
51
-
52
-
53
-
54
-
55
-
56
-
57
-
58
-
59
-
60
-
61
 |
 |