Sony PRS650SC Service Manual - Page 5
Frame Rear, Ornament T
 |
View all Sony PRS650SC manuals
Add to My Manuals
Save this manual to your list of manuals |
Page 5 highlights
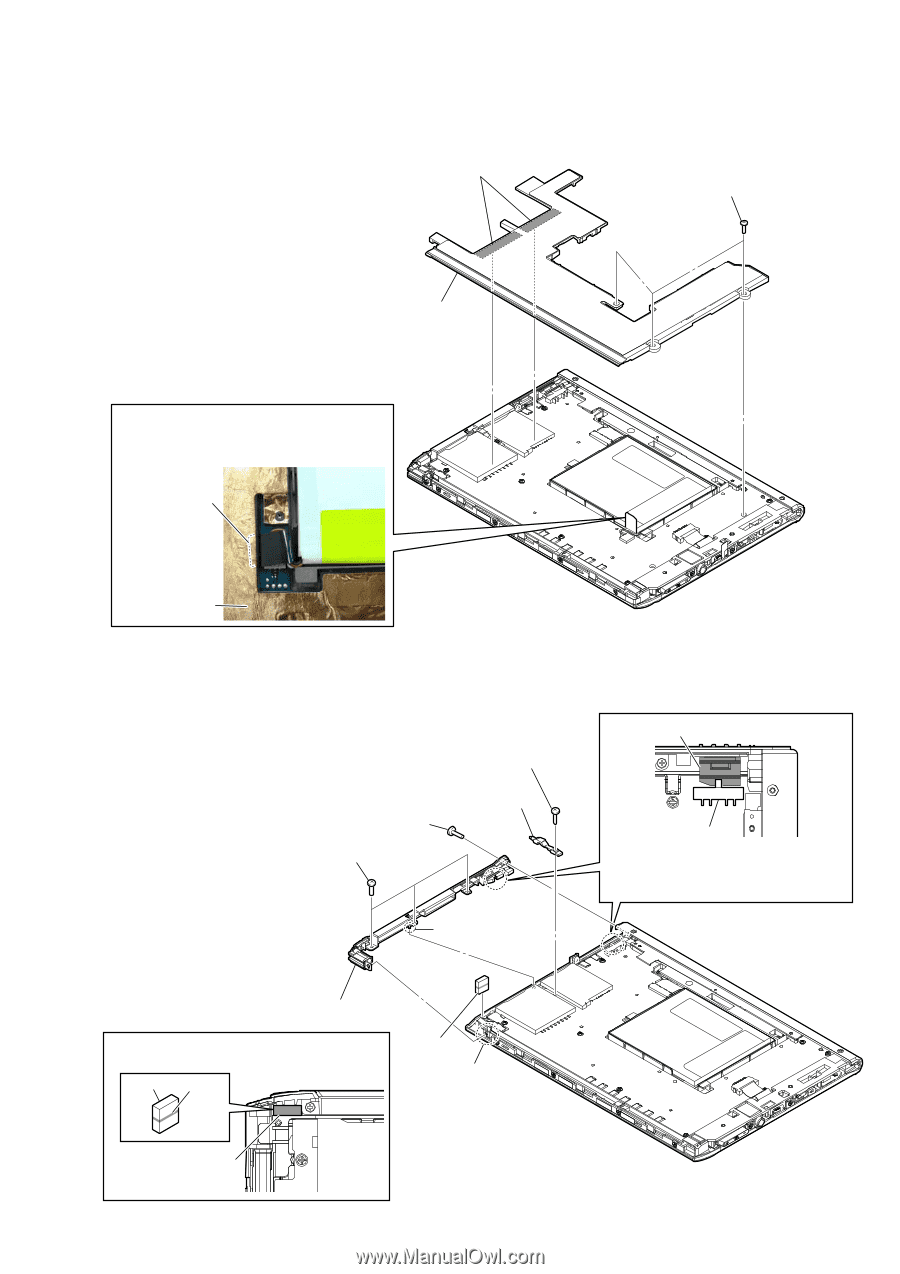
2-5. FRAME (REAR) ASSY 2 Peel copper leaf in two places. Note 1: When installing the frame (rear) assy, paste it on CN2001 and CN2002 firmly. PRS-650 1 three precision pan screws (M1.4) 3 frame (rear) assy Note 2: When installing the frame (rear) assy, make the sheet (BATT) slip into the frame (rear) assy under after installing it. sheet (BATT) frame (rear) assy - Rear side view - 2-6. ORNAMENT (T) ASSY 2 precision pan screw (M1.4) 3 light guide (card) 4 precision pan screw (M1.4) 5 three precision pan screws (M1.4) knob (power) switch Note 2: When installing the ornament (T) assy, the position of switch and knob (power) is set and installed. 7 boss 8 ornament (T) assy Note 1: When installing the magnet, note the position of marking of the magnet. magnet marking 1 magnet 6 mold marking side - Rear side view - 5
-
 1
1 -
 2
2 -
 3
3 -
 4
4 -
 5
5 -
 6
6 -
 7
7 -
 8
8 -
 9
9 -
 10
10 -
 11
11 -
12
-
13
-
14
-
15
-
16
 |
 |