Sony PRS650SC Service Manual - Page 8
PRS-650, - e reader 6 touch
 |
View all Sony PRS650SC manuals
Add to My Manuals
Save this manual to your list of manuals |
Page 8 highlights
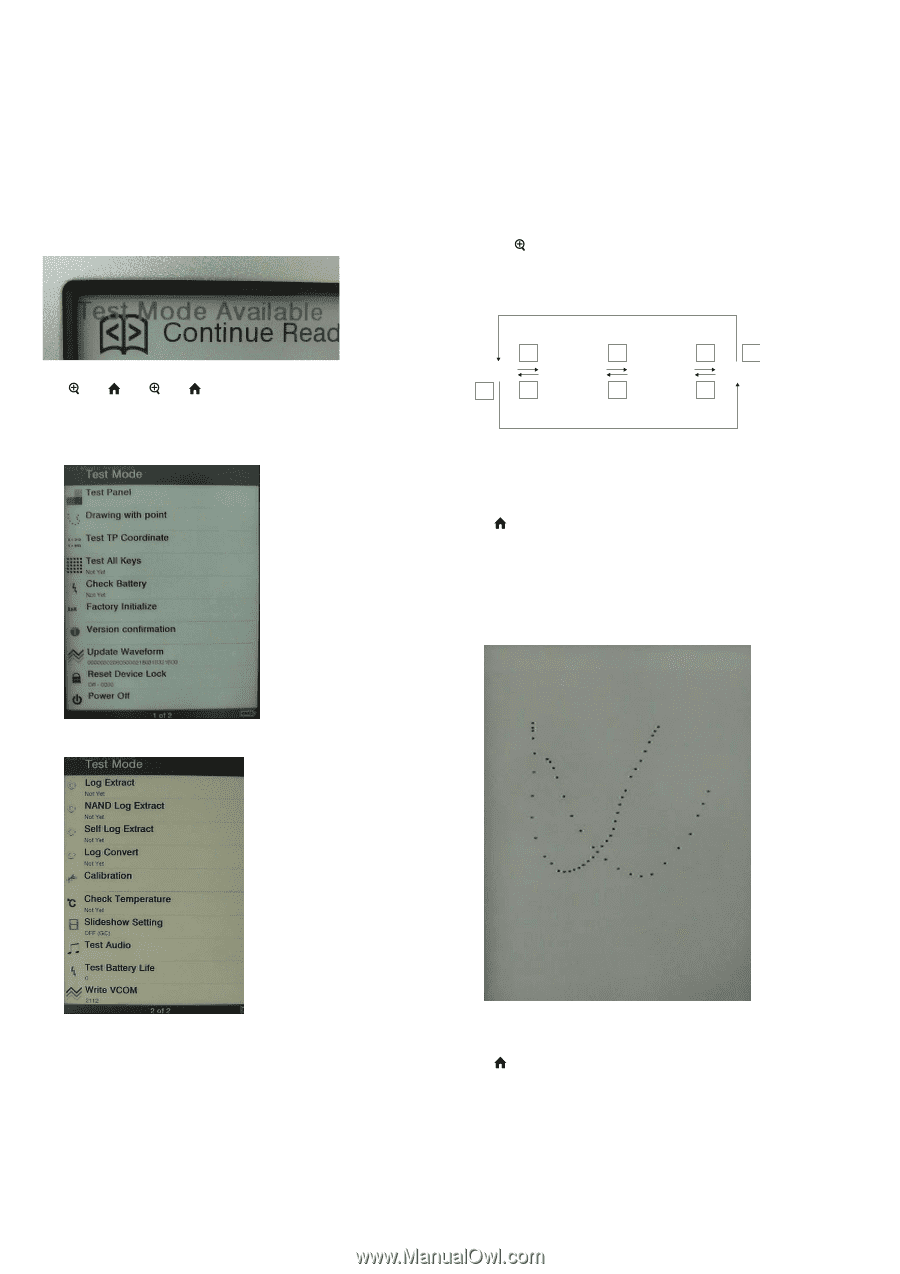
PRS-650 SECTION 3 TEST MODE HOW TO ENTER THE TEST MODE 1. Connect the set to PC by the USB cable. 2. The file for the test mode is copied under the "READER" drive. Note: Confirm the method of obtaining the file for test mode to each ser- vice headquarters. 3. Remove the set from PC. Then, the power supply automati- cally becomes on. 4. Confirm "Test Mode Avaliable" is displayed on the screen. OPERATION OF THE TEST MODE 1. Test Panel Procedure: 1. Touch the "Test Panel" in the test mode menu page 1. The screen is changed into the image files. (all image files of in the directly as "/Sony Reader/software/images") 2. Press the [] keys, change the image files. 3. Press the [ ] key, image file display size change to 600×800 or 500×700. 4. If there are no image files, screen is filled with grayscale color. Press the [] keys, change the grayscale color. 5. Press the key as following order 6. After a while, indicate the test mode menu, enter the test mode. 7. Press the [] keys, change the test mode menu page 1/page 2. > > > > WHITE LIGHT GRAY DARK GRAY BLACK < < < < When the setting of "17. Slideshow Setting" is turning on, the image files (or grayscale color) are changes by the automatic operation. Releasing method: Press the [ ] key, return to the test mode menu 1. 2. Drawing with point Procedure: 1. Touch the "Drawing with point" in the test mode menu page 1. The screen is changed into the drawing check. 2. The scanned coordinate is displayed while dragging. (Test mode menu page 1) (Test mode menu page 2) RELEASING THE TEST MODE Slide the [POWER] key for 5 seconds or more to turn the power off. Then, delete the file copied in "How to enter the test mode" from the "READER" drive. (Screen display) Releasing method: Press the [ ] key, return to the test mode menu 1. 8
-
 1
1 -
2
-
 3
3 -
 4
4 -
 5
5 -
 6
6 -
 7
7 -
 8
8 -
 9
9 -
 10
10 -
 11
11 -
 12
12 -
 13
13 -
14
-
15
-
16
 |
 |