Sony PSLX350H Primary User Manual - Page 4
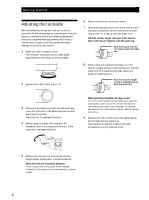
Getting Started, Assembling the Turntable
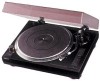 |
UPC - 027242543195
View all Sony PSLX350H manuals
Add to My Manuals
Save this manual to your list of manuals |
Page 4 highlights
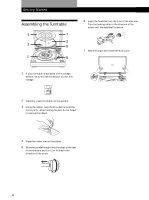
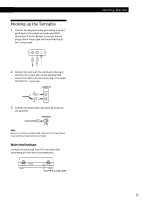
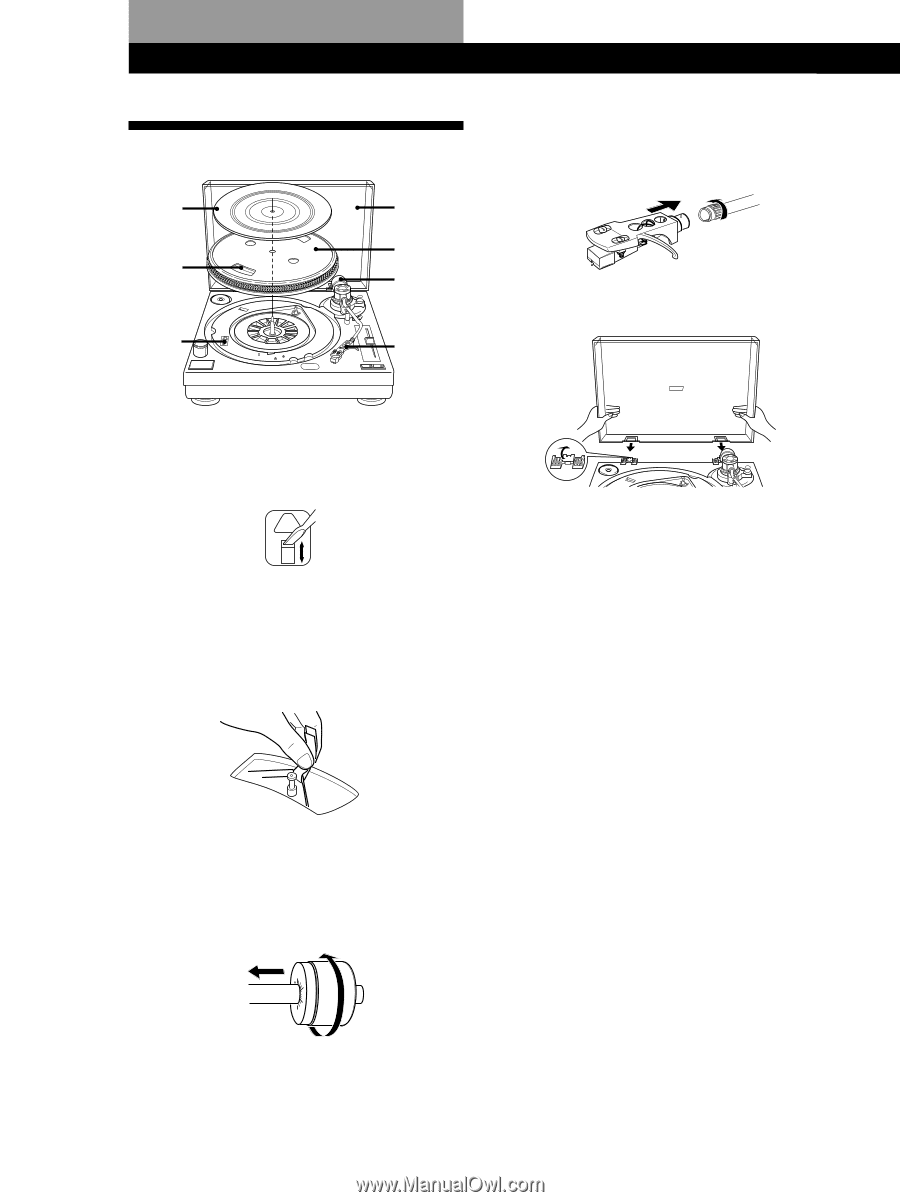
Getting Started Assembling the Turntable 4 7 2 3 5 1 6 6 Insert the headshell into the front of the tone arm. Turn the locking collar in the direction of the arrow until the headshell is secure. 7 Rise the hinges and install the dust cover. 1 If your turntable is equipped with a voltage selector, be sure to set the selector to your line voltage. 110V·120V 220V·240V 2 Carefully, place the platter on the spindle. 3 Using the ribbon, loop the drive belt around the motor pully. After looping the belt, do not forget to remove the ribbon. 4 Place the rubber mat on the platter. 5 Slide the counter weight onto the shaft at the rear of the tone arm and turn 3 or 4 times in the direction of the arrow. 4
-
 1
1 -
 2
2 -
 3
3 -
 4
4 -
 5
5 -
 6
6 -
 7
7 -
 8
8 -
 9
9 -
 10
10 -
11
-
12
 |
 |
4
Assembling the Turntable
1
If your turntable is equipped with a voltage
selector, be sure to set the selector to your line
voltage.
2
Carefully, place the platter on the spindle.
3
Using the ribbon, loop the drive belt around the
motor pully.
After looping the belt, do not forget
to remove the ribbon.
4
Place the rubber mat on the platter.
5
Slide the counter weight onto the shaft at the rear
of the tone arm and turn 3 or 4 times in the
direction of the arrow.
Getting Started
6
Insert the headshell into the front of the tone arm.
Turn the locking collar in the direction of the
arrow until the headshell is secure.
7
Rise the hinges and install the dust cover.
3
4
7
5
6
1
2
110V·120V
220V·240V