Sony RCD-W222ES Primary User Manual - Page 20
Recording on a CD-R or, CD-RW Manually
 |
View all Sony RCD-W222ES manuals
Add to My Manuals
Save this manual to your list of manuals |
Page 20 highlights
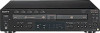
Recording on a CD-R or CD-RW Manually You can start recording from the end of the existing material. Before recording, see "Notes on Recording" on page 16. When using the remote, set SELECT to CDR. • After recording, you must finalize the disc. Until the disc is properly finalized, it cannot be played on any other machine. See "Finalizing a CD-R or CD-RW" on page 24. OPEN/CLOSE INPUT SELECT Nx X REC z INPUT H X REC z x 1 Turn on the amplifier and the sound source, and then select the sound source on the amplifier. 2 Press OPEN/CLOSE of DECK B and place a recordable CD-R or CD-RW on DECK B. Press OPEN/CLOSE again to close the disc tray. With the label side up 3 Press INPUT repeatedly to select the 20 input connector. To record through Turn on the indicator DIGITAL OPTICAL IN OPTICAL DIGITAL COAXIAL IN COAXIAL ANALOG IN ANALOG To record the disc in DECK A, turn off "OPTICAL," "COAXIAL,"or "ANALOG." 4 Press REC z. DECK B stands by for recording. 5 Adjust the recording level, if necessary. For details, see "Adjusting the Recording Level" on page 21. 6 Press N (or H on the remote). 7 Start playing the sound source you want to record. To pause recording Press X. To resume recording, press the button again or press N (or H on the remote). Note Whenever you pause recording, a new track number is added. For example, if you paused recording while recording on track 4, the track number increases by one and recording continues on the new track when recording is resumed. To stop recording Press x. "PMA Writing" appears while updating the information of the disc before stopping the recording. Notes • If you press REC z during recording, you can add a track (page 22). The track must be longer than 4 seconds. • When recording from more than one disc manually, the silence between tracks may become longer. To prevent this, use Synchro-Recording. • This unit uses the Serial Copy Management System, which allows only first-generation digital copies to be made of premastered software via the unit's digital input. Therefore you may not be able to record a CD-R or CD-RW digitally through the DIGITAL OPTICAL IN or DIGITAL COAXIAL IN jack depending on the content being recorded. • Because of the restriction of the Serial Copy Management System (SCMS), you may not be able to make digital recordings. In this case, use analog recording through the ANALOG IN jack when you record from other units. Or use Synchro-Recording when you record from DECK A. (The recording mode is automatically changed to analog recording.)
-
 1
1 -
2
-
3
-
4
-
5
-
6
-
7
-
8
-
9
-
10
-
11
-
12
-
13
-
14
-
 15
15 -
 16
16 -
 17
17 -
 18
18 -
 19
19 -
 20
20 -
 21
21 -
 22
22 -
 23
23 -
 24
24 -
 25
25 -
26
-
27
-
28
-
29
-
30
-
31
-
32
 |
 |
