Sony SRPC5 Product Manual (SRMASTER: SRPC4 / SRPC5 Operation Manual) - Page 22
Automatic Execution Using a Job File, Executing a job file
 |
View all Sony SRPC5 manuals
Add to My Manuals
Save this manual to your list of manuals |
Page 22 highlights
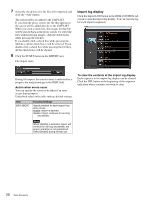
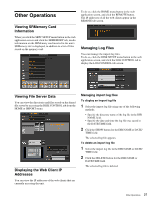
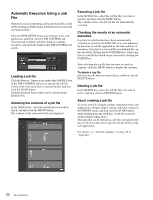
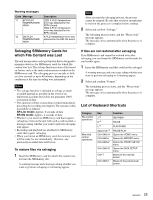
Automatic Execution Using a Job File Operations such as importing can be automatically carried out by loading an XML-format job file that you create with an external editor. Click the DISK SETUP menu select button on the web application, and then click the JOB CONTROL tab. You can load or delete a job file, check its contents, execute it, and check the results in the JOB CONTROL tab screen. Loading a job file Click the Browse... button to the right of the JOB FILE box in the JOB CONTROL tab screen, specify the job file stored on the web client disk or external media, and then click the LOAD button. Job files that have been loaded can be selected in the QUEUE box. Checking the contents of a job file In the QUEUE box, select the job file that you want to check, and then click the SHOW button. The contents of the selected job file are displayed. Executing a job file In the QUEUE box, select the job file that you want to execute, and then click the EXEC button. The contents of the selected job file are automatically executed. Checking the results of an automatic execution Log files for job files that have been automatically executed are stored in the JOB LOG area, each indicated by the name of job file appended by the date and time of execution. A log file of a successfully executed job file can be selected by clicking the SUCCEEDED box, while a log file of a job file that failed can be selected by clicking the FAILED box. After selecting the log file that you want to check its contents, click the SHOW button to display the contents. To delete a log file Select the log file that you want to delete, and then click the DELETE button. Deleting a job file In the QUEUE box, select the job file that you want to delete, and then click the DELETE button. About creating a job file To create a job file using the settings configured in the web application, configure import settings and other settings in the IMPORT menu, and then click the START button while holding down the Shift key. A job file is created without import taking place. The tasks that can be defined in a job file correspond with most of the items that can be specified in the menus of the web application. For details, see "Job File Samples" on page 28 in "Appendix". 22 Other Operations
-
 1
1 -
2
-
3
-
4
-
5
-
6
-
7
-
8
-
9
-
10
-
11
-
12
-
13
-
14
-
15
-
16
-
 17
17 -
 18
18 -
 19
19 -
 20
20 -
 21
21 -
 22
22 -
 23
23 -
 24
24 -
 25
25 -
 26
26 -
 27
27 -
28
-
29
-
30
-
31
 |
 |
