Sony STR-DB840 Operating Instructions - Page 43
Receiving Broadcasts
 |
View all Sony STR-DB840 manuals
Add to My Manuals
Save this manual to your list of manuals |
Page 43 highlights
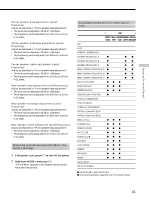
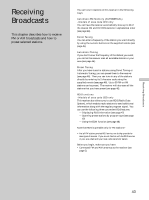
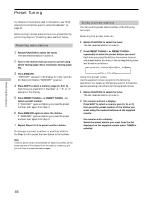
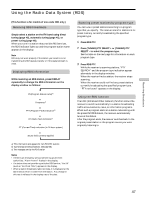
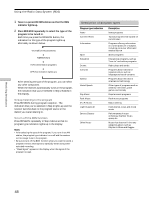
Receiving Broadcasts This chapter describes how to receive FM or AM broadcasts and how to preset selected stations. You can tune in stations on this receiver in the following ways: Automatic FM Memory (AUTOBETICAL) - Models of area code CED only You can have the receiver automatically store up to 30 of the clearest FM and FM RDS stations in alphabetical order (see page 44). Direct Tuning You can enter a frequency of the station you want directly by using the numeric buttons on the supplied remote (see page 45). Automatic Tuning If you don't know the frequency of the station you want, you can let the receiver scan all available stations in your area (see page 45). Preset Tuning After you have tuned in stations using Direct Tuning or Automatic Tuning, you can preset them to the receiver (see page 46). Then you can tune in any of the stations directly by entering its 2-character code using the supplied remote (see page 46). Up to 30 FM or AM stations can be preset. The receiver will also scan all the stations that you have preset (see page 46). RDS functions - Models of area code CED only This receiver also allows you to use RDS (Radio Data System), which enables radio stations to send additional information along with the regular program signal. You can use the following three convenient RDS features: - Displaying RDS information (see page 47) - Scanning preset stations by program type (see page 47) - Using the EON function (see page 48) Note that RDS is operable only for FM stations.* * Not all FM stations provide RDS service, nor do they provide the same types of services. If you are not familiar with the RDS services in your area, check with your local radio stations for details. Before you begin, make sure you have: • Connected FM and AM antennas to the receiver (see page 5). Receiving Broadcasts 43
-
 1
1 -
2
-
3
-
4
-
5
-
6
-
7
-
8
-
9
-
10
-
11
-
12
-
13
-
14
-
15
-
16
-
17
-
18
-
19
-
20
-
21
-
22
-
23
-
24
-
25
-
26
-
27
-
28
-
29
-
30
-
31
-
32
-
33
-
34
-
35
-
36
-
37
-
 38
38 -
 39
39 -
 40
40 -
 41
41 -
 42
42 -
 43
43 -
 44
44 -
 45
45 -
 46
46 -
 47
47 -
 48
48 -
49
-
50
-
51
-
52
-
53
-
54
-
55
-
56
-
57
-
58
-
59
-
60
-
61
-
62
-
63
-
64
 |
 |
