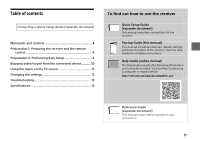
Sony STR-ZA2000ES Startup Guide - Page 6
Remote Control
 |
View all Sony STR-ZA2000ES manuals
Add to My Manuals
Save this manual to your list of manuals |
Page 6 highlights
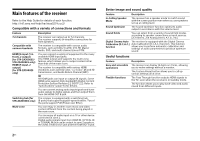
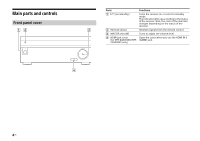
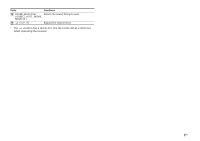
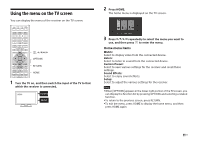
Remote Control 6US Parts MAIN / (on/standby) ZONE2, ZONE3, MAIN PURE DIRECT IN-CEILING SP Menu operation buttons INPUT SETUP AUTO CAL Tuner control buttons INPUT +/- INPUT MODE ZONE2 /, ZONE3 HDMI OUTPUT Input buttons SOUND OPTIMIZER CUSTOM PRESET (1, 2, 3, 4) SP SETUP TEST (PICTURE, TONE) Functions Turns the receiver on or sets it to standby mode. Selects the location to be controlled. Press to use the Pure Direct function. Activates the In-Ceiling Speaker Mode. Used for menu operations displayed on the TV screen and the display panel of the receiver. HOME Displays the home menu on the TV screen. AMP MENU Displays the menu on the display panel of the receiver to operate the receiver. Displays the Input Setup menu. Press to perform Auto Calibration. Used for tuner operations. Press + or - to select the input source. Press to select the input mode. Turns the receiver in zone 2 or zone 3 on or sets it to standby mode. Switches the output for two monitors connected to the HDMI OUT A and HDMI OUT B jacks. Select the device you want to use. When you press any of the input buttons, the receiver turns on. Press to use the Sound Optimizer to enjoy clear and dynamic sound at low volume levels. Saves and recalls various settings for the receiver. Displays the Speaker Setup menu. Press to output the test picture or test tone.
-
 1
1 -
 2
2 -
 3
3 -
 4
4 -
 5
5 -
 6
6 -
 7
7 -
 8
8 -
 9
9 -
 10
10 -
 11
11 -
 12
12 -
13
-
14
-
15
-
16
-
17
-
18
-
19
-
20
-
21
-
22
-
23
-
24
-
25
-
26
-
27
-
28
-
29
-
30
-
31
-
32
-
33
-
34
-
35
-
36
-
37
-
38
-
39
-
40
-
41
-
42
-
43
-
44
-
45
-
46
-
47
-
48
-
49
-
50
-
51
 |
 |
