Sony VPL CS6 Operating Instructions - Page 13
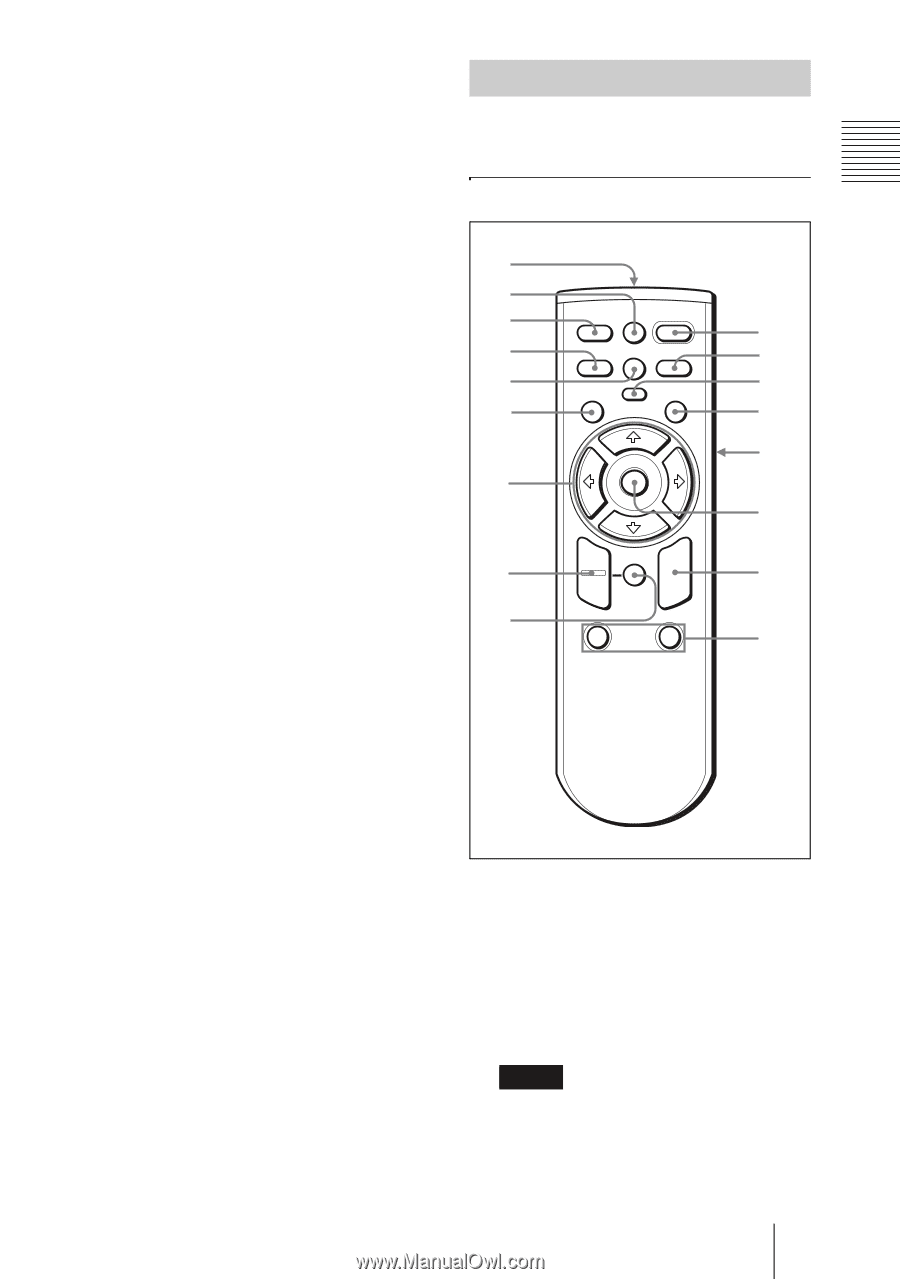
Remote Commander, APA Auto Pixel Alignment key - remote control
 |
UPC - 027242627024
View all Sony VPL CS6 manuals
Add to My Manuals
Save this manual to your list of manuals |
Page 13 highlights
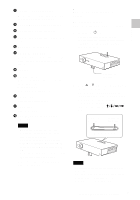
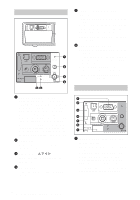
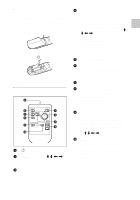
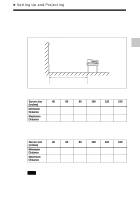
2 USB connector (USB plug for upstream, 4-pin) Connect to the USB connector on a computer. When you connect the projector to the computer, you can control the mouse function with the supplied Remote Commander. (When you use the VPL-EX1, an optional Remote Commander is required to control the mouse function with a Remote Commander.) The supplied application software (VPL-CX6 only) can be installed in the computer attached to this connector. 3 Memory Stick slot (VPL-CX6 only) The Memory Stick can be inserted. Never insert an object other than the Memory Stick. For details, see the attached "Operating Instructions" for Memory Stick. 4 AUDIO (stereo minijack) connector When listening to sound output from the computer, connect to the audio output of the computer. When listening to sound output from the VCR, connect to the audio output of the VCR. 5 Access lamp (VPL-CX6 only) Lights during having access to the Memory Stick. Do not remove the Memory Stick while the access lamp is lit. 6 Video input connector Connect to external video equipment such as a VCR. • VIDEO (phono type): Connects to the composite video output of video equipment. • S VIDEO (mini DIN 4-pin): Connects to the S video output (Y/C video output) of video equipment. 7 AC IN socket Connects the supplied AC power cord. Remote Commander The keys that have the same names as those on the control panel function identically. For VPL-CS6/VPL-CX6 qg qf qd FREEZE MS SLIDE I / 1 qs KEYSTONE INPUT APA qa MENU PIC ENTER 0 MUTING 9 8 + RESET R - CLICK 7 D ZOOM 1 FUNCTION 2 1 2 3 4 5a 5b 5c 6 1 I / 1 (on/standby) key 2 APA (Auto Pixel Alignment) key Adjusts a picture clearest automatically while a signal is input from a computer. Used when "Smart APA" in the SET SETTING menu is set to "Off." Normally set to "On." Notes • Press the APA key when the full image is displayed on the screen. If there are black edges around the image, the APA function will not function properly and the image may extend beyond the screen. 13 Location and Function of Controls GB Overview
-
 1
1 -
2
-
3
-
4
-
5
-
6
-
7
-
 8
8 -
 9
9 -
 10
10 -
 11
11 -
 12
12 -
 13
13 -
 14
14 -
 15
15 -
 16
16 -
 17
17 -
 18
18 -
19
-
20
-
21
-
22
-
23
-
24
-
25
-
26
-
27
-
28
-
29
-
30
-
31
-
32
-
33
-
34
-
35
-
36
-
37
-
38
-
39
-
40
-
41
-
42
-
43
-
44
-
45
-
46
-
47
-
48
-
49
-
50
-
51
-
52
-
53
-
54
-
55
-
56
-
57
-
58
-
59
-
60
-
61
-
62
-
63
-
64
-
65
-
66
-
67
-
68
-
69
-
70
-
71
-
72
-
73
-
74
-
75
-
76
-
77
-
78
-
79
-
80
-
81
-
82
-
83
-
84
-
85
-
86
-
87
-
88
-
89
-
90
-
91
-
92
-
93
-
94
-
95
-
96
-
97
-
98
-
99
-
100
-
101
-
102
-
103
-
104
-
105
-
106
-
107
-
108
-
109
-
110
-
111
-
112
-
113
-
114
-
115
-
116
-
117
-
118
-
119
-
120
-
121
-
122
-
123
-
124
-
125
-
126
-
127
-
128
-
129
-
130
-
131
-
132
-
133
-
134
-
135
-
136
-
137
-
138
-
139
-
140
-
141
-
142
-
143
-
144
-
145
-
146
-
147
-
148
-
149
-
150
-
151
-
152
-
153
-
154
-
155
-
156
-
157
-
158
-
159
-
160
-
161
-
162
-
163
-
164
 |
 |