Sony XNV-660BT Operating Instructions - Page 52
Selecting the aspect ratio, Settings, Basic setting operation, Source List, then - parts
 |
UPC - 613815562115
View all Sony XNV-660BT manuals
Add to My Manuals
Save this manual to your list of manuals |
Page 52 highlights
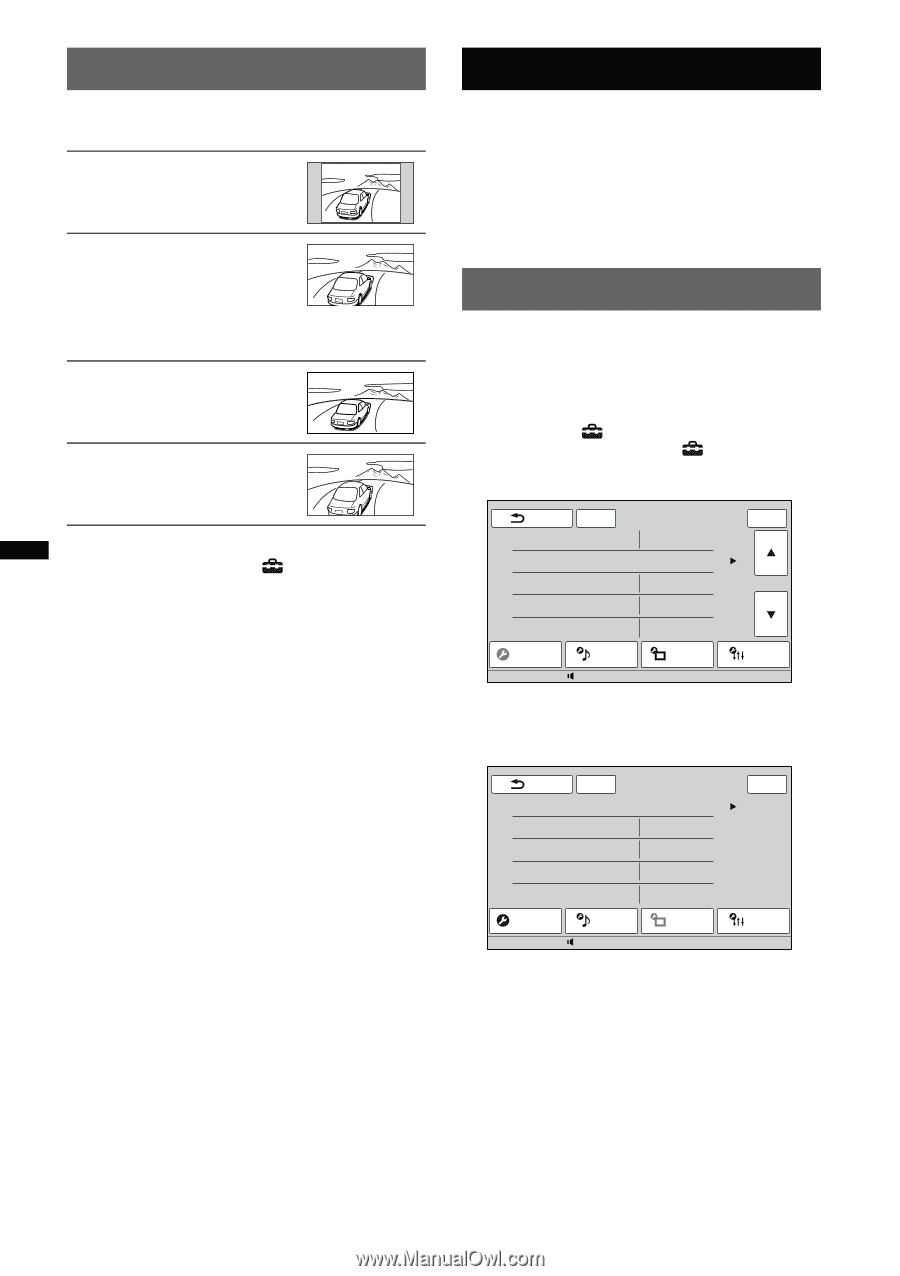
Selecting the aspect ratio You can change the screen aspect ratio. The options are indicated below. "Normal": Picture with 4:3 aspect ratio (regular picture). "Wide": Picture with 4:3 aspect ratio enlarged to the left and right edges of the screen, with overflowing parts of top and bottom cut off to fill the screen. "Full": Picture with 16:9 aspect ratio. "Zoom": Picture with 4:3 aspect ratio enlarged to the left and right edges of the screen. 1 During video/image playback, touch "Source List," then . 2 Touch "Screen." The screen setting menu appears. 3 Touch "Aspect." The options appear. 4 Touch the desired option. To return to the previous display, touch "Back." Note The screen aspect ratio of the rear view camera cannot be changed. Settings The setting menu includes the following categories. • "General": General settings (page 53) • "Sound": Sound settings (page 55) • "Screen": Screen settings (page 57) • "Visual": DVD and other playback settings (page 58) Basic setting operation You can set items in the menu by the following procedure. E.g., when setting the demonstration 1 While the unit is off, touch "Source List," then . From the top menu, touch . The setting menu appears. Back ATT Security Control Clock Adjust Auto OFF CT Output Color System General Sound 15 Locked No OFF / ON NTSC / PAL Screen Top 1/4 Visual 12:00 2 Touch "Screen." The screen setting display appears. Back ATT Screen Select Picture EQ Aspect Clock Demo General Sound 15 Dynamic Full OFF / ON OFF / ON Screen Top Visual 12:00 3 Touch "Demo" to set to "ON" or "OFF." The setting is complete. To scroll the options (only when required), touch v/V. To return to the previous display, touch "Back." 52
-
 1
1 -
2
-
3
-
4
-
5
-
6
-
7
-
8
-
9
-
10
-
11
-
12
-
13
-
14
-
15
-
16
-
17
-
18
-
19
-
20
-
21
-
22
-
23
-
24
-
25
-
26
-
27
-
28
-
29
-
30
-
31
-
32
-
33
-
34
-
35
-
36
-
37
-
38
-
39
-
40
-
41
-
42
-
43
-
44
-
45
-
46
-
 47
47 -
 48
48 -
 49
49 -
 50
50 -
 51
51 -
 52
52 -
 53
53 -
 54
54 -
 55
55 -
 56
56 -
 57
57 -
58
-
59
-
60
-
61
-
62
-
63
-
64
-
65
-
66
-
67
-
68
-
69
-
70
-
71
-
72
-
73
-
74
-
75
-
76
-
77
-
78
-
79
-
80
-
81
-
82
-
83
-
84
-
85
-
86
-
87
-
88
-
89
-
90
-
91
-
92
-
93
-
94
-
95
-
96
-
97
-
98
-
99
-
100
-
101
-
102
-
103
-
104
-
105
-
106
-
107
-
108
-
109
-
110
-
111
-
112
-
113
-
114
-
115
-
116
-
117
-
118
-
119
-
120
-
121
-
122
-
123
-
124
-
125
-
126
-
127
-
128
-
129
-
130
-
131
-
132
-
133
-
134
-
135
-
136
-
137
-
138
-
139
-
140
-
141
-
142
-
143
-
144
-
145
-
146
-
147
-
148
-
149
-
150
-
151
-
152
-
153
-
154
-
155
-
156
-
157
-
158
-
159
-
160
-
161
-
162
-
163
-
164
-
165
-
166
-
167
-
168
-
169
-
170
-
171
-
172
-
173
-
174
-
175
-
176
-
177
-
178
-
179
-
180
-
181
-
182
-
183
-
184
-
185
-
186
-
187
-
188
-
189
-
190
-
191
-
192
-
193
-
194
-
195
-
196
-
197
-
198
-
199
-
200
-
201
-
202
-
203
-
204
-
205
-
206
-
207
-
208
-
209
-
210
-
211
-
212
-
213
-
214
-
215
-
216
-
217
-
218
-
219
-
220
-
221
-
222
-
223
-
224
-
225
-
226
-
227
-
228
-
229
-
230
-
231
-
232
 |
 |